React Native App Development in 2026: Complete Guide
A hands-on guide to React Native app development. Learn to build, navigate, style, and deploy high-quality mobile apps with practical, real-world examples.
By Riya
30th Sep 2025
Last updated: 16th Apr 2026
React Native lets you build mobile apps for both iOS and Android using a single JavaScript codebase. For product teams—founders, PMs, and developers alike—this is a game-changer. By using one team and one set of code, you can significantly cut down on development time and costs, getting your product in front of users on both app stores, faster.
Why Choose React Native for Your Next App
Picking the right tech for your mobile app is a massive decision. It directly impacts your budget, your launch date, and how quickly you can add features your users are asking for. For many teams building mobile products today, React Native app development has become the go-to choice because it strikes a practical balance between performance, speed, and cost.
The promise is straightforward but incredibly powerful: write your app once, and run it on both iOS and Android. This "learn once, write anywhere" approach, pioneered by Facebook, means you don't need separate teams of Swift (for iOS) and Kotlin (for Android) developers. A single team that knows JavaScript can build and maintain the entire app.
The Strategic Edge of a Single Codebase
This isn't just about saving money—it's about gaining a real competitive edge. Imagine a startup trying to validate an idea quickly. With React Native, they can build a minimum viable product (MVP) and launch it on both the App Store and Google Play simultaneously. This can slice the time-to-market almost in half compared to building two separate native apps.
For example, a fintech startup could build a simple MVP for expense tracking. Instead of building one version for iOS and another for Android over six months, a single React Native team could ship both in three to four months, getting crucial user feedback twice as fast.
Even for larger companies, the benefits are clear. Managing a single codebase makes updates, bug fixes, and new feature rollouts much simpler. When you add a new feature, it’s instantly available to all users, no matter what phone they have. This consistency leads to a better user experience and a much smoother development process.
This image really drives home why so many teams are turning to React Native.
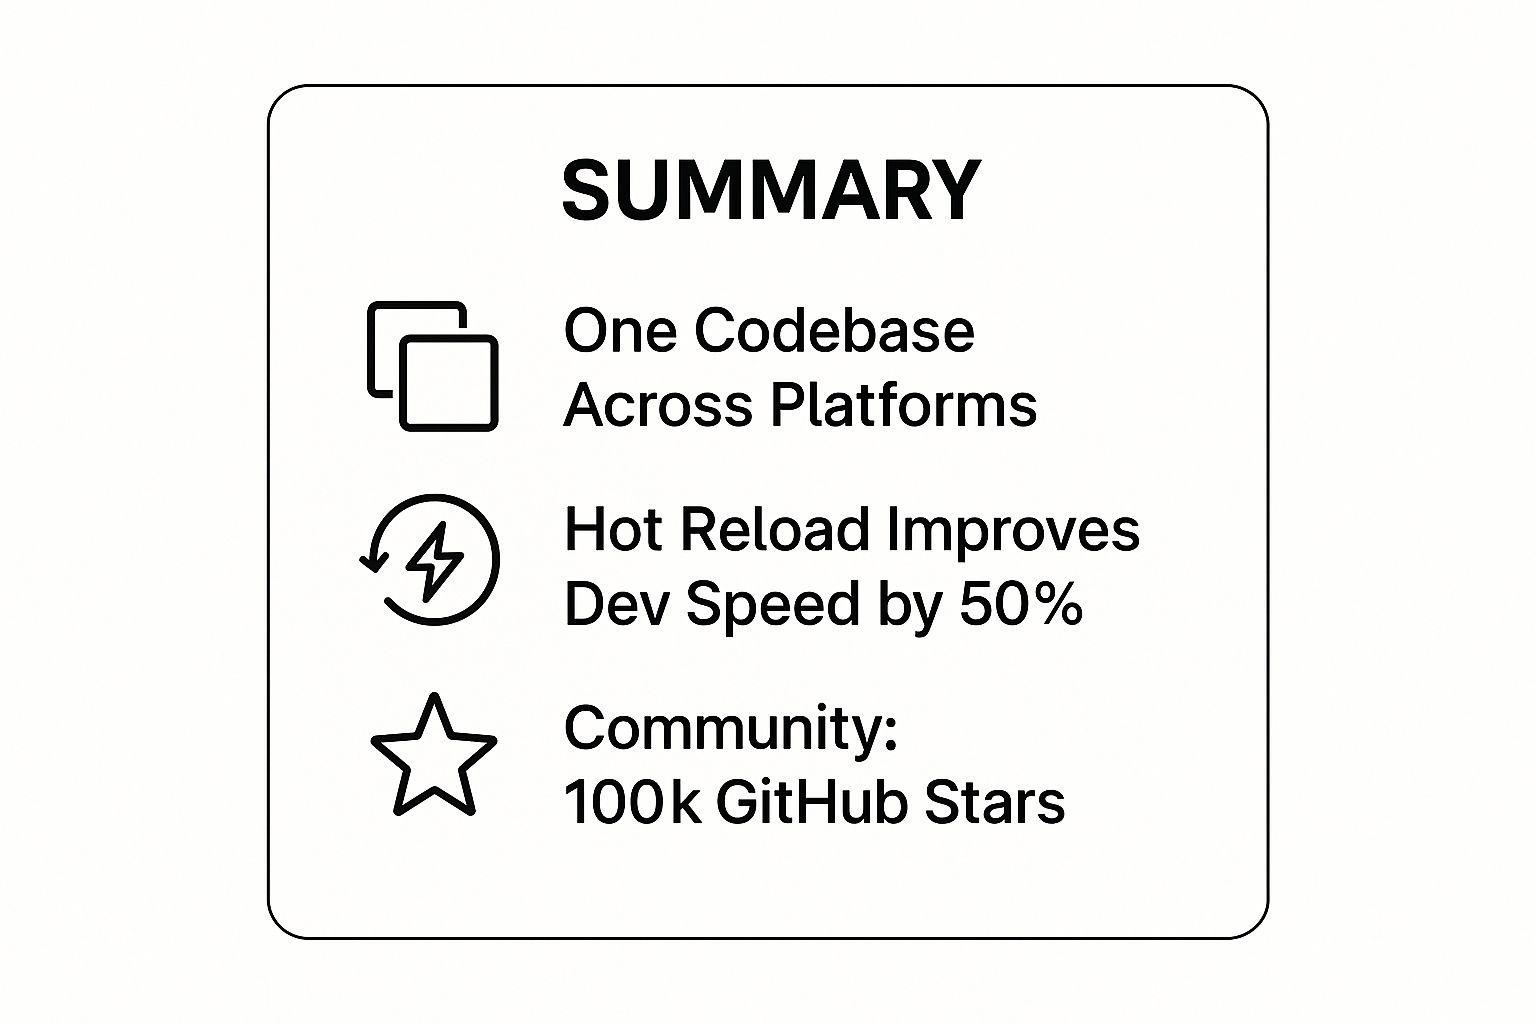
It shows how the framework brings together a single codebase with developer-friendly tools like Hot Reloading and a huge open-source community, all of which speeds things up considerably.
But Does It Feel Like a Real App?
A common question from founders and product managers is whether a cross-platform app can actually feel truly "native." With React Native, the answer is a confident yes. It's not a web page stuffed into an app container; it uses the real, native UI components of the operating system.
When a user taps a button in your React Native app, they're interacting with a genuine native button. This makes the app's look, feel, and performance virtually identical to an app built with Swift or Kotlin.
This native rendering is what sets it apart. It allows for fluid animations, responsive gestures, and the high-performance feel that users expect. This solid technical foundation has helped it grab a significant market share. In fact, the global React Native app development market was valued at around USD 325 million and is expected to hit nearly USD 499 million by 2031.
For teams who want to move even faster, AI-powered tools are now available that can generate production-ready React Native UI screens from simple text prompts. This can slash the initial setup time to almost nothing. This approach, which you can see in action with tools from RapidNative, helps product teams turn ideas into functional code in minutes.
React Native vs Native Development At a Glance
When you're weighing your options, a direct comparison is helpful. React Native offers incredible efficiency, but there are times when fully native development might be the right call, especially for apps requiring intense graphical processing or deep OS-level integrations.
| Factor | React Native | Native Development (iOS/Android) |
|---|---|---|
| Codebase | Single JavaScript codebase for both platforms. | Separate codebases for iOS (Swift) and Android (Kotlin). |
| Development Speed | Faster initial build and feature rollout. "Hot Reloading" speeds up UI tweaks. | Slower, as features must be built and maintained for each platform separately. |
| Cost | Generally lower. One team, one codebase reduces overhead. | Higher. Requires separate teams or developers with specialized skills. |
| Performance | Excellent for most apps. Nears native performance but can lag in complex animations. | The gold standard for performance, offering direct access to device hardware. |
| Community & Ecosystem | Massive open-source community with a vast library of packages. | Strong, mature ecosystems backed directly by Apple and Google. |
Ultimately, the choice depends on your project's specific needs, your team's skillset, and your long-term goals. For a huge number of apps, React Native provides the perfect blend of speed, cost-efficiency, and a high-quality user experience.
Getting Your Development Environment Ready
Before you can build anything, you need to set up your workshop. For React Native app development, this means getting your computer loaded with the right tools. We're going to focus on the Expo Go workflow, a popular and powerful approach that cuts through a lot of the usual setup noise. It lets you skip most of the complex native configuration and get an app running on your actual phone in minutes.
The goal here is to get you from a fresh machine to a working dev environment without the typical headaches. This process works great on both macOS and Windows. We’ll be installing the essential building blocks: Node.js, the Expo command-line interface (CLI), and a way to actually see your app.
The Core Tools You'll Need
Getting started only requires a few key pieces of software. Think of these as the foundation your entire app will be built on.
-
Node.js (LTS version): This is the JavaScript runtime that executes your code. You can download it from the official Node.js website. It also comes with npm (Node Package Manager), which you'll use to install everything else.
-
Expo CLI: This is your command-line multitool for React Native. It makes creating, building, and running projects incredibly straightforward. You'll install it using npm.
-
A Physical Device or Emulator: You need a screen to see your app. The easiest way is to use the Expo Go app on your own iPhone or Android phone. If you prefer, you can also set up an Android emulator or iOS simulator on your computer.
This setup is intentionally lean. The Expo framework bundles most of the tricky native dependencies for you, so you don’t have to install bulky tools like Android Studio or Xcode right away. This "managed" workflow is perfect for getting ideas off the ground fast. You can dive deeper into the philosophy behind efficient development workflows.
The magic of the Expo Go workflow is its speed. You literally scan a QR code with your phone and see your app come to life. As you code, changes appear almost instantly. This rapid feedback loop is a total game-changer for prototyping and iterating quickly.
Setting Up Your Machine
First, you need Node.js. Head over to the official Node.js website and grab the latest Long-Term Support (LTS) version. The installer is simple—just click through the prompts. Once it’s done, you can double-check that it’s working by opening your terminal (or Command Prompt) and running node -v. You should see a version number.
With Node.js in place, it’s time to install the Expo CLI. This is a "global" package, which means you can run it from any folder on your system. In your terminal, type this command and hit enter:
npm install -g expo-cli
After a few moments, the installation will finish. That’s it! Your computer is now ready to create and run React Native applications. It's a surprisingly quick process that sidesteps the platform-specific complexities that often trip up new developers.
The official React Native docs even provide a handy visual for choosing your path, reinforcing why we're starting with Expo.

As you can see, the Expo Go Quick Start is designed to be the smoothest entry point, letting teams focus on building rather than on configuration.
Seeing Your App in Action
The last piece of the puzzle is getting your app running where you can see it. Using your own phone is the most direct method.
-
Grab the Expo Go App: Head to the Apple App Store or Google Play Store on your phone and download the free "Expo Go" app.
-
Get on the Same Wi-Fi: This is crucial. Make sure your computer and your phone are connected to the same Wi-Fi network so they can communicate.
-
Run the Project: When we create a project in the next section, you'll run a command like
expo start. This will open a new tab in your web browser showing a QR code. -
Scan the Code: Open the Expo Go app on your phone, tap the "Scan QR Code" option, and point it at your computer screen. Your project will start building and loading right onto your device.
If you'd rather work entirely on your computer, you can always install Android Studio to use its built-in emulators or Xcode (on a Mac) for the iOS simulator. But for a quick start, your physical phone is the fastest way to confirm your setup is solid and ready for your React Native app development journey.
Building Your First Screen with Core Components
With the setup done, it's time for the fun part: turning code into something you can see and interact with. We’re going to build a simple UI for a "Task Manager" app. Along the way, you'll get comfortable with the fundamental building blocks of almost every mobile app.
The idea here isn't just to copy and paste code. It's to understand why we're using each piece. By the end of this section, you'll have the confidence to start assembling your own layouts.
Getting a Project Started
First, we need a project directory. Open your terminal or command prompt, navigate to where you keep your projects, and run this command:
npx create-expo-app TaskManager
This command uses the Expo toolkit to create a new project named TaskManager, pulling in all the necessary files and dependencies. Once it finishes, jump into your new project folder:
cd TaskManager
Now you can open this TaskManager folder in your favorite code editor (like VS Code) and get to work.
Meet the Core Components
React Native gives you a set of ready-to-use components that serve as the foundation for your UI. Think of them as pre-built Lego bricks that work seamlessly on both iOS and Android. For our task manager, we’ll use four of the most common ones.
-
View: Your go-to container. It's the most fundamental building block for creating layouts, like a<div>in web development. You'll use it to group other components and structure your screen. -
Text: If you want to display any text, it must live inside aTextcomponent. -
TextInput: The essential component for creating forms, search bars, or any feature that requires user input. -
TouchableOpacity: A wrapper that makes anyViewrespond to touch. When a user presses it, the component's opacity fades slightly, giving them that classic, satisfying visual feedback.
These four components are the workhorses of React Native app development. Once you get the hang of these, you’re well on your way to building complex interfaces.
Assembling the Task Manager UI
Let's clear out the default boilerplate code in App.js and replace it with our own structure. We're aiming for a simple layout: a title, an input field for new tasks, and an "Add" button.
import React from 'react';
import { SafeAreaView, View, Text, TextInput, TouchableOpacity, StyleSheet } from 'react-native';

export default function App() {
  return (
    <SafeAreaView style={styles.container}>
      <View style={styles.header}>
        <Text style={styles.title}>My Tasks</Text>
      </View>

      <View style={styles.inputContainer}>
        <TextInput
          style={styles.input}
          placeholder="Add a new task..."
          placeholderTextColor="#888"
        />
        <TouchableOpacity style={styles.addButton}>
          <Text style={styles.addButtonText}>Add</Text>
        </TouchableOpacity>
      </View>
    </SafeAreaView>
  );
}
Here, we're using SafeAreaView as the root element to prevent our UI from getting stuck behind the device's notch or status bar. Inside, a couple of View components create a clean header and an input area.
A key concept here is nesting. You build layouts by placing components inside one another. The
Viewacts as a flexible container, and theTextorTextInputcomponents inside it provide the actual content.
Adding Some Basic Style
Our app works, but it looks plain. In React Native, styling is done with JavaScript, and it feels a lot like writing CSS. The best practice is to use the StyleSheet API, which helps organize your styles and optimize performance.
Add this code block to the bottom of your App.js file:
const styles = StyleSheet.create({
  container: {
    flex: 1,
    backgroundColor: '#f5f5f5',
  },
  header: {
    padding: 20,
    borderBottomWidth: 1,
    borderBottomColor: '#ddd',
  },
  title: {
    fontSize: 24,
    fontWeight: 'bold',
    color: '#333',
  },
  inputContainer: {
    flexDirection: 'row',
    padding: 20,
  },
  input: {
    flex: 1,
    height: 50,
    backgroundColor: '#fff',
    borderColor: '#ddd',
    borderWidth: 1,
    borderRadius: 8,
    paddingHorizontal: 15,
    fontSize: 16,
  },
  addButton: {
    marginLeft: 10,
    backgroundColor: '#007AFF',
    height: 50,
    justifyContent: 'center',
    alignItems: 'center',
    paddingHorizontal: 20,
    borderRadius: 8,
  },
  addButtonText: {
    color: '#fff',
    fontSize: 16,
    fontWeight: 'bold',
  },
});
Let's quickly break down a few key properties:
-
flex: 1on the main container tells it to expand and fill the entire screen. -
flexDirection: 'row'is what makes the text input and the button line up horizontally. -
justifyContentandalignItemsare used to perfectly center the "Add" text within our blue button.
To see it all in action, run npx expo start in your terminal. Scan the QR code with the Expo Go app on your phone, and you should see your first styled screen come to life. You've just built a clean, functional starting point for your task manager and taken your first real step into hands-on React Native app development.
Making Your App Interactive with Navigation
A single screen is a great start, but it doesn't make an app. The magic begins when users can move between different views, tap on items, and see the application respond. This is where we breathe life into the project by adding navigation and handling user input.
To do this, we'll use React Navigation, the go-to library for building multi-screen experiences in the React Native community. It's battle-tested, well-documented, and has a solution for almost any navigation pattern you can imagine.
Introducing React Navigation
Before we can link screens together, we need to install the right tools. React Navigation is modular, so you'll install a few different packages to get the core functionality running.
In your terminal, inside your TaskManager project folder, run this command:
npx expo install @react-navigation/native react-native-screens react-native-safe-area-context
Notice we're using expo install instead of npm install. This is a small but critical detail. Expo's command ensures you get library versions that are guaranteed to be compatible with your specific Expo SDK version, saving you from a world of versioning headaches.
The official React Navigation documentation gives a great visual overview of its different navigators, like stack, tab, and drawer.

As the screenshot shows, you build your app's structure by composing different types of navigators, giving you complete control over how a user flows through your app.
Building a Stack Navigator
For our task manager, we'll use a "stack navigator"—the most common pattern in mobile apps. New screens get pushed onto a stack, and the back button simply pops them off. Think of it like a deck of cards: you add a new card to the top and take it off from the top.
First, install the stack navigator package:
npx expo install @react-navigation/native-stack
With the packages in place, it's time to wire everything together. The standard practice is to wrap our entire application in a NavigationContainer and then define our screens inside a createNativeStackNavigator. This setup provides the necessary context for navigation to work everywhere in the app.
We'll start with two simple screens: a TaskList screen (our home base) and a TaskDetail screen that a user can navigate to. This structure is a fundamental part of React Native app development, forming the skeleton of your app's user experience.
Passing Data Between Screens
Knowing how to pass information from one screen to another is an essential skill. For instance, when a user taps a specific task in our list, we need to tell the TaskDetail screen exactly which task to display.
React Navigation makes this surprisingly simple. When you call the navigation.navigate() function, you can pass a second argument: an object containing whatever data you want to send.
// Example of navigating with data
navigation.navigate('TaskDetail', { taskId: '123', taskName: 'Design the new logo' });
Then, on the TaskDetail screen, you can easily grab this data from the route.params object. This simple mechanism is incredibly powerful, letting you build dynamic flows where each screen knows exactly what it needs to show.
This pattern of passing parameters through the route is a core concept. It helps keep your components decoupled—the
TaskListscreen doesn't need to know howTaskDetailworks, it just needs to know what data to send it.
Managing State with React Hooks
To make our app genuinely useful, we need a way to manage its state—things like the list of tasks, the text in an input field, or whether a task is marked as complete. This is the perfect job for React's built-in hooks, specifically useState and useEffect.
-
useState: This hook lets you add a "state variable" to your component. It's like giving your component a memory. We’ll use it to hold our array of tasks and to keep track of what the user is typing. -
useEffect: This hook is for handling "side effects"—a technical term for running code in response to events, like when a component first loads or when a piece of state changes.
For our app, we can use useState to manage an array of task objects. When a user hits the "Add" button, we'll update this state array, and React will automatically re-render the list to show the new task.
Here's a quick look at how you'd manage the input text and the task list:
import React, { useState } from 'react';

function TaskList() {
  const [inputText, setInputText] = useState('');
  const [tasks, setTasks] = useState([
    { id: '1', text: 'Learn React Native' },
    { id: '2', text: 'Build a cool app' },
  ]);

  const handleAddTask = () => {
    if (inputText.trim().length > 0) {
      setTasks([...tasks, { id: Date.now().toString(), text: inputText }]);
      setInputText(''); // Clear the input field after adding
    }
  };

  // ... rest of the component UI ...
}
In this snippet, inputText holds the current value from a text input, and tasks holds our list. The handleAddTask function creates a new task and updates the state. By weaving together navigation and state management, you transform a collection of static screens into a dynamic, interactive application—a cornerstone of effective React Native app development.
Putting the Finishing Touches on Your App: Styling and Deployment
Getting your app to work is a huge win, but the visual polish is what makes it feel like a real, professional product. This is where we shift from pure functionality to aesthetics and, finally, getting it out into the world. We’ll start by giving our Task Manager a design upgrade and then walk through the deployment process.
First up, styling. In React Native development, you don't write CSS. Instead, you use JavaScript to style everything. The main tool for this is the StyleSheet API, which is not only great for keeping your styling code clean but also comes with performance benefits under the hood. We'll use it to dial in our colors, fonts, and spacing to transform the app from a wireframe into something you'd want to use.
Wrangling Layouts with Flexbox
One of the most essential tools you'll use for styling is Flexbox. It’s a layout model that gives you incredible power to build complex, responsive UIs that look great on any screen size. Ever wondered how an app manages to adapt perfectly from a tiny iPhone to a massive Android tablet? More often than not, Flexbox is the magic behind it.
The core idea is simple: you arrange items inside a container along a main axis. From there, you can control almost everything with just a handful of properties.
-
flexDirection: This sets the main axis.rowlines things up horizontally, whilecolumn(the default) stacks them vertically. -
justifyContent: This is how you distribute items along that main axis. You'll constantly be reaching for options likecenter,space-between, andspace-aroundto create perfectly balanced layouts. -
alignItems: This handles alignment on the cross-axis (the one perpendicular toflexDirection). Need to vertically center text inside a button?alignItems: 'center'is your best friend.
Once you get the hang of combining these, you can build practically any layout you can imagine. For example, a common header with a title on the left and a settings icon on the right is a simple combination of flexDirection: 'row' and justifyContent: 'space-between'.
From Your Laptop to the App Stores
With your design locked in, it's time for the final hurdle: deployment. This means creating a production-ready version of your app and submitting it to the Apple App Store and Google Play Store. For anyone using Expo, this process is made infinitely easier by Expo Application Services (EAS).
EAS is a cloud service that takes the headache out of building your app. Instead of wrestling with Xcode and Android Studio on your own machine, you let Expo’s servers handle the heavy lifting.
EAS demystifies the entire build process. It takes your JavaScript, bundles it with the necessary native code, and creates the
.ipa(for iOS) and.aab(for Android) files that the app stores require. It’s a game-changer that saves a ton of time and frustration.
It also manages tricky credentials, like signing keys and provisioning profiles, which are notoriously difficult to get right. Once the build is done, EAS can even push it directly to App Store Connect and the Google Play Console for you.
Why This All Matters
This ability to go from a styled app to a store-ready build so seamlessly is a huge reason why this framework continues to gain momentum. You can see its impact across the app marketplaces. In fact, SDK intelligence ranks React Native as the number 1 non-native framework on the Apple App Store and number 2 on Google Play, just behind the native languages themselves. If you're curious, you can discover more about cross-platform mobile trends and what they signal for developers in 2026.
Getting your creation into the hands of users is the ultimate goal. With powerful styling tools like Flexbox and build services like EAS, the path from an idea to a live product on a global stage has never been more straightforward.
Answering Common Questions About React Native
If you're considering React Native, you probably have some questions. It’s a common experience, whether you're a founder mapping out a budget, a PM planning a roadmap, or a developer weighing technical trade-offs. Let’s clear up a few of the big ones.
How Much Code Can I Actually Share?
This is usually the first question people ask. From my experience on various projects, you can realistically expect to share between 70-85% of your code across both iOS and Android. That’s a huge win for efficiency.
This shared codebase typically handles the core of your app—all the business logic, the UI components you build, and how you manage data and state. The leftover 15-30% is where you'll get platform-specific. This might mean tapping into a unique native API (like Apple's HealthKit), fine-tuning designs to meet platform guidelines, or writing a custom native module for a piece of hardware.
What About Performance and Workflows?
Performance is another major talking point. For the vast majority of business and consumer apps—think social media, e-commerce, or productivity tools—the performance is excellent. Users won't be able to tell the difference between your React Native app and a fully native one.
However, if you're building something graphically intense, like a 3D game or a heavy-duty animation tool, you're better off going fully native with Swift and Kotlin or using a game engine like Unity. React Native excels at apps built around standard UI controls, fetching data, and common user interactions.
When you start a new project, you'll face a choice: the "Expo Go" workflow or the "Bare" workflow. Think of Expo Go as a helpful managed environment—it takes care of the tricky native configuration so you can just focus on writing JavaScript. It's the best way to get moving quickly and the path I recommend for most new projects.
The "Bare" workflow is for when you need to get your hands dirty with the native iOS and Android projects directly. You’d only go this route if you need to integrate custom native code that Expo doesn’t support. The good news? You can always start with Expo and "eject" to the Bare workflow later if your app's needs change.
Where Can I Get Expert Advice?
The React Native community is fantastic, but sometimes you hit a roadblock and need guidance tailored to your specific product. Your business goals and technical challenges are unique, and a forum post might not cut it.
In those cases, talking directly to an expert is the fastest way forward. If you have questions about using AI to build your app faster or want to walk through a specific challenge you're facing, feel free to reach out to our team for a consultation.
Ready to ship a real React Native app?
If you'd rather skip the boilerplate, RapidNative ships seven production-ready React Native templates you can customize and deploy to the App Store. Each one is full Expo SDK 54, NativeWind, TypeScript:
Ready to build your app?
Turn your idea into a production-ready React Native app in minutes.
Free tools to get you started
Free AI PRD Generator
Generate a professional product requirements document in seconds. Describe your product idea and get a complete, structured PRD instantly.
Try it freeFree AI App Name Generator
Generate unique, brandable app name ideas with AI. Get creative name suggestions with taglines, brand colors, and monogram previews.
Try it freeFree AI App Icon Generator
Generate beautiful, professional app icons with AI. Describe your app and get multiple icon variations in different styles, ready for App Store and Google Play.
Try it freeFrequently asked questions
What is RapidNative?
RapidNative is an AI-powered mobile app builder. Describe the app you want in plain English and RapidNative generates real, production-ready React Native screens you can preview, edit, and publish to the App Store or Google Play.
Can I export the code?
Yes. RapidNative generates clean React Native and Expo code that you can export at any time. No lock-in, no proprietary format. Hand it to your developers or keep building inside RapidNative.
Is RapidNative free to use?
Yes. You can build apps on the free plan with no credit card required. Paid plans unlock unlimited AI generations, code export, and direct publishing to the App Store and Google Play.
Do I need to know how to code?
No. Most users build apps by describing what they want in plain English. Developers can drop into the code whenever they want more control, but coding is optional.
How long does it take to build an app?
Most users have a working first screen in under a minute. A full MVP usually takes a few hours instead of the weeks or months traditional development requires.