Your Guide to Mobile App Development Costs
Understand mobile app development costs. Our guide breaks down pricing factors, budget stages, and cost-saving tips to help you plan your investment wisely.
By Riya
15th Oct 2025
Last updated: 6th Nov 2025

The truth is, the real mobile app development cost can fall anywhere from $40,000 for a simple app all the way up to $400,000 or more for a complex, enterprise-level solution. It’s a lot like building a house—the final price tag really boils down to the size, features, and materials you choose.
What Does It Really Cost to Build an App?
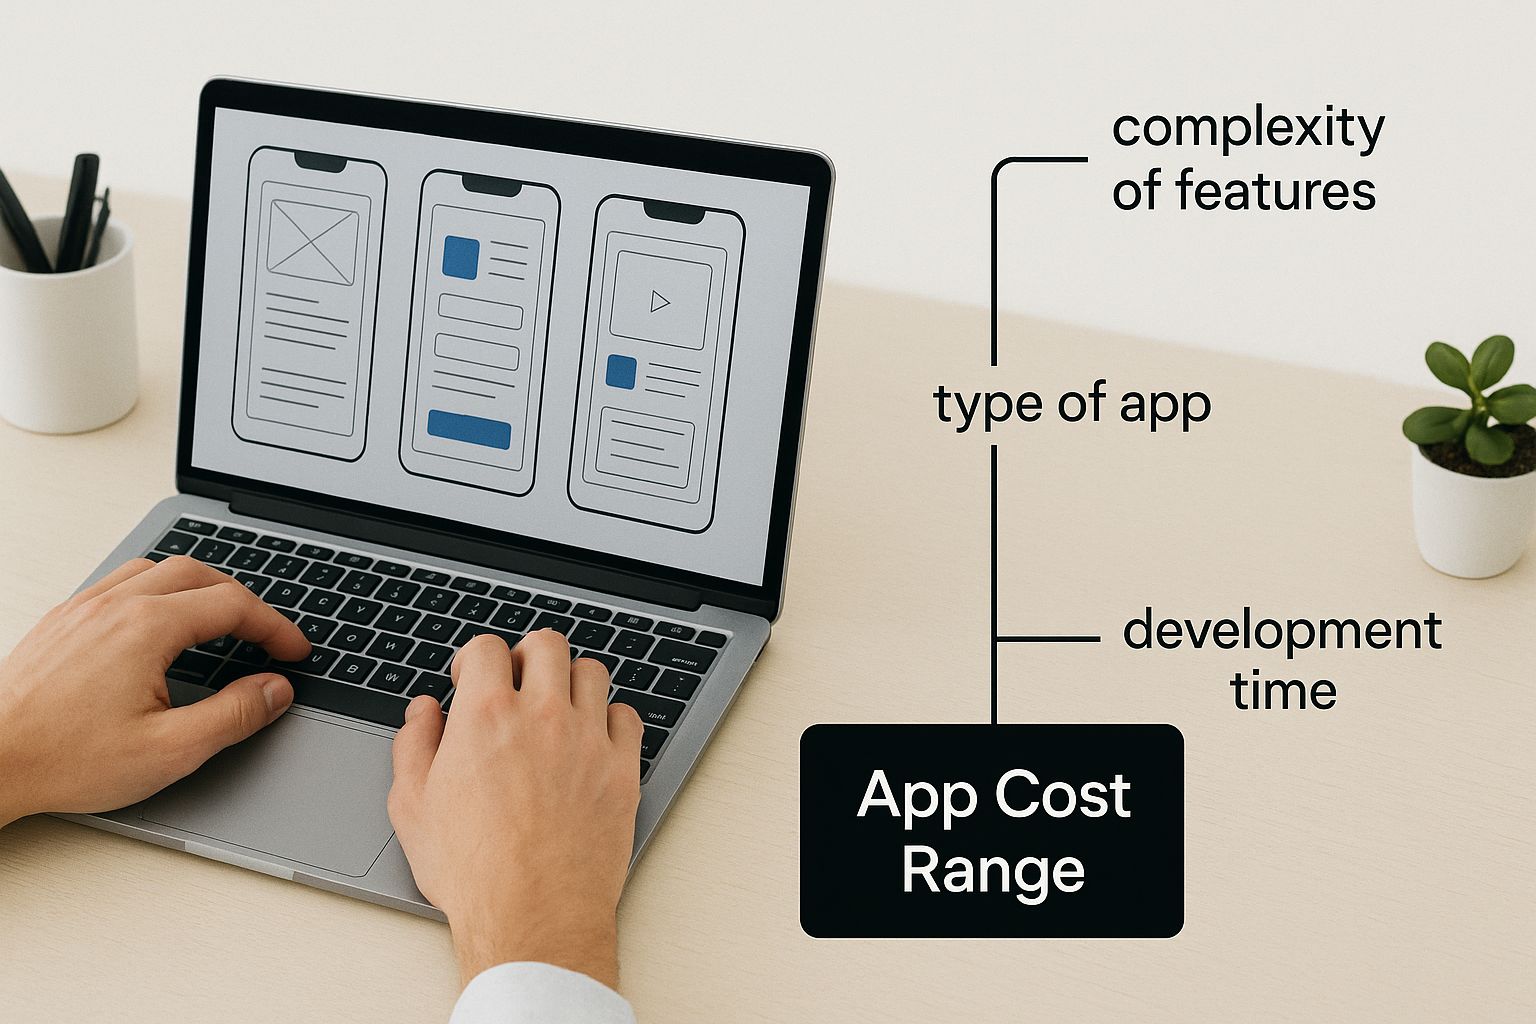
Let’s get right to it. The first question every founder or product manager asks is, "What's my actual investment going to be?" The honest answer isn't a single number, but a spectrum.
Think of it like buying a car. A basic sedan that gets you from A to B has a completely different price than a luxury SUV loaded with all-wheel drive and every high-tech feature imaginable. Both are cars, sure, but their complexity and capabilities are worlds apart, and that's reflected in the cost.
Your app idea fits somewhere on that same spectrum. Is it a simple utility with a handful of core functions? Or is it a feature-packed platform with custom animations, real-time data syncing, and multiple third-party integrations? Figuring that out is the very first step toward building a realistic budget.
Breaking Down the Cost Brackets
To give you a clearer picture, let's group app development costs into tiers based on their complexity. The latest data for 2025 shows a direct link between an app's feature list and its final price tag.
-
A basic app with core functionalities typically lands between $40,000 and $100,000, taking about 3 to 6 months to develop.
-
Moderately complex apps with more features can range from $100,000 to $200,000 and require 6 to 9 months.
-
Advanced apps with sophisticated back-end systems can run between $200,000 and $400,000 over 9 to 12 months.
As you can see, the investment grows pretty steeply as you pile on more features and technical requirements, which also stretches out the development timeline.
App Development Cost and Timeline Estimates by Complexity
To make this even more tangible, here's a quick-glance table that summarises these estimates. Use it to get a ballpark idea of where your app might fit before we dive into the specific factors that drive these costs up or down.
App Complexity | Estimated Cost Range | Estimated Timeline |
|---|---|---|
Simple (MVP) | $40,000 – $100,000 | 3 – 6 Months |
Moderate | $100,000 – $200,000 | 6 – 9 Months |
Advanced | $200,000 – $400,000 | 9 – 12 Months |
Enterprise | $400,000+ | 12+ Months |
This table should give you a solid starting point. Now, let’s get into the nitty-gritty of what exactly makes an app simple, moderate, or complex.
So, why does one app cost $50,000 while another that seems similar on the surface can run you $500,000? That massive gap isn't random. It comes down to a handful of critical decisions you'll make long before a single line of code is written.
Getting a handle on these core cost drivers is the first step to creating a realistic budget and, more importantly, avoiding nasty surprises down the road.
Think of it like building a restaurant. A food truck and a Michelin-star restaurant both serve food, but that's where the similarities end. The menu's complexity, the interior design, the location, and the size of the staff are all factors that create a chasm in their startup costs. Your app works the exact same way.

Let's break down the "Big Four" that will ultimately shape your final bill.
App Complexity and Features
This is, without a doubt, the biggest piece of the puzzle. Every button, every screen, and every function adds hours to the development timeline. A simple email login feature might take 30-40 hours to build out properly. But something complex, like real-time video streaming? You could be looking at 300-400 hours of work, which can easily translate to $15,000 or more for just that one feature.
It’s not just about how many features you have, but how deep they go.
-
Simple Apps: Think of a basic calculator or a note-taking app. They have minimal backend needs, don't require user accounts, and don't need to talk to other services. They work perfectly fine offline.
-
Moderately Complex Apps: Here's where you start integrating with the outside world. Think of an e-commerce app that uses a payment gateway like Stripe, or a travel app that integrates with Google Maps. These apps need a more robust backend to manage user data, process transactions, and handle API calls.
-
Highly Complex Apps: This is where the budget can really take off. We're talking custom algorithms, real-time data syncing between users, and machine learning features. Think about an app like Uber—it’s juggling real-time GPS, dynamic pricing, and a two-sided marketplace. That’s a whole different level of engineering.
Don’t be fooled by a clean, minimalist interface. The real work—and the real cost—is often hidden in the backend that powers everything, keeps data secure, and makes the magic happen.
Platform and Tech Stack
The technology you choose to build on directly impacts your budget. The big question is whether you want to build separate "native" apps for iOS and Android or go with a cross-platform solution that covers both at once.
-
Native Development (iOS & Android): This means building two distinct apps, one for each platform, using their own dedicated languages (Swift for iOS, Kotlin for Android). You get the absolute best performance and a seamless user experience this way. But it’s also the most expensive route, since you're essentially paying to build your app twice.
-
Cross-Platform Development: Frameworks like React Native or Flutter let developers use a single codebase for both iOS and Android. This can be a game-changer for your budget, often trimming initial development costs by 20-40%. The trade-off is that it might not be the best fit for apps that need intense graphics or deep access to a phone's hardware. If you're weighing your options, exploring a breakdown of React Native versus app builders can give you a better feel for where each solution shines.
Design and User Experience (UI/UX)
Design is so much more than just making things look pretty; it's about crafting the entire journey a user takes through your app. A polished, custom design is a serious investment, but it's one that pays off.
-
Basic Template-Based Design: This is the most budget-friendly path, typically running between $3,000 to $6,000. It gets the job done using standard UI kits but won't do much to make your app memorable.
-
Custom UI/UX Design: For a completely unique look and feel that reflects your brand—with custom icons, illustrations, and a thoughtfully mapped-out user flow—you can expect to invest anywhere from $8,000 to $30,000.
-
Premium Design with Animation: If your vision includes sophisticated animations, satisfying micro-interactions, and an ultra-polished experience, the design portion of your budget can easily sail past $30,000.
Putting money into good UX design from the start is non-negotiable. An app that's confusing or frustrating to use will bleed users, no matter how powerful its features are.
Team Composition and Location
Who you hire and where they live will cause massive swings in your total cost. A standard team usually includes a Project Manager, a UI/UX Designer, developers, and a QA Engineer. The cost for that team is all over the map depending on geography.
Here’s a rough guide to hourly rates:
-
North America: $100 to $250 per hour
-
Western Europe: $70 to $150 per hour
-
Eastern Europe: $35 to $70 per hour
-
Asia (India): $20 to $50 per hour
Choosing a team is always a balance of cost, quality, and communication. A lower hourly rate is tempting, but it won't save you money if it leads to project delays, communication breakdowns, or a final product that needs to be rebuilt.
How Your Budget Gets Spent, Phase by Phase
Knowing the total cost of an app is one thing, but understanding where that money actually goes is what separates a well-managed project from a financial train wreck. Your budget isn't a single check you write at the start. It’s an investment that flows through distinct phases, each with its own goals, team, and deliverables.
Think of it like building a custom home. You don't pay for the entire house upfront. Instead, you allocate funds for the architect to draw up blueprints, then for the construction crew to pour the foundation and frame the walls, and finally for the inspectors to give it the green light. Each stage builds on the last, turning a vision into something real.
Let's walk through how a typical app budget breaks down, so you can see exactly where every dollar goes.

Phase 1: The Discovery and Strategy Blueprint
This is the most critical phase, and ironically, the one founders are most tempted to skip. Before a single line of code is written, the Discovery phase acts as your project's foundation. This is where you validate your idea, nail down the core features, size up the competition, and get crystal clear on your business goals.
The whole point here is to de-risk your investment. Spending time on strategy upfront saves you from expensive changes and complete do-overs down the road. It’s less about building and more about thinking, planning, and making sure everyone agrees on what "done" and "successful" actually look like.
This initial deep-dive, which includes market research and defining your Minimum Viable Product (MVP), usually takes up 10-15% of the total budget. This can range from $5,000 to $40,000 and typically lasts between one and four weeks.
Investing 10-15% of your budget in a solid Discovery phase isn't an expense—it's insurance. It's the cheapest, most effective way to ensure you're building the right product for the right people before you commit to the much heavier cost of full-scale development.
Phase 2: The UI/UX Design Framework
Once the strategy is locked in, the focus shifts to how the app will look, feel, and function. The UI/UX design phase is where you translate those strategic goals into a tangible user experience. It's so much more than just picking pretty colors and fonts; it's about crafting an intuitive, seamless journey for your users.
This stage involves a few key steps to bring your app to life visually:
-
Wireframing: Creating simple, black-and-white layouts that map out the app’s structure and user flow without any distracting visual design.
-
Prototyping: Building interactive, clickable mockups that feel like the real app. This lets you test the user experience and gather feedback before development even begins.
-
Visual Design (UI): Applying your brand identity—colors, typography, icons, and imagery—to create a polished, beautiful, and engaging interface.
This design phase typically eats up about 20-25% of your total budget. An investment here pays dividends in user adoption and retention. After all, an app that's confusing or frustrating to use is dead on arrival, no matter how powerful it is under the hood.
Phase 3: The Core Development and Coding
Here we go—the most resource-intensive phase and where the bulk of your budget is spent. This is where developers take the approved designs and prototypes and breathe life into them, turning static screens into a fully functional application. The code gets written, the backend infrastructure is built, and every feature is meticulously implemented.
Development is usually broken into two parallel tracks:
-
Frontend Development: Building everything the user sees and interacts with (the client-side).
-
Backend Development: Creating the server, database, and application logic that powers the app from behind the scenes (the server-side).
This phase easily accounts for 40-55% of the total app development cost. The final price tag is heavily influenced by your app's complexity, the number of features you're building, and the technology stack you choose. If you're starting with an MVP, our founder's guide on how to build an MVP mobile app is a great resource for prioritizing features to keep this cost in check.
Phase 4: The Testing and Deployment Launchpad
Before your app can make its grand debut, it needs to be put through the wringer. The Quality Assurance (QA) phase is all about hunting down and squashing bugs, ensuring the app works flawlessly on different devices and operating systems, and verifying that it meets every requirement laid out in the plan.
Once testing is complete and the app is stable, it's time for launch. This involves preparing and submitting it to the Apple App Store and Google Play Store, which have their own strict guidelines to follow.
This final leg of the journey, covering both comprehensive testing and deployment, usually represents 15-20% of the budget. It's the final polish that ensures your app makes a strong, stable, and positive first impression on your users.
How Your Team's Location Shapes the Final Price Tag
Of all the things that can swing your mobile app development budget, one of the biggest surprises is often geography. It’s not just about features or fancy design—it's about where your developers are physically located. The exact same app, built with the same tech stack, can have a wildly different price tag depending on where your team calls home.
Think about it this way: the cost of hiring a top-tier architect in New York City is going to be worlds apart from hiring an equally skilled one in Lisbon or Manila. App development is no different. Local economies, the cost of living, and the simple law of supply and demand create huge gaps in what developers charge per hour across the globe.
But let's be clear: a lower price tag doesn't mean lower quality. Brilliant developers are everywhere. The real trick is understanding what you're trading off. It's not just about the hourly rate; it’s about time zones, communication styles, and cultural fit.
A Quick Tour of Global Developer Rates
To put this into perspective, let's look at what you can expect to pay for developer talent in different corners of the world. Seeing the numbers side-by-side makes it obvious why this is such a critical financial decision.
Industry reports for 2025 show a dramatic spread. In North America, rates typically run between $100 to $250 per hour. Hop over to Eastern Europe, and you’ll find rates that are much easier on the wallet, usually landing somewhere between $35 and $70 per hour. And in parts of the Middle East and Africa, those rates can dip even lower, from $20 to $60. You can dig deeper into these global app development cost trends on Lizard.global.
The math is simple but powerful. A feature that takes 100 hours to build could cost you $15,000 with a U.S.-based team. That same feature, built by an equally talented team in Eastern Europe, might only set you back $5,000. Where you build really matters.
To give you a clearer picture, here’s how hourly rates stack up across the major development hubs.
Average Hourly Developer Rates by Region
This table breaks down the typical hourly rates you can expect to pay for mobile app developers in different parts of the world. Notice the stark contrast between established Western markets and emerging tech hubs.
Region | Average Hourly Rate (USD) |
|---|---|
North America (USA & Canada) | $100 - $250 |
Australia | $90 - $180 |
Western Europe (UK, Germany) | $70 - $150 |
Eastern Europe (Poland, Ukraine) | $35 - $70 |
Latin America (Brazil, Argentina) | $30 - $60 |
Asia (India, Philippines) | $20 - $50 |
As you can see, the potential for cost savings is enormous. But remember, the hourly rate is just one piece of the puzzle. The cheapest option isn't always the best value.
Weighing the Pros and Cons of Each Region
A low hourly rate is always attractive, but it’s crucial to look at the whole picture. Every region brings its own set of benefits and potential headaches that can affect your project’s final outcome.
-
North America (USA & Canada)
-
Pros: Communication is effortless. You're in the same time zone (or close to it), share the same cultural context, and have zero language barriers.
-
Cons: You'll pay a serious premium. These are the highest rates in the world, which can make it tough for startups and smaller businesses to afford top talent.
-
-
Western Europe (UK, Germany)
-
Pros: Home to world-class engineering talent with excellent English skills. Time zones are manageable, especially if you're on the U.S. East Coast.
-
Cons: Still quite expensive. Rates are often just a step below North America.
-
-
Eastern Europe (Poland, Ukraine)
-
Pros: This is the sweet spot for many. You get access to incredibly skilled, highly-educated developers for a fraction of Western prices. English proficiency in the tech community is fantastic.
-
Cons: You’ll need to be more intentional about scheduling meetings to accommodate the time difference.
-
-
Asia (India, Philippines)
-
Pros: The most budget-friendly rates you'll find anywhere, period. The talent pool is massive, so you can find developers for virtually any technology.
-
Cons: The significant time difference can lead to communication lag. You also have to be mindful of potential cultural and language nuances to avoid misunderstandings.
-
Choosing a development partner is a balancing act. You're weighing cost savings against communication friction. The goal is to find the point where you get the most value without sacrificing project momentum or quality.
At the end of the day, you have to look beyond the price tag. A team that's cheaper by the hour but requires twice the management from you might not be a bargain. Think about your own schedule, how hands-on you want to be, and your project's complexity before you make a final call.
Planning for Costs Beyond the Launch
Getting your app into the App Store or Google Play feels like a huge win, and it is! But it's not the finish line—it's the starting pistol for a much longer race. Too many founders sink every last dollar into the initial build, only to be blindsided by the ongoing costs needed to keep the app running and relevant.
Thinking your spending stops at launch is like buying a brand-new car and forgetting about gas, insurance, and oil changes. Your app is a living, breathing product, and it needs constant care to stay secure, functional, and valuable to your users. Overlooking these post-launch costs is one of the quickest ways for a promising app to fade into obscurity.
A good rule of thumb is to budget an extra 15-20% of your initial development cost for annual maintenance. So, if building your app cost $100,000, you should have another $15,000 to $20,000 set aside for that first year alone, just to keep things ticking.
Where Does the Post-Launch Budget Go?
So, what are you actually paying for after your app is live? These aren't just surprise expenses; they're predictable and absolutely essential for your app's long-term health.
The costs typically fall into a few key buckets:
-
Infrastructure & Hosting: The servers and databases that are the backbone of your app.
-
Third-Party Subscriptions: The tools you plug in for payments, analytics, notifications, and more.
-
Ongoing Maintenance & Updates: Bug fixes and crucial updates for new operating systems.
-
Future Feature Development: The budget for adding new functionality to stay competitive.
Let's dig into what each of these really means for your wallet.
Your launch budget gets you into the game. Your maintenance budget is what keeps you competitive and prevents your initial investment from becoming obsolete within a year.
Infrastructure and Third-Party Services
Your app needs a place to live online. This "home" is made up of servers that store user data, manage accounts, and handle all the complex logic running in the background.
You'll likely be using services like Amazon Web Services (AWS) or Google Cloud, which are the industry standard. But they come with monthly bills that scale right alongside your user base. The more popular your app gets, the more data and traffic you have, which means your hosting costs will climb.
On top of that, modern apps don't do everything from scratch. They rely on a whole ecosystem of specialized third-party services, and nearly all of them come with their own subscription fees. This includes things like:
-
Payment Gateways: Services like Stripe or Braintree are non-negotiable for processing transactions, and they take a small cut of every purchase.
-
Analytics Platforms: Tools like Mixpanel or Amplitude are key for understanding user behavior, but their pricing is often tied to how many monthly active users you have.
-
Push Notification Services: Sending notifications to your users is managed by platforms that often charge based on the volume of messages you send.
These recurring fees are the operational heartbeat of your app.
Essential Maintenance and Future Growth
Technology never stands still. Every year, Apple and Google release major updates to their operating systems, and these changes can easily break parts of your app. Your maintenance budget is what pays developers to adapt your code, fix compatibility issues, and make sure your app doesn't crash on the latest devices. It also covers squashing all the little bugs that inevitably pop up after launch.
But you can't just keep the lights on—you have to grow. A portion of your ongoing budget has to be dedicated to evolving the product. The app you launch is just version 1.0. User feedback and what your competitors are doing will create a roadmap of new features and improvements. This is where you'll fund the development that keeps users excited and attracts new ones.
As you scale, these updates become even more critical. Many founders learn the hard way that the tools that got them to their first 1,000 users often aren't the ones that will get them to 100,000. It’s important to understand why app builders often fail to scale and why having a flexible, well-engineered foundation from the start is so important.
Smart Ways to Cut Your App Development Costs
Working with a tight budget doesn't mean you have to compromise on quality. The trick is to be strategic, putting your money where it counts the most. Making smart, deliberate decisions right from the start can dramatically lower your mobile app development costs.
It’s all about efficiency without sacrificing the core value your app provides. Instead of throwing everything but the kitchen sink into version one, a focused approach will save you a ton of cash and likely result in a better, more polished product.
Champion the Minimum Viable Product
By far, the most effective way to manage your budget is to start with a Minimum Viable Product (MVP). An MVP isn't a cheap or half-baked app. It’s a lean, focused version that includes only the essential features needed to solve one core problem for your first users.
Think of it like opening a restaurant. You wouldn't launch with a 50-page menu. You'd start with a handful of your absolute best dishes to see what people love, get their feedback, and build a following before you add more. This approach can slash your initial development costs by as much as 55%, mainly because you avoid building features that your users might not even care about.
The goal of an MVP is maximum learning for minimum cost. You get your product into the hands of real users faster, allowing their feedback to guide your future investment, which is far cheaper than building based on assumptions.
Ready to stop guessing and start building? With RapidNative, you can generate production-ready React Native UI screens from a simple prompt. It's a fantastic way to speed up your prototyping, validate your idea, and get your app out there faster. Try RapidNative today.
Embrace Cross-Platform Development
Another fantastic way to keep costs in check is by opting for a cross-platform framework like React Native or Flutter. Instead of building two completely separate apps for iOS and Android—which is like paying for the whole project twice—these frameworks let developers write a single codebase that runs on both.
The savings here are huge, often trimming development expenses by 20-40%. For a startup or a founder on a shoestring budget, this can easily be the difference between launching and never getting off the ground.
For example, a small business building a simple e-commerce app could save tens of thousands of dollars by using React Native. They can launch on the App Store and Google Play at the same time, reaching the biggest possible audience without doubling their engineering bill. That kind of efficiency is a game-changer.
Use Open-Source and Pre-Built Solutions
There's no need to reinvent the wheel for every single feature. Your development team can save hundreds of hours by tapping into open-source libraries, frameworks, and ready-made solutions for common functions. Why build a complex payment system from scratch when a secure, trusted solution like Stripe already exists?
Leaning on these battle-tested components gives you a few key advantages:
-
Reduced Development Time: Using existing code for things like user logins, analytics, or maps drastically cuts down coding hours.
-
Lower Costs: Fewer hours spent coding means a smaller final invoice. Simple as that.
-
Improved Stability: Open-source tools are often supported by massive communities, which means they’re typically more stable and secure than something you'd build from the ground up.
By focusing on an MVP, choosing cross-platform tools, and using pre-built components, you can make your budget work smarter, not harder. These strategies empower you to build a high-quality app that users will love without breaking the bank.
Got Questions? Let's Get You Some Answers
Even with a solid plan, a few questions always pop up when you're trying to nail down a budget. Here are some of the most common ones I hear from founders and product teams diving into app development.
iOS vs. Android: Which One Costs More to Build?
You might have heard that building for Android used to be more expensive. That was true for a while—the sheer number of different devices and screen sizes meant a lot more time spent on testing to make sure everything worked everywhere.
These days, though, the costs are pretty much on par. What really moves the needle is how you build. If you develop two separate, native apps (one for iOS, one for Android), you're essentially paying for the same project twice. A more budget-friendly route is using a cross-platform framework like React Native, which lets your team build once for both platforms from a single codebase.
How Do I Get a Real, Accurate Cost Estimate?
A vague idea will get you a vague (and probably inaccurate) estimate. If you want a number you can actually take to the bank, you need to hand over a detailed project brief.
Your brief should spell out the app's core purpose, who it's for, and—most critically—a prioritized list of features. Split them into "must-haves" for your first version and "nice-to-haves" for later. If you've got any wireframes or mockups, throw those in too. The more you can show and tell, the less guesswork the development agency has to do.
A well-defined scope is your best friend when it comes to getting a reliable quote. It leaves no room for assumptions, which means a more accurate budget and a much smoother project right from the get-go.
A Simple Design Means a Cheap App, Right?
Not so fast. An app's complexity isn't just skin deep. Think about an app like Uber or a sleek modern banking app—they look clean and simple, but the technology running underneath is anything but.
That minimalist interface is powered by a beast of a backend handling real-time GPS tracking, secure payment processing, and complex algorithms. The real drivers of mobile app development costs are often invisible to the user. It's the backend systems, third-party APIs, and complex integrations that really shape the budget, not just how many screens you have.
Ready to build your app?
Turn your idea into a production-ready React Native app in minutes.
Free tools to get you started
Free AI PRD Generator
Generate a professional product requirements document in seconds. Describe your product idea and get a complete, structured PRD instantly.
Try it freeFree AI App Name Generator
Generate unique, brandable app name ideas with AI. Get creative name suggestions with taglines, brand colors, and monogram previews.
Try it freeFree AI App Icon Generator
Generate beautiful, professional app icons with AI. Describe your app and get multiple icon variations in different styles, ready for App Store and Google Play.
Try it freeFrequently asked questions
What is RapidNative?
RapidNative is an AI-powered mobile app builder. Describe the app you want in plain English and RapidNative generates real, production-ready React Native screens you can preview, edit, and publish to the App Store or Google Play.
Can I export the code?
Yes. RapidNative generates clean React Native and Expo code that you can export at any time. No lock-in, no proprietary format. Hand it to your developers or keep building inside RapidNative.
Is RapidNative free to use?
Yes. You can build apps on the free plan with no credit card required. Paid plans unlock unlimited AI generations, code export, and direct publishing to the App Store and Google Play.
Do I need to know how to code?
No. Most users build apps by describing what they want in plain English. Developers can drop into the code whenever they want more control, but coding is optional.
How long does it take to build an app?
Most users have a working first screen in under a minute. A full MVP usually takes a few hours instead of the weeks or months traditional development requires.