Expo QR Code: Preview Your React Native App in Seconds
A complete guide to implementing expo qr code functionality. Learn to build, scan, and generate QR codes in your React Native app with practical examples.
By Damini
1st Jan 2026
Last updated: 16th Apr 2026

Adding an Expo QR code feature is a fantastic way to connect your mobile app directly to the physical world. It makes everything from event check-ins to sharing contact info feel incredibly smooth for the user. In this guide, we'll walk through how to build both a scanner and a generator using battle-tested libraries like expo-camera and react-native-qrcode-svg, which simplify what could otherwise be a complex process.
Why QR Codes Are a Game-Changer for Mobile Apps
QR codes have moved way beyond the restaurant menu. They've become a core tool for product teams building interactive mobile experiences. If you're a founder, product manager, or designer, understanding their potential is key to creating slick user journeys that bridge the gap between digital and physical worlds.
This technology gives your app a way to react to its environment. For example, a user at a trade show could scan a code at a booth to instantly download a product brochure or connect with a sales rep. Or, a warehouse worker could scan a pallet to update inventory in real time. These aren't just cool features; they're practical solutions to real business problems.
Bridging Physical and Digital Worlds
The real magic of an Expo QR code is how it acts as an instant, zero-friction gateway. Instead of making someone type a long URL, search for a product, or fill out a form, a quick scan can trigger a whole series of actions inside your app. This is a vital part of modern mobile strategy, especially in cross-platform development where you're aiming for a consistent user experience. For more on this, check out our guide to cross-platform mobile phone development.
This approach makes users happier by removing unnecessary steps. A few practical use cases come to mind:
- Effortless Onboarding: A new user scans a QR code from a welcome email or a physical starter kit to automatically configure their app settings.
- Interactive Marketing: Print ads or product packaging can come alive with QR codes that link to exclusive video content or AR try-on experiences.
- Seamless Event Management: For a deep dive on how much barcodes and QR codes are transforming event ticketing, this Ultimate Guide to Barcode for Tickets is a great resource.
Getting Your Project Ready for QR Codes
A solid foundation is key. Before you can build a slick QR code scanner or generator, your Expo project needs to be set up correctly. This isn't just about running an npm install command; it's about establishing a stable, production-ready environment from the start. For this guide, we'll use a modern stack with TypeScript and NativeWind to keep our code clean, scalable, and easier to maintain.
First, you need an Expo project. If you're starting from scratch, initializing a new app is straightforward. For a detailed walkthrough, we have a dedicated guide on how to create a new Expo app. Once your project is running, it's time to add the libraries that will do the heavy lifting.
Picking the Right Tools for the Job
To build a full-featured Expo QR code system, you'll need two distinct tools: one for scanning and another for generating. My go-to choices have proven reliable in many projects.
- For Scanning: The clear winner is
expo-camera. It's the official Expo package for camera access, which means it's well-integrated and stable. It provides all the hooks and components you need to build a scanner view and handles the tricky permissions flow for you. - For Generating: I always reach for
react-native-qrcode-svg. This library is lightweight yet powerful. It renders QR codes as SVG elements, which is a huge plus—they scale perfectly on any screen size without looking blurry or pixelated.
The goal is to bridge the gap between the physical world and your app, creating a smooth journey for the user.
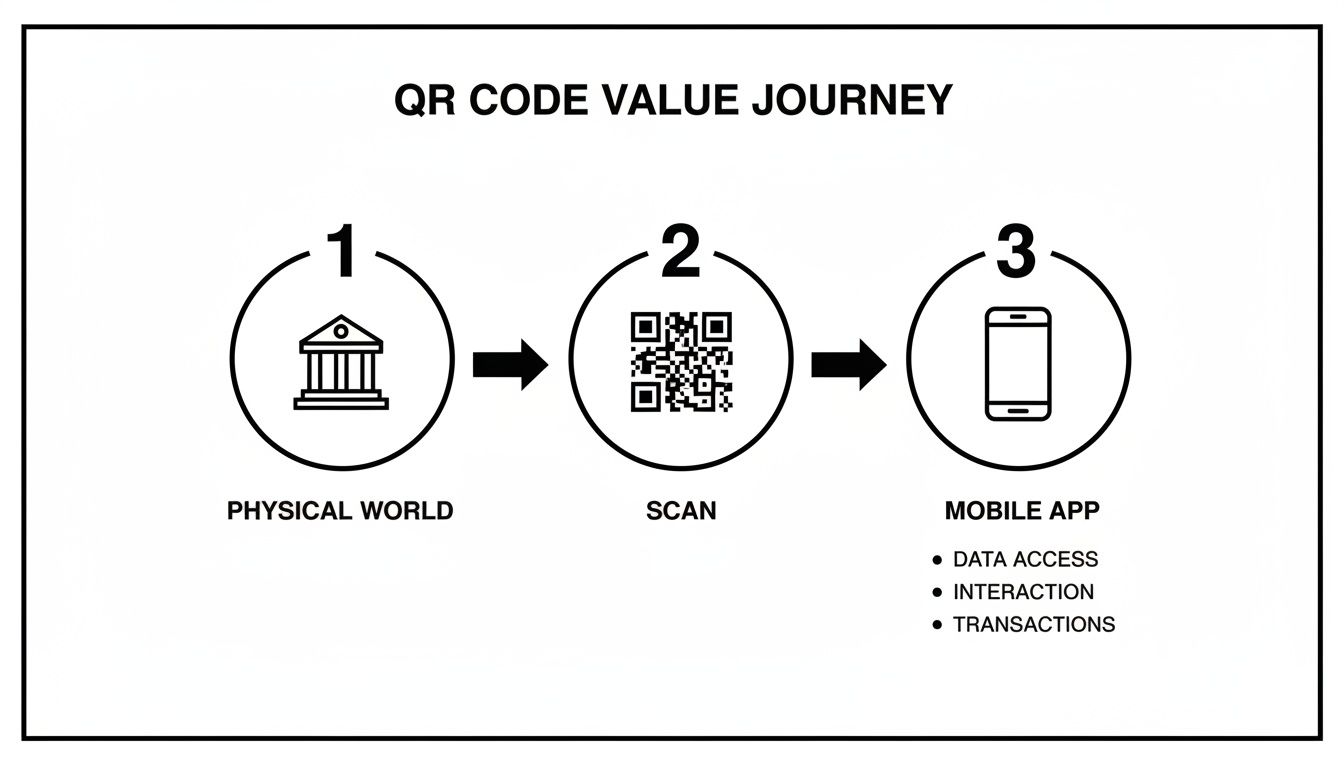
That transition from a physical scan to a meaningful in-app action is where the value is created.
The recent explosion in QR code usage makes this feature more valuable than ever. In the first quarter of 2022 alone, global QR code scans jumped by 433%, shifting them from a tech novelty to a core tool for everything from live events to retail. For teams like ours at RapidNative, building AI-powered React Native apps, this means we can help founders quickly prototype event apps that scan booth codes for product info, all with clean, exportable code. You can read more about these trends at ExpoPlatform.com.
Nailing the Permissions Setup
One of the most common pitfalls developers encounter is mishandling permissions. Your app must ask the user for permission to access the camera, and this needs to be configured correctly in your app.json or app.config.js file.
Pro Tip: Forgetting to add the camera permission string in
app.jsonis a classic mistake. Your scanner will work perfectly in Expo Go but then fail silently in a standalone build, leaving you wondering what went wrong.
To avoid this headache, add the expo-camera plugin and a clear, user-friendly permission message to your configuration file. This small step ensures your app behaves correctly, properly prompts the user, and doesn't crash when it's time to open the camera. It’s a simple setup that leads to a much smoother development experience.
Building a Reusable QR Code Scanner
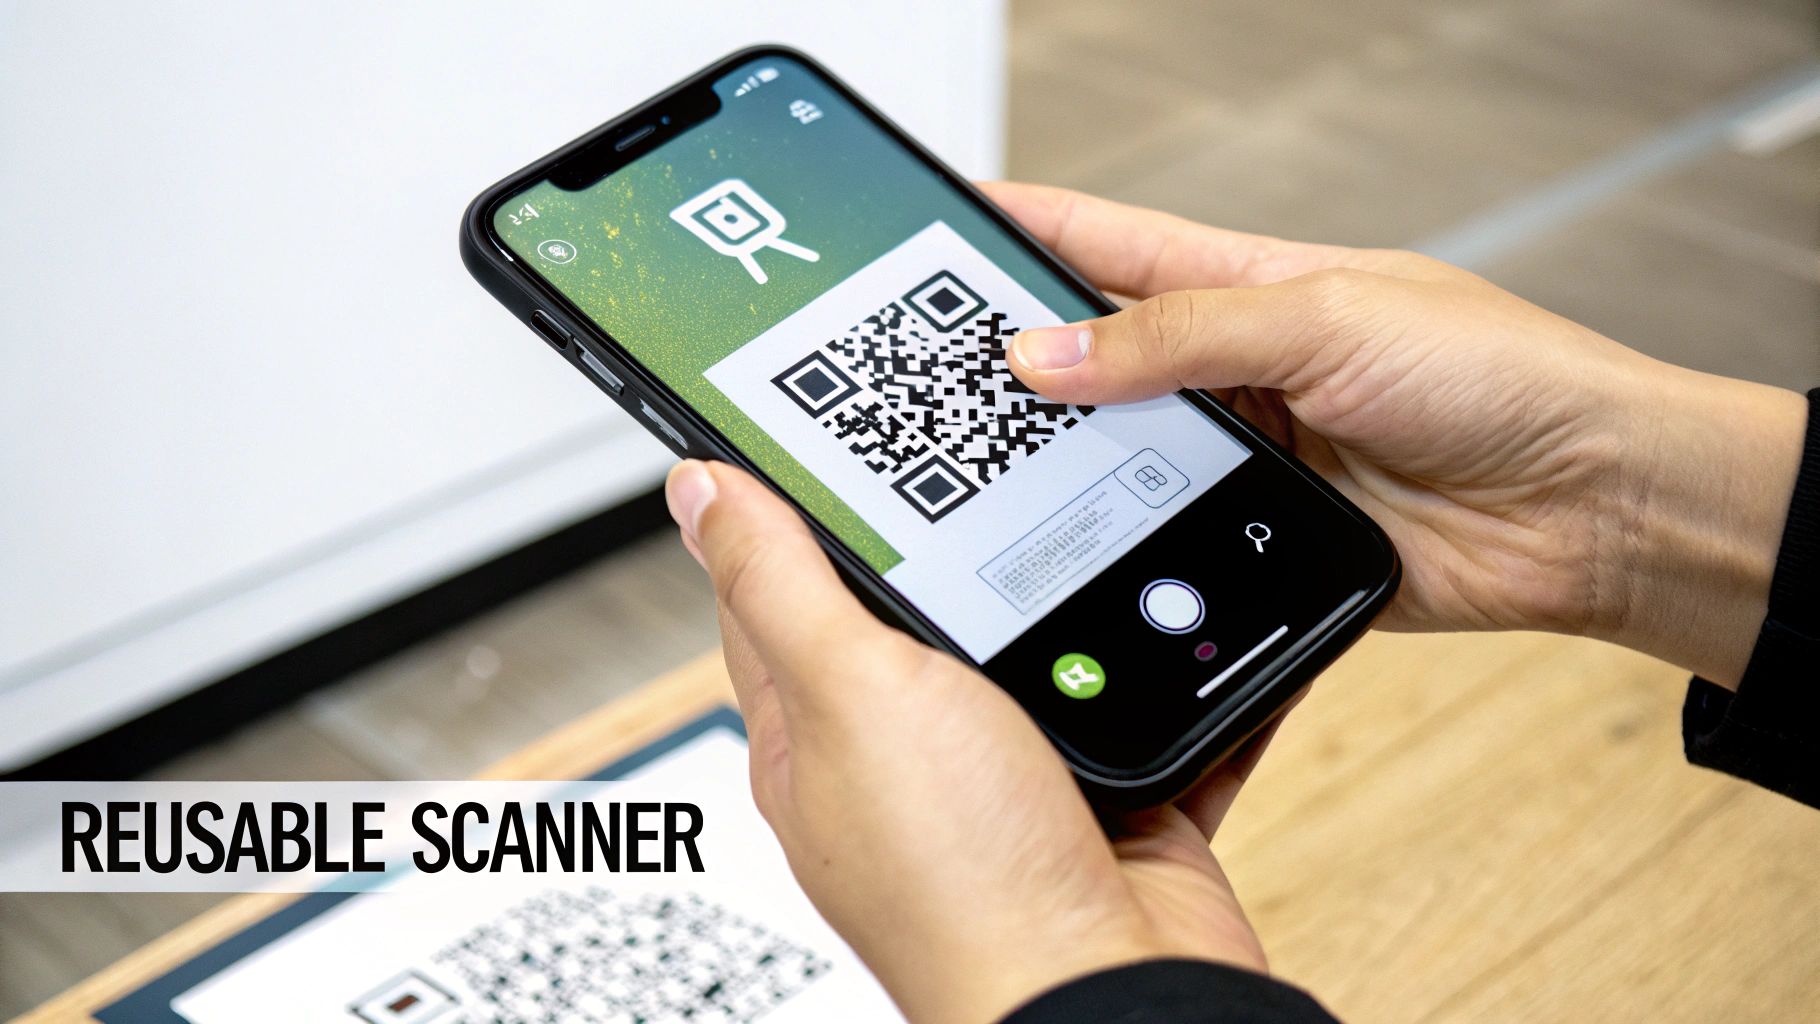
Now, let's get practical and build a functional, reusable QR code scanner component with TypeScript. This isn't just about copying and pasting code. The goal is to understand the logic behind a great scanning experience so you can adapt it to any app you’re working on.
We're aiming for a component that feels polished and is easy to drop into any screen. A good scanner does more than just read data—it guides the user, handles permissions respectfully, and gives clear feedback. These details are what separate a clunky prototype from a professional app.
Handling Camera Permissions Gracefully
Before the camera can turn on, your app needs permission. This is a critical user interaction. A poorly handled permission request can feel intrusive and cause users to deny access, rendering your feature useless.
To do this right, we’ll use the built-in hooks from the expo-camera library. The useCameraPermissions hook is a lifesaver. It gives you a function to request permission and, more importantly, returns the current status. You'll know instantly if the user has already granted, denied, or hasn't been asked yet.
This lets you create a much smarter UI. Instead of showing a jarring black screen or an error, you can display a friendly message explaining why you need the camera. Add a simple button, and you put the user in control of when the official permission prompt appears. It's a user-centric approach that builds trust and increases the likelihood of getting that "Allow."
Implementing the Scanner View
The heart of our scanner is the <Camera> component from expo-camera. Think of it as a special View that shows a live feed from the device's camera. The key property for us is onBarCodeScanned.
You pass a function to this prop, and it fires the instant a valid QR code comes into view. That function receives an object containing the scanned data. From there, you can trigger any action you need—navigating to a new screen, fetching data from an API, or updating state.
Important Takeaway: The
onBarCodeScannedcallback can fire rapidly, sometimes multiple times for a single scan. It's standard practice to disable scanning immediately after the first successful read to prevent unpredictable behavior. A simple "Scan Again" button can then be used to re-enable it.
This simple control flow makes your component far more robust. If you're just getting started with the Expo ecosystem, our guide on your first hour with Expo is a great place to begin.
Adding Polished UI Details
A raw camera feed is functional, but it isn't very user-friendly. You can elevate the experience with a few simple UI elements.
- Viewfinder Overlay: This is a semi-transparent layer that sits on top of the camera view, with a clear square "window" in the middle. It gives the user a clear target, guiding them on where to position the QR code. The result is a faster, more intuitive scan.
- Success Indicator: Once a scan is successful, give the user instant feedback. A quick green flash, a subtle vibration, or the viewfinder's border changing color all work well. It’s a clear signal that tells them, "Got it, you can lower your phone now."
These touches, built with standard React Native <View> components and styled with NativeWind, are what turn a basic utility into a polished feature. By wrapping all this logic—permissions, scanning, and UI feedback—into one component, you create a powerful, reusable asset for any future Expo QR code needs.
Generating Dynamic QR Codes in Your App

While a scanner lets your app read from the physical world, a generator lets the world connect back to your users. When you build a feature to dynamically generate an Expo QR code, you're turning static information into a shareable, interactive asset. This is where an app starts to feel less like a simple tool and more like a platform.
To get this done, we’ll use the react-native-qrcode-svg library. It’s a solid, lightweight choice that renders crisp SVG-based codes, meaning they’ll look sharp on any device, from a low-resolution Android to a high-density iPhone screen. No pixelation, just clean lines. Best of all, the setup is simple, so you can focus on creative ways to use it.
Choosing the Right QR Code Library for Expo
There are a few good options out there, each with its own strengths. Here’s a quick rundown to help you decide which one fits your project.
| Library | Primary Use Case | Key Feature | Best For |
|---|---|---|---|
react-native-qrcode-svg | SVG-based QR generation | Highly customizable (color, logo) | Apps needing branded, high-res codes. |
react-native-qrcode-generator | Canvas-based QR generation | Simple, fast rendering | Quick implementations where style isn't a priority. |
react-native-qrcode-styling | Advanced QR styling | Supports gradients, dots, custom shapes | Projects that need a unique visual flair. |
For this guide, react-native-qrcode-svg hits the sweet spot between performance, customization, and ease of use. It’s the one I reach for most often.
From Data to a Scannable Image
At its core, a QR code is just a visual representation of a string of data. The real power comes from deciding what to encode. You can transform just about any piece of information into a format that other devices can instantly understand.
This opens the door to all sorts of practical features:
- Digital Business Cards: Instead of typing, generate a QR code with a user's contact info in a vCard format. A quick scan and they're saved as a new contact.
- Event Ticketing: Create a unique QR code for every ticket. The code can hold a ticket ID or user info, making check-in at the door fast and secure.
- Payment Information: Encode a payment link or crypto wallet address. This is a staple in fintech apps because it makes sending and receiving money incredibly simple.
These features are more relevant now than ever. Global usage is on track to grow an astonishing 323% between 2021 and 2025. Businesses that adopt them are seeing real results, with 95% reporting they collect valuable data at 3-4 times the engagement rate of other methods. You can find more stats on QR code growth over at Krofile.com.
Customizing Your QR Codes for Branding
A standard black-and-white QR code works, but a branded one gets noticed. The react-native-qrcode-svg library makes it easy to customize the look and feel with simple props, turning a functional tool into an extension of your brand.
Pro Tip: One of the most effective tweaks you can make is embedding your app's logo in the center. It looks professional and instantly builds trust, since users can see who the code belongs to before they even scan it.
You can easily adjust a few key properties to match your app’s style:
- Size: Control the exact dimensions so the code fits perfectly in your UI.
- Color: Change the foreground and background colors to align with your theme.
- Logo: Drop a small logo image into the center, with options for padding to ensure it doesn’t interfere with scannability.
By pairing dynamic data with thoughtful branding, you can create an Expo QR code component that’s both powerful and visually appealing.
Navigating Common Pitfalls and Debugging
Getting your Expo QR code feature working on your local machine is a great first step, but ensuring it works reliably for actual users is another challenge. A little bit of foresight can save you hours of debugging. Let's walk through some of the most common issues you're likely to face.
One of the biggest hurdles that trips up developers is the difference in behavior between Expo Go and a real standalone build. It's incredibly common for a feature to work perfectly in your development environment, only to fail in production. The culprit is almost always how native permissions are handled.
The Expo Go vs. Standalone Build Dilemma
Expo Go is a fantastic tool for rapid iteration. You scan a QR code and your app is running on a real device—it's a huge time-saver. But here's the catch: Expo Go is a pre-built app that already has a wide range of permissions baked in.
When you create a standalone build for the app stores, you’re creating a fresh app binary. This new app only has the permissions you specifically requested in your app.json or app.config.js. This is where things often break.
A Classic Pitfall: Your QR scanner works flawlessly in Expo Go, but in the final build, the camera simply won't open. This almost always means you forgot to include the necessary camera permission messages in your project config. Expo Go handles this for you, which can create a false sense of security during development.
Troubleshooting When The Scanner Won't Scan
Even with a perfect setup, you might run into situations where the scanner just doesn't seem to work. If your onBarCodeScanned callback isn't firing, here are the first things to check.
- Poor Lighting or a Blurry Feed: The
expo-cameralibrary is solid, but it can't perform miracles. If the user is in a dimly lit room or has a shaky hand, the underlying native code might struggle to detect a code. It’s a good idea to add a message in your UI prompting users to find better light or hold their device steady. - Mismatched Barcode Types: By default, the scanner looks for all supported barcode types. But if you’ve narrowed the
barCodeTypesprop to only scan for QR codes (likeBarCodeScanner.Constants.BarCodeType.qr), make sure the code you're testing with is actually a QR code and not another format like a UPC. - Performance on Older Phones: Not everyone has the latest flagship phone. On older or lower-end devices, camera processing can be slower. The scanner might need an extra second or two to lock on and decode the QR code. Always test on a range of hardware if possible.
Keeping these common issues in mind will help you build a much more resilient Expo QR code feature. Properly handling permissions and accounting for real-world conditions like bad lighting will ultimately create a better and more reliable experience for your users.
Common Questions and Sticking Points with Expo QR Codes
As you build with QR codes in Expo, a few common questions will likely come up. Whether you're a founder sketching out a user flow or a developer digging into the code, getting these sorted out early can save you a lot of time.
Let's walk through some of the most frequent hurdles teams face.
Can I Actually Style the Scanner View?
This is often the first question people ask. A raw, full-screen camera feed can feel disconnected from your app's polished UI. The good news? You absolutely can style it.
Think of the <Camera> component from expo-camera as a special kind of <View>. You can apply styles to it directly and, more importantly, overlay other components on top of it.
A popular approach is to create a semi-transparent overlay with a cutout in the middle—like a viewfinder. This simple UI tweak guides the user to line up the QR code perfectly, making the experience feel more intentional. You can build this entire overlay with standard components and style it with NativeWind, just like any other part of your app.
What Kind of Data Can I Put Into a QR Code?
Pretty much anything you can represent as a string. This flexibility is what makes QR codes so useful.
Here are a few common examples:
- URLs for sending users to a website or deep-linking them to a specific screen in your app.
- Plain text for simple info like a coupon code, a serial number, or a quick note.
- Stringified JSON objects to pass structured data. This is great for things like user profile info or product details that your app can then parse and use.
- vCard data so someone can scan a digital business card and instantly add a contact to their phone.
The key isn't what you can encode, but what your app is prepared to handle. Once you've scanned the data string, it's up to your code to figure out what it is and what to do next.
What’s the Right Way to Handle Permissions When a User Says No?
This is a critical moment for your user experience. If someone denies camera access, your app can't just crash or show a blank, broken screen. You need to fail gracefully.
Your code must detect that permissions were denied and show a helpful alternative screen. This UI should explain why you need camera access for the feature to work.
Pro Tip: Don't just tell them to go to their phone's settings. Make it easy for them. Add a button that takes them there directly. The expo-linking library has a function that opens your app's specific settings page, removing all the friction for the user.
At RapidNative, we help you turn ideas into production-ready React Native screens using simple, plain-English prompts. Go from a rough sketch to clean, exportable code in minutes. It's the fastest way to validate flows, prototype UIs, and get your app moving. Try RapidNative today and see for yourself.
Ready to build your app?
Turn your idea into a production-ready React Native app in minutes.
Free tools to get you started
Free AI PRD Generator
Generate a professional product requirements document in seconds. Describe your product idea and get a complete, structured PRD instantly.
Try it freeFree AI App Name Generator
Generate unique, brandable app name ideas with AI. Get creative name suggestions with taglines, brand colors, and monogram previews.
Try it freeFree AI App Icon Generator
Generate beautiful, professional app icons with AI. Describe your app and get multiple icon variations in different styles, ready for App Store and Google Play.
Try it freeFrequently asked questions
What is RapidNative?
RapidNative is an AI-powered mobile app builder. Describe the app you want in plain English and RapidNative generates real, production-ready React Native screens you can preview, edit, and publish to the App Store or Google Play.
Can I export the code?
Yes. RapidNative generates clean React Native and Expo code that you can export at any time. No lock-in, no proprietary format. Hand it to your developers or keep building inside RapidNative.
Is RapidNative free to use?
Yes. You can build apps on the free plan with no credit card required. Paid plans unlock unlimited AI generations, code export, and direct publishing to the App Store and Google Play.
Do I need to know how to code?
No. Most users build apps by describing what they want in plain English. Developers can drop into the code whenever they want more control, but coding is optional.
How long does it take to build an app?
Most users have a working first screen in under a minute. A full MVP usually takes a few hours instead of the weeks or months traditional development requires.