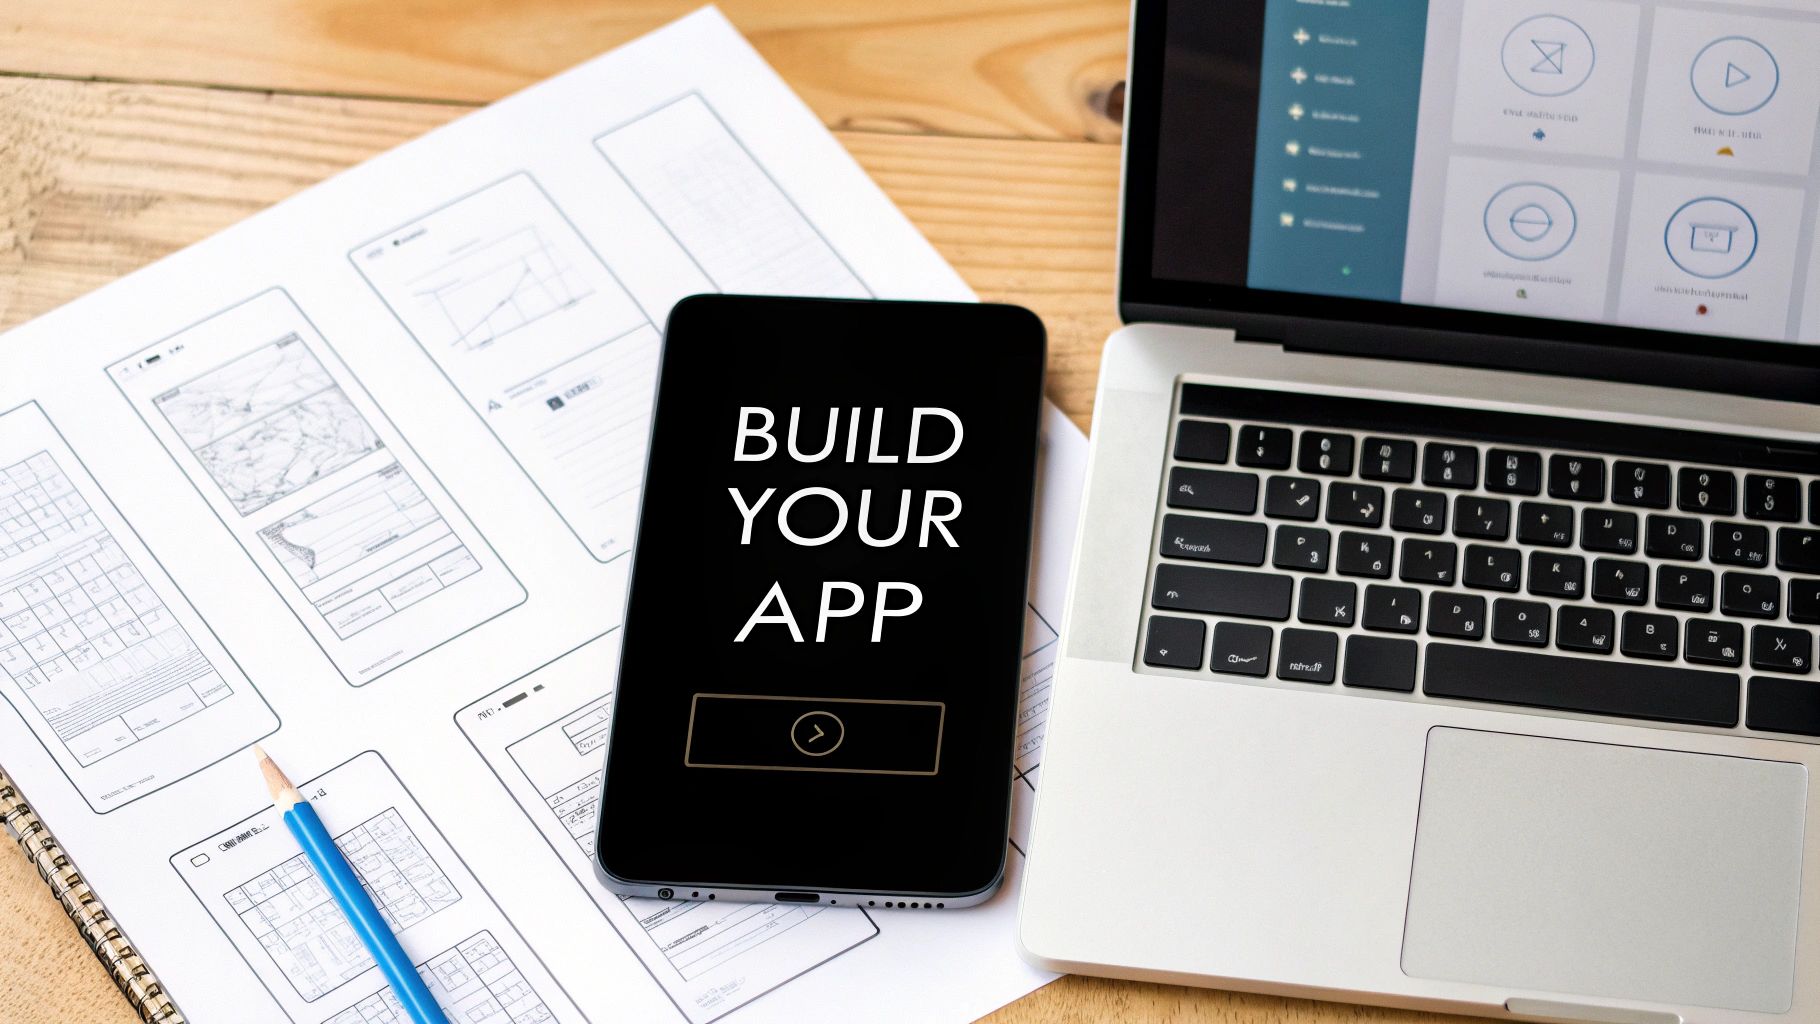
How to Create an App on Your Own Without Being a Developer
Learn how to create an app on your own, from idea to launch. This modern guide covers validation, AI-powered design, and getting your app to the App Store.
By Riya
30th Dec 2025
Last updated: 30th Dec 2025
Thinking about how to build an app on your own can feel like staring up at a mountain. For a long time, it seemed like a climb reserved only for seasoned developers. But that’s changing. Building an app solo is now genuinely possible for founders, designers, and product managers, thanks to a new wave of AI tools that deliver both speed and professional, ready-to-use code.
It’s a New Era for Solo App Builders
The opportunity in the mobile space is staggering. By 2025, we’re projected to see a mind-boggling 299 billion mobile app downloads globally, a significant jump from 257 billion in 2023. This growth is largely driven by soaring smartphone adoption in emerging markets, opening up a massive, hungry audience for new ideas.
Of course, that also means the competition is fierce. There are over 2.06 million apps on Google Play alone, with thousands more launching every day. If you want to dig deeper, you can find more mobile app download statistics and projections.
The Old Way vs. The New Way
For years, if you wanted to create an app on your own, your options were pretty limited. You could either spend months (or years) learning to code from scratch, or you could use a restrictive "no-code" builder. While no-code platforms get you started, they often trap you in their ecosystem with code that’s a nightmare to scale or hand off to a developer.
This guide is about a completely different path. We're going to explore how AI-powered tools like RapidNative are changing the game for solo creators. This isn’t just another no-code platform. It’s about generating clean, professional, and fully ownable code that you can build on.
Key Takeaway: It's time to shift your mindset from "this is too hard" to "I can do this with the right strategy and tools." You don't need to become a senior developer overnight to bring a great app idea to life.
What This New Approach Means for You
This modern, AI-assisted process gives solo builders serious advantages:
- Move at lightning speed. Go from an idea or a napkin sketch to a functional, interactive prototype in minutes, not weeks.
- You own everything. You get real, production-ready React Native code. It’s your asset, completely free from platform lock-in.
- No code? No problem. Build and refine your app's user interface using plain English prompts, which is incredibly intuitive for non-technical founders.
- Built for future growth. The code is clean and easy to understand, so when you're ready to add complex features, you can seamlessly bring in a developer to help.
In this guide, I’ll walk you through every step—from validating your initial spark of an idea to finally hitting "publish" on the app stores. It’s time to prove that building a high-quality mobile app on your own is no longer out of reach.
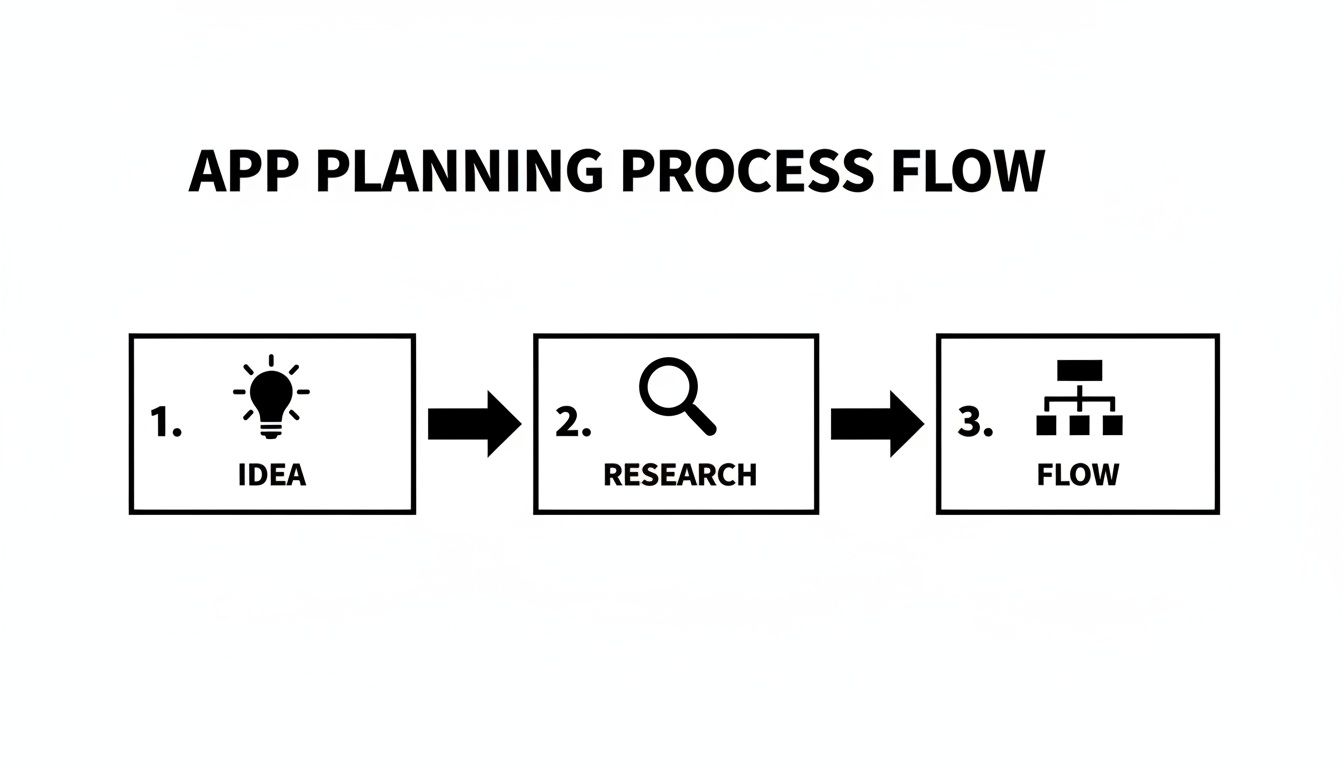
Turning Your Idea into a Real Plan
Every great app starts with an "aha!" moment, but the real magic is turning that spark into a solid plan. Before you even think about designing a screen, you need to do the groundwork. This is the step that separates apps people actually use from those that end up in the digital graveyard.
Let's be clear: this isn't about drafting a stuffy, 50-page business document. It's about doing the lean, essential work to prove your idea solves a real problem for a real group of people. Skipping this phase is the single biggest mistake solo builders make—a surefire way to waste months building something nobody wants.
Define the Problem, Not Just the Solution
It's easy to fall in love with your solution—the app itself. But successful founders are obsessed with the problem. Your initial idea is probably too broad. The trick is to narrow it down until it's almost painfully specific.
Instead of building "a fitness app," think more like "an app for new moms who need 15-minute, at-home workouts they can do during naptime." See the difference? That laser focus is your superpower as a solo builder. It immediately tells you who you're building for and what features truly matter.
Get brutally honest and ask yourself these questions:
- Who is this for? Don't just say "millennials." Imagine your ideal user. What's their name? Their job? Their daily routine? Get specific.
- What's their #1 pain point? Describe the exact frustration your app is going to fix.
- Why isn't their current solution working? What are they using now? An old spreadsheet, a competitor's clunky app, a bunch of sticky notes? Figure out why it fails them.
Answering these turns a vague concept into a focused mission. You’re no longer just building software; you're solving a tangible problem.
Do Just Enough Research to Be Dangerous
"Market research" can sound intimidating, but it doesn't have to be. Your goal is simple: find evidence that other people actually have the problem you think they do. You're not looking for absolute certainty—just a few strong signals that you’re on the right path.
Don't build in a vacuum. The cheapest and fastest way to learn is by listening to your potential users before you build. A handful of conversations can save you hundreds of hours.
Here are a few practical ways to get the validation you need:
- Analyze Competitor Reviews: Head to the App Store and Google Play. Look up similar apps and filter for the 2-star and 3-star reviews. This is a goldmine of user frustrations and feature requests. Jot down recurring complaints—these are your opportunities.
- Run Simple Surveys: Use a tool like Google Forms to create a quick, 5-question survey. Share it in relevant Reddit communities, Facebook groups, or Slack channels where your target audience hangs out. Remember to ask about their problems, not pitch your solution.
- Conduct Quick Interviews: Find 3 to 5 people who fit your user profile and ask for 15 minutes of their time. Your only job is to listen and understand their world and their struggles, not to sell them on your idea. For a deeper dive, check out our guide on how to validate product ideas fast with more practical techniques.
This process gives you priceless insights and ensures you’re not just building something for yourself.
Map the Core User Journey
With a validated idea in hand, it's time to translate it into a simple, actionable flow. Don't get bogged down mapping out every single feature. Instead, focus on the single most important workflow that delivers on your app's promise. This is often called the "happy path."
For our new mom fitness app, the core journey might look like this:
- User opens the app during naptime.
- She picks a 15-minute, low-impact workout.
- She finishes the workout and sees a quick summary.
That's it. That's your blueprint. This simple flow defines the essential screens for your Minimum Viable Product (MVP), keeping you focused on shipping value quickly and avoiding feature bloat. Now you're ready to bring it to life.
Bringing Your App to Life with AI
With a solid plan, it’s time for the fun part: turning those ideas into something you can actually see and interact with. This is where modern AI tools have completely changed the game for solo builders. Forget the steep learning curve of design software or clunky builders of the past.
We're going to walk through how to build a working prototype of your app's front-end—the part your users will actually see and touch—using a tool like RapidNative. The goal here is speed and iteration, getting you from concept to a clickable prototype in hours, not months.
This shift toward accessible app creation is not a small trend. Traditional app development is slow and expensive, often costing $50,000-$150,000 and taking months of work. For a founder or PM, that’s a massive barrier. AI is breaking down those barriers for good.
Talking Your UI into Existence with Chat Prompts
The most straightforward way to get started is to simply tell the AI what you want. Think of it as a conversation with a senior designer who can instantly build whatever you describe. You just use plain English.
This prompt-based approach is brilliant for quickly knocking out common app screens. The key is to be specific.
- A weak prompt: "Make a login screen."
- A strong prompt: "Create a clean sign-up screen with a field for email and password. Include buttons for 'Sign Up with Google' and 'Sign Up with Apple' below the main CTA."
That simple command generates a fully coded screen with every component you asked for. It's the fastest way to get foundational pieces like login flows, user profiles, or settings pages into your project.
Turning Your Napkin Sketches into Real Code
Are you more of a visual thinker? It’s often easier to grab a pen and sketch out an idea on paper or a whiteboard. The "image-to-app" feature was built for exactly this workflow, turning a rough drawing into functional code.
Just snap a photo of your hand-drawn wireframe and upload it. The AI gets to work, analyzing the visual structure and generating a mobile screen to match. It's smart enough to recognize common UI elements—buttons, input fields, images, text—and translates your sketch into real, editable components.
This is a game-changer for rapid prototyping. You can test a visual idea in minutes, get feedback, and make changes without investing tons of time into a polished design. It’s proof that you don't need to be a professional designer to create an app.
Mapping Out Your App on a Visual Canvas
Once you've got a few screens, you need to string them together into a user journey that actually makes sense. This is where a visual flow canvas comes in. It’s basically a digital whiteboard for mapping out your app's entire navigation.
You can drag and drop your screens, connect them with arrows representing user actions (like tapping a button), and get a bird's-eye view of how someone will move through your app. This high-level perspective is critical for spotting awkward dead-ends or confusing navigation before you get too deep in the weeds.
It helps you nail down the answers to essential questions:
- How does a user get from the home screen to their profile?
- What happens right after they finish onboarding?
- Is the path to my app's core feature direct and obvious?
You're essentially building the skeleton of your app's navigation, making sure every screen has a purpose and a logical connection to the others.
As you can see, a validated idea, backed by solid research, flows directly into a well-structured app map—the foundation for everything that follows.
Comparing AI Prototyping Methods
Deciding which method to use often comes down to what you're trying to build at that moment. Here’s a quick breakdown to help you pick the right tool for the job.
| Method | Best For | Example Use Case |
|---|---|---|
| Chat Prompts | Quickly creating standard screens and foundational UI elements. | "Generate a user profile screen with a profile picture, name, bio, and a grid of their posts." |
| Image-to-App | Translating visual ideas, sketches, or existing designs into code. | Uploading a photo of a whiteboard wireframe for a new dashboard layout. |
| Flow Canvas | Mapping out the entire user journey and app navigation. | Connecting the "Sign Up" screen to the "Onboarding" flow, then to the "Home" screen. |
Most of the time, you’ll find yourself mixing and matching them as you build. Start with prompts for the basics, sketch out more unique layouts, and use the canvas to tie it all together.
Fine-Tuning Your Design in Real-Time
The real magic of using AI isn't just the initial screen generation; it's how ridiculously easy it is to iterate. You are never stuck with the first version. You just continue the conversation with the AI to refine every little detail.
Want to change the color scheme? Just ask.
- "Change the primary button color to a vibrant orange and make the text white."
Need to tweak the layout? It’s just as simple.
- "Increase the spacing between the list items and make the font size for the titles larger."
This back-and-forth conversational editing lets you experiment with design choices instantly. You can try out different looks and perfect your UI without ever touching a line of code or fighting with a complex design tool. If you're curious how this approach is becoming more common, see how you can build a project with AI quickly and without code. This seamless feedback loop empowers you to be both the founder and the designer.
From AI Generation to Real Code
This is where everything changes. Unlike the restrictive, walled gardens of traditional "no-code" platforms, what you get after designing your screens with AI isn't just a project stuck in the cloud. It’s a tangible, professional asset: a complete, production-ready codebase.
When you export from a tool like RapidNative, you're not getting some proprietary, locked-down file. You receive a full React Native project, built with the same tools top developers use every day. We're talking Expo for a cleaner workflow, TypeScript for robust code, and NativeWind for consistent styling.
For non-technical founders, this is the single most important takeaway. You now own a genuine piece of software. Any React Native developer on the planet can pick it up, understand it, and build on it. There is absolutely zero platform lock-in.
Understanding Your New Codebase
As a solo builder, you can't afford to waste weeks on boilerplate setup, which is precisely what AI generation automates. You get a massive head start.
Curious about what’s actually inside that exported project? Let's peek under the hood. The code is organized just like a human developer would structure it, making it clean and easy to navigate.
- Components Folder: This is your box of LEGOs. All the reusable UI elements—buttons, cards, input fields—that the AI created based on your designs live here.
- Screens Folder: Each screen you designed (like
LoginScreen.tsxorHomeScreen.tsx) has its own dedicated file. No more hunting around for the right piece of code. - Navigation File: This is the roadmap for your app. It defines how all your screens connect and handles the logic for moving between them.
Even if you never write a line of code yourself, understanding this basic structure makes you a better project manager. When you eventually hire a developer, you can communicate with precision, making the handoff incredibly smooth.
Connecting to a Simple Backend
So far, your app's code handles the "front-end"—everything the user sees and touches. But to make it truly dynamic, you need a "back-end" to store and manage data like user profiles, posts, or product lists.
This part used to be intimidating, but it’s more accessible than ever. You don’t need to be a database guru to get a simple backend up and running.
Pro Tip for Founders: Look into "Backend-as-a-Service" (BaaS) platforms like Firebase or Supabase. They handle all the complex server management for you and offer simple tools to set up a database, manage user logins, and store files. Most have generous free tiers that are perfect for getting your MVP off the ground.
Let’s say you’re building a simple social feed app. Here’s a quick look at what connecting a backend actually involves:
- Set Up Your Database: In a service like Firebase Firestore, you’d create a "collection" called
posts. Inside, each "document" would represent a single post, containing fields liketext,author, andtimestamp. - Fetch the Data: In your
HomeScreen.tsxfile, you’d add a small snippet of code that connects to your Firebase project and "listens" for new documents in thatpostscollection. - Display the Data: Finally, you connect the data to your UI, telling your app to display the
textandauthorfrom each post in the list you already designed.
That's it. Now, when a new post is added to the database, your app updates automatically to show it. This is how you breathe life into your prototype with real, dynamic content. To dig deeper, you can learn more about how to streamline the app design-to-code process in our full guide.
By starting with AI-generated code, you skip the most tedious parts of app development and jump straight to adding real value. You're not just building a disposable prototype; you're laying the foundation for a scalable, future-proof application from day one.
Testing Your App with Real Users

You’ve built something that works on your machine. Now it’s time for the moment of truth: putting it in the hands of real people. This is where your assumptions get tested against reality, and honestly, it’s one of the most eye-opening parts of building an app. Getting this feedback before you launch is what will elevate your app from good to great.
The best part? You don't need a fancy QA lab or expensive user testing platforms to get this done. Modern tools have made it incredibly simple to share your work with a small, trusted group.
Sharing Your App for Early Feedback
If you've built your React Native project with Expo, getting it onto other people's phones is a breeze. The Expo Go app, which is free on both the App Store and Google Play, is your best friend here. It lets anyone you invite run a development build of your app just by scanning a QR code you send them.
This is perfect for getting quick, raw feedback from friends, family, or a few early adopters. It lets them use your app in their own environment—on their couch, on the bus—giving you the kind of authentic insights you’d never get just by testing it yourself.
The goal of early testing isn't to find every single bug. It's to validate that your core user journey is intuitive and that the app actually solves the problem you set out to fix.
Your User Testing Checklist
To get the most out of your testing sessions, you need a game plan. Just handing someone your phone and asking, "So, what do you think?" won't get you very far. You need to guide the process to get specific, actionable feedback. You can learn a lot by looking into things like designing effective playtest surveys to structure your questions.
Here’s a practical checklist to run a useful test:
- Set a Clear Goal: Don't let them wander aimlessly. Give them a specific task. For a fitness app, that might be: "Your goal is to find and start a 15-minute workout."
- Observe Silently: This is the hard part. Watch what they do and resist the urge to help. Every moment of hesitation or confused tap is a golden nugget of feedback.
- Ask Open-Ended Questions: Once they've finished (or given up), ask questions that can't be answered with a "yes" or "no." Try "What were you expecting to see when you tapped that button?" or "Talk me through what you were thinking on that last screen."
- Prioritize Feedback: You're going to get a flood of ideas. Your job is to filter. A suggestion for a brand-new feature can go on the back burner. But if someone can't figure out how to sign up? That's a five-alarm fire you need to put out immediately.
A Quick Guide to App Store Submission
Once you've ironed out the major kinks based on user feedback, you’re ready for the home stretch: publishing. The submission process for Apple and Google can feel a bit intimidating, but it’s completely manageable when you tackle it piece by piece.
Setting Up Your Developer Accounts
Before anything else, you’ll need to register as a developer on both platforms.
For the Apple App Store, you'll need an Apple Developer Program membership, which runs $99 per year. Be prepared for a thorough review process; Apple is known for its high standards, so make sure your app is polished and adheres to their guidelines.
For the Google Play Store, it’s a one-time registration fee of $25. Their review process is generally faster, but don’t mistake that for being lax—their guidelines are just as important to follow.
Preparing Your App Store Listing
Think of your app store listing as your digital storefront. It needs to grab attention and communicate value instantly. You’ll want to have these assets ready to go:
- Screenshots: Don’t just snap random pictures. Curate a set of high-quality images that tell a visual story of your app's best features.
- App Icon: This is your app's first impression. It needs to be simple, memorable, and look sharp at any size.
- Compelling Description: Clearly state what your app does, who it's for, and the problem it solves. Weave in some relevant keywords to help people find you.
Hitting that "publish" button and seeing your app get approved is a massive milestone. It’s the final step that turns your idea into a real product that anyone in the world can download.
Common Questions About Building an App Solo
Going it alone on an app project is exciting, but it's natural to have a few nagging questions. I hear the same ones all the time from solo founders, so let's tackle them head-on and clear the path for you to start building.
Do I Really Need to Know How to Code?
For the entire user interface and navigation? Nope. You can get surprisingly far without writing a single line of code. Modern tools like RapidNative let you generate all your front-end screens just by describing them in plain English, uploading sketches, or using a drag-and-drop canvas.
The result is a fully interactive prototype that looks and feels like a real app.
Of course, once you need to hook up complex business logic or connect to a custom backend, some coding will come into play. But here’s the game-changer: the tool hands you a clean, production-ready React Native codebase. This isn't just a mock-up; it's a massive head start that can save you thousands of dollars right out of the gate.
What's This Actually Going to Cost Me?
This is where things get really interesting. Traditional app development is famously expensive, often running anywhere from $50,000 to over $150,000. For a solo builder, that's usually a non-starter.
Using an AI-powered approach completely flips the script. Your main costs boil down to:
- A subscription to the AI builder itself.
- Any backend services you choose (many, like Firebase, have generous free tiers to get you started).
- The standard developer program fees: $99/year for Apple's App Store and a $25 one-time fee for Google Play.
This model makes it financially realistic to test your ideas. You're shifting the burden from a huge upfront capital investment to a much more manageable operational cost.
Key Insight: You're not just saving money; you're saving your most valuable resource—time. By automating the UI development, you can focus on user feedback and business strategy instead of boilerplate code.
What Are the Limitations? I Know There's a Catch.
Fair question. AI builders are incredible for generating the user interface, navigation flows, and all the front-end components. This is often the most tedious and time-consuming part of the process, and these tools put it on hyper-speed.
However, they don't magically create your backend. You’ll still be responsible for connecting the generated UI to a data source to handle things like user accounts, storing information, and other server-side logic. Also, if your app needs to tap into highly specialized device features, like obscure hardware sensors, you'll probably have to code that part by hand.
Think of these tools as an expert front-end developer that handles the "what it looks like" so you can focus on the "how it works."
Can I Build Any Kind of App This Way?
You can build the UI for an incredibly wide range of apps. Think social media platforms, e-commerce stores, fitness trackers, and productivity tools. The code you get is React Native, the same powerful framework used by giants like Shopify, Instagram, and Coinbase.
This approach really shines for apps that are driven by content and user interaction. If your idea is an extremely performance-heavy 3D game or a real-time video processing tool, you’d likely need a more specialized, native-code-from-scratch approach. For almost everything else, this is the fastest way to get a real product into users' hands.
Ready to stop planning and start building? With RapidNative, you can turn your app idea into a fully-coded, interactive prototype in minutes. Generate professional React Native code from simple text prompts and see your vision come to life today. Start building for free at RapidNative.com.
Ready to build your app?
Turn your idea into a production-ready React Native app in minutes.
Free tools to get you started
Free AI PRD Generator
Generate a professional product requirements document in seconds. Describe your product idea and get a complete, structured PRD instantly.
Try it freeFree AI App Name Generator
Generate unique, brandable app name ideas with AI. Get creative name suggestions with taglines, brand colors, and monogram previews.
Try it freeFree AI App Icon Generator
Generate beautiful, professional app icons with AI. Describe your app and get multiple icon variations in different styles, ready for App Store and Google Play.
Try it freeFrequently asked questions
What is RapidNative?
RapidNative is an AI-powered mobile app builder. Describe the app you want in plain English and RapidNative generates real, production-ready React Native screens you can preview, edit, and publish to the App Store or Google Play.
Can I export the code?
Yes. RapidNative generates clean React Native and Expo code that you can export at any time. No lock-in, no proprietary format. Hand it to your developers or keep building inside RapidNative.
Is RapidNative free to use?
Yes. You can build apps on the free plan with no credit card required. Paid plans unlock unlimited AI generations, code export, and direct publishing to the App Store and Google Play.
Do I need to know how to code?
No. Most users build apps by describing what they want in plain English. Developers can drop into the code whenever they want more control, but coding is optional.
How long does it take to build an app?
Most users have a working first screen in under a minute. A full MVP usually takes a few hours instead of the weeks or months traditional development requires.