How to Create an App with React Native, Faster Than Ever
Learn how to create app with react native quickly using AI to turn ideas into production-ready code.
By Rishav
7th Jan 2026
Last updated: 7th Jan 2026
We’ve all been there: staring at a blank editor, knowing the long road ahead from a static design to a working app. When you create an app with React Native, the process is rewarding, but that initial slog of manual coding can kill your momentum. What if you could skip most of that and generate production-ready UI from a simple prompt or a rough sketch in minutes?
That’s exactly what we’re going to do here.
Build Your App in Days, Not Weeks

React Native’s core promise has always been about efficiency—build for both iOS and Android with one codebase. But even with that advantage, the initial setup and UI boilerplate can feel like a bottleneck. For product managers, designers, and founders, this often means waiting weeks just to see the first version of an idea. Meticulously translating a Figma file into components is slow and, frankly, a poor use of expensive developer time.
Thankfully, modern AI tools are smashing that barrier. Instead of waiting for every line of JSX to be hand-coded, you can now automate the most tedious parts of UI development. This isn’t about generating messy, throwaway code. It’s about using smart automation to produce clean, production-ready React Native components that perfectly match your vision.
A More Practical Way to Build
This completely changes the development workflow. You move from being a manual director of a slow process to an active creator, guiding the AI to build the interface so your developers can focus on what really matters: the core business logic and unique user experience.
Here’s what this new process means for your team:
- Founders & PMs: Got an idea this morning? You can generate a clickable prototype by this afternoon. No more waiting weeks for a developer to build a screen just to test a user flow.
- Designers: Imagine seeing your Figma mockups or even a quick whiteboard sketch come to life as a real, interactive screen on a phone, almost instantly.
- Developers: Your team can forget the repetitive grind of scaffolding screens, wiring up navigation, and theming components. They can kickstart a project with a solid codebase and dive straight into the interesting, complex engineering problems.
This is a practical, hands-on path from a simple idea to a fully exportable React Native project. By using AI to do the heavy lifting, your team can dramatically accelerate its development cycle and get to market faster.
This guide will walk you through the entire process, from setting up your environment to generating screens and exporting the final code. We'll cover everything you need to know to get started. If you're curious about the tech behind this, you can get a deeper look at how an AI app builder for React Native actually works.
Let's build something.
Prepare Your AI-Powered Development Environment
Before we jump into generating screens with AI, we need to lay some groundwork. Getting the right tech stack is like ensuring your factory has the right machinery before you start production—it makes the whole process smoother and more efficient. A solid foundation is key to making sure the app we build is scalable, easy for developers to maintain, and uses modern standards right from the start.
To successfully create an app with React Native using an AI-first approach, we need a specific stack. This isn't just about picking shiny new tools; it's about choosing a combination that plays nicely with AI generation and sets your project up for long-term success.
Our go-to stack is a trio of powerful technologies:
- Expo: Think of Expo as a framework that handles the annoying parts of native development for your team, like build configurations and managing native modules. It lets them focus purely on writing your app.
- TypeScript: Adding static types to JavaScript with TypeScript is a game-changer for code quality. It helps developers catch errors before they happen and makes the project much easier to refactor as it grows.
- NativeWind: This tool brings the utility-first magic of Tailwind CSS to React Native. NativeWind lets you style components quickly and consistently, which is perfect for keeping AI-generated UIs on-brand.
Together, these three create a fantastic platform for AI-assisted development. Expo provides a managed workflow, TypeScript keeps the code reliable, and NativeWind handles the styling with precision.
Setting Up Your Expo and TypeScript Project
Getting this part done is straightforward. Your development team will create a new Expo project using their TypeScript template. This gives them a clean slate with all the initial configurations handled automatically.
They can spin up a new project with a single command in the terminal, which scaffolds the entire directory with all the starter files needed. As you start weaving AI into your workflow, it's also helpful to think about the bigger picture. Understanding strategies for seamless AI adoption in tech companies can make integrating new tools like this much more effective for your whole team.
For a detailed walkthrough of this initial step, your dev team can reference this guide on how to https://www.rapidnative.com/blogs/create-expo-app. It covers everything needed to get a perfect foundation in place.
Integrating NativeWind for Consistent Design
Once the Expo project is ready, the next move is to set up your design system with NativeWind. This is a critical step because it ensures the AI generates components that are visually consistent and stick to your brand's style guide right out of the gate.
Think of NativeWind as your app's style rulebook. By defining your colors, fonts, and spacing upfront, you're telling the AI exactly how every component should look and feel. This cuts out the guesswork and a ton of rework later on.
Setting up NativeWind involves a few quick configuration steps for a developer:
- Install the packages: They'll add
nativewindand its peer dependencies to the project. - Configure Tailwind CSS: They'll create a
tailwind.config.jsfile. This is where you'll define your app's theme—your custom color palette, font families, and spacing scale. - Update the Babel config: They'll add the NativeWind plugin to the
babel.config.jsfile to get the just-in-time compiler working.
With that configured, you can start using familiar Tailwind class names directly in your React Native components. You now have a powerful, themeable design system that the AI can use to generate on-brand, consistent UI across your entire app. Now that the environment is prepped, we're ready to connect it to an AI tool and really start building.
From a Simple Prompt to Your First Screens
Alright, with the environment set up, it's time for the fun part. We're moving from configuration to creation, and you're about to see just how fast you can create an app with React Native when AI does the heavy lifting. We'll build out the core screens for a simple project management app to see this in action.
The key to this process is the prompt. A great prompt is the difference between getting a generic, useless screen and a pixel-perfect component that's ready to integrate. The trick is to be descriptive without being vague. Just imagine you're giving clear, concise instructions to a junior developer. To really get the most out of this, it helps to have a good handle on understanding prompt engineering to steer the AI effectively.
Let's start with the front door of almost any app: the user sign-in screen.
Crafting a Prompt for a Login Screen
Instead of waiting for a developer to create a new file, your first move is simply to describe what you want in plain English. We're going to tell the AI exactly what to build, down to the UI elements, placeholder text, and basic layout.
Here’s a practical example to get us started:
"Create a user sign-in screen with a large app logo at the top. Below the logo, add an email input field with a placeholder 'Enter your email' and a password input field with a placeholder 'Password'. Include a 'Forgot Password?' link aligned to the right below the inputs. Finally, add a primary login button with the text 'Sign In' and a secondary button below it for new users that says 'Don't have an account? Sign Up'."
In just a few moments, the AI takes this description and generates a fully functional React Native screen. This isn't just a picture—it's real, interactive code with text inputs you can type in and buttons you can press, all styled with the NativeWind theme we configured earlier. That single prompt just saved your team 30-60 minutes of manual coding.
Turning a Napkin Sketch into a Functional Screen
Text prompts are great, but what if you've already sketched out an idea? So many great apps begin as a scribble on a whiteboard or a quick mockup in Figma. AI tools like RapidNative can take those visuals and translate them directly into code, closing the gap between design and development in an instant.
For our project management tool, the most critical screen is the Kanban board. Let's say we have a screenshot of a Kanban UI that we like.
We can just upload that image with a simple instruction:
- Input: A screenshot showing a Kanban board with columns for "To Do," "In Progress," and "Done."
- Prompt: "Generate a React Native screen based on this image. Make the columns scrollable horizontally and the task cards within each column scrollable vertically."
The AI gets to work analyzing the image, identifying the core components—the columns, cards, titles, and buttons—and then reconstructs them as React Native components. It figures out the layout, color scheme, and typography, generating the necessary JSX and NativeWind classes to match. The result is an interactive screen that looks just like your design, saving hours of painstaking work.
This image-to-code feature is a massive win for team collaboration. A product manager can sketch a user flow, and a developer can generate the initial screens in minutes. It allows the whole team to see and interact with a real build almost immediately.
Building Out the App’s Structure
Of course, an app is more than just a pile of screens; it needs a solid structure and navigation to tie everything together. With our login and Kanban screens ready, the next move is to build the main navigation. A tab bar is a classic choice for a tool like ours.
We can generate this with another simple prompt:
"Create a tab bar navigation with three tabs: 'Projects', 'Tasks', and 'Settings'. The 'Tasks' tab should be the default screen and show the Kanban board we just created. The 'Projects' tab should show a simple list of projects, and the 'Settings' tab should be a placeholder screen for user profile information."
The AI doesn't just create the visual tab bar. It actually scaffolds the entire navigation logic using a library like React Navigation. It generates the placeholder screens for 'Projects' and 'Settings' and wires everything up. This completely automates the boilerplate of setting up navigators and stacks, which is often a tedious and error-prone part of starting a project. Just like that, you have a navigable app skeleton.
If you're curious about what else is possible, you can find more examples of building an entire app from a single prompt and see how detailed instructions lead to amazing results on our blog post: https://www.rapidnative.com/blogs/prompt-to-app.
To help you write effective prompts as you create an app with React Native, I've put together a quick reference guide for some common UI patterns.
AI Prompt Strategies for Common UI Patterns
This table offers a practical guide to writing effective prompts for standard mobile app screens, helping you achieve better and more accurate results.
| UI Goal | Example Prompt | Key Elements to Include |
|---|---|---|
| User Profile | "A user profile screen with a circular avatar at the top, followed by the user's full name and email. Below this, include a list of options like 'Edit Profile', 'Notifications', and 'Logout'." | Component shapes (circular avatar), text content, layout (list of options), and interactive elements. |
| Dashboard | "A dashboard screen for a fitness app. Include a large card showing 'Today's Steps', two smaller stat cards for 'Active Calories' and 'Distance', and a bar chart showing activity for the past week." | Specific components (cards, charts), data placeholders, and a clear visual hierarchy (large vs. small cards). |
| Onboarding Flow | "An onboarding screen with a large illustration at the top, a bold heading 'Welcome to Our App!', and a short descriptive paragraph. Add a 'Next' button at the bottom." | Image placeholders, typography instructions (bold heading), text content, and primary calls-to-action. |
| Product List | "A product list screen for an e-commerce app. Display products in a two-column grid. Each product card should have an image, the product name, price, and an 'Add to Cart' button." | Layout structure (two-column grid), repeatable components (product card), and the specific elements within each component. |
By being specific and describing both the content and the layout, you give the AI everything it needs to generate high-quality, relevant code. This initial generation phase gives us a strong foundation, letting us move quickly into the next stage: refining and iterating on our new app.
Refine and Iterate on Your App with AI
Getting your initial screens generated is a fantastic starting point, but let's be honest—the first draft is never the final one. This is where the real power of an AI-assisted workflow comes into play. Instead of the typical, slow-moving feedback loop between designers, product managers, and developers, you can now make changes in real-time with simple, conversational prompts.
This completely changes the game for how you create an app with React Native. The focus shifts from mind-numbing boilerplate to making direct, meaningful refinements on the fly.
Think about the traditional cycle: a designer finds a tiny alignment issue in a mockup. That turns into a ticket, gets prioritized in the next sprint, and maybe gets fixed days later. With a conversational AI like RapidNative, that whole process is over in seconds.
This diagram really captures the simplicity of going from an idea to a working interface.
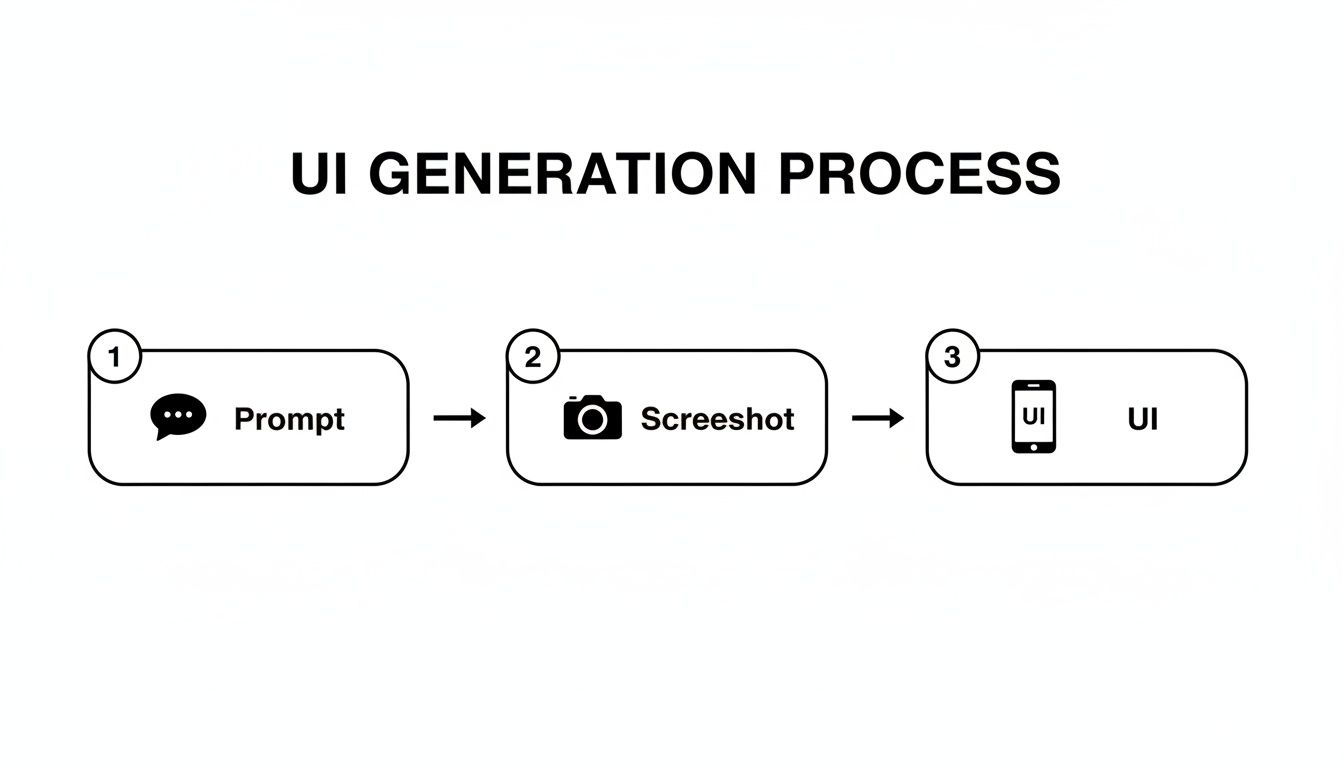
As you can see, you can jump straight from a text prompt or a screenshot to a functional UI, cutting out all the tedious manual steps. Now, let’s get into how we can polish that generated UI.
Making Changes with Simple Chat Commands
Once a screen is on your canvas, you can treat the AI like a pair programmer. By typing plain English commands into the chat, you can make precise adjustments to the UI without ever writing a line of code. It's an approach that opens up the development process to everyone on the team, regardless of their coding experience.
Let's go back to that Kanban board we generated earlier. Maybe the task cards look a little flat, or the main call-to-action button doesn't pop.
Here are a few examples of edits you could make just by talking to the AI:
- Styling: "Change the main button color to a vibrant blue."
- Typography: "Increase the font size of all headings to 24px."
- Layout: "Add a subtle shadow to the task cards on the project board to make them pop."
Each of these requests gets instantly translated into the right NativeWind utility classes and applied to your React Native components. You see the result immediately, which makes it incredibly easy to experiment until it looks just right.
This workflow breaks down the walls between roles. A product manager can test new button copy, a designer can fine-tune a color palette, and a founder can tweak a layout—all in real-time, without needing a developer to free up.
Empowering Non-Technical Team Members
This conversational model is a massive win for collaboration. Product managers and designers are no longer just handing off specs; they become active builders. They can test their ideas directly and see the impact right away.
The benefits here are huge:
- Faster Feedback: You can validate or kill an idea in minutes, not days. This dramatically shortens the time it takes to land on a great user experience.
- Less Miscommunication: By making changes themselves, non-technical folks eliminate the risk of their vision getting "lost in translation" during a handoff.
- More Ownership: When everyone on the team can contribute directly to the app, people become far more invested in the outcome.
Imagine a UX designer wants to test different icon styles for the main tab bar. Instead of creating a dozen Figma variants and waiting for a developer to implement them, they can just ask the AI:
- "Replace the current tab bar icons with outlined versions."
- "Okay, now let's try solid-filled icons."
- "Can you make the active icon a little bigger to make it more prominent?"
This kind of rapid-fire experimentation is incredibly powerful. It fosters a culture where you can quickly prototype and make decisions based on what you actually see and feel in the app. The underlying architecture of modern React Native makes this possible, ensuring that even these AI-driven changes result in high-quality, performant code that's ready for production.
Once you’ve used this iterative process to polish your UI and nail down the user flows, the next step is getting that code out of the tool and into your actual project.
Taking Your Code From Prototype to Production

Alright, after all the generating, tweaking, and iterating, we’ve arrived at the moment of truth: turning this AI-assisted creation into a real-world project. The whole point of this process isn't just to make a pretty mockup that lives inside a tool; it's to get clean, usable code that you can actually build on. This is where we bridge the gap between visual design and hands-on development.
When you create an app with React Native this way, you’re not trapped in a closed ecosystem. The entire workflow is built around handing off a clean, developer-friendly codebase. With a single click, you can export all the UI components, screens, and navigation files you’ve put together.
And what you get isn't a messy, confusing dump of code. It’s a well-organized project structure that any developer will find immediately familiar and easy to work with.
What to Expect in Your Exported Code
The exported project is built on the exact same modern stack we set up from the beginning: Expo, TypeScript, and NativeWind. That consistency is crucial because it means no surprises and no weird proprietary formats for your developers to learn.
Your exported folder comes with everything needed to get the app running:
- Components: Every UI element, from buttons to custom cards, is saved as a reusable, modular React component.
- Screens: Each screen you generated is its own file, making it simple to find and edit down the line.
- Navigation: Your tab bars and screen stacks are fully configured using the popular React Navigation library.
- Theme: Your
tailwind.config.jsfile is included, so all the styling rules and design tokens you defined are preserved perfectly.
The code output is deliberately clean and unopinionated. Think of it as the perfect starting point. It gives your development team a massive head start by handling all the UI boilerplate, letting them skip straight to the harder, more interesting problems.
Plugging in Your Backend and Business Logic
The generated UI is the front door, but every great app needs an engine running in the back. This is where your developers take the exported code and breathe life into it by connecting it to backend services, managing application state, and wiring up all the custom logic.
Let’s take that sign-in screen we built as an example. The exported code gives you the TextInput components and the "Sign In" button, all styled and ready. A developer’s very next step is to make that button actually do something—like call an authentication API.
Here’s what that looks like in practice:
- State Management: They'll likely bring in a state management library like Zustand or Redux Toolkit to handle user input (like email and password), loading states, and any error messages from the server.
- API Calls: Next, they'll use a library like Axios or TanStack Query to fire off a
POSTrequest to your login endpoint when the user taps the button. - Handling Responses: Finally, they'll write the logic to update the app's state based on the API response. If the login is successful, they’ll navigate the user to the main dashboard. If it fails, they’ll display an error message.
Because the components are just standard React Native building blocks, they can be extended with any logic you can dream up. The AI handles the "what it looks like," freeing up your developers to focus entirely on the "how it works." This clean separation of concerns is a hallmark of a well-architected app and makes the whole project easier to maintain and scale as you continue to create an app with React Native.
A Few Common Questions
Diving into a new way of building apps with React Native is going to bring up some questions. It's a big shift from the old-school, line-by-line approach, so let's tackle a few of the most common things people ask.
How Is This Different From a No-Code Builder?
This is a really important point. No-code tools are great for getting simple apps off the ground fast, but they have a ceiling. As soon as you need a truly custom feature or have to integrate a specific native API, you’re stuck inside their walled garden. You can’t just pop the hood and edit the source code.
An AI tool like RapidNative is built on a completely different philosophy. It’s not a no-code platform; it's a code accelerator. The end product isn't a locked-in project file—it's clean, human-readable React Native code that you own. You get the incredible speed of AI generation without giving up the power and flexibility of a real codebase.
The point isn't to replace developers. It's to take the tedious, repetitive UI work off their plate so they can focus on what really matters: building the complex business logic and unique features that make an app great.
Can My Team Actually Use This Code in a Production App?
Absolutely. The code isn't just a random assortment of components. It's built on a modern, professional-grade stack that serious teams are already using in the real world.
- Expo: Provides a managed workflow that takes the headache out of builds and deployments.
- TypeScript: Adds type safety, which makes the code much easier to maintain and scale as your app grows.
- NativeWind: Gives you a powerful, themeable design system from the very beginning.
What you get is a set of modular, reusable components that follow standard React best practices. It's like having a senior developer set up the project foundation for you, so your team can hit the ground running.
What Are the Real-World Limitations?
It's good to be realistic about where AI shines and where it still needs a human hand. While it's phenomenal at generating UI, setting up navigation, and scaffolding components, it’s not going to write your backend logic for you.
Here’s where a developer still needs to step in:
- Backend Integration: You'll still need to connect the UI to your APIs, handle authentication, and manage your databases.
- Complex State Management: For anything beyond basic data passing between screens, you'll want to implement a robust state management solution.
- Native Module Integration: If your app requires deep access to device hardware—think custom Bluetooth protocols or ARKit—that's where you'll need to write or integrate native code.
Think of it this way: the AI handles the first 95% of the UI grind. This frees up your developers to focus their expertise on that critical final 5% that involves complex logic and a polished user experience.
Ready to stop writing boilerplate and start building your next mobile app at lightning speed? RapidNative transforms your designs and ideas into production-ready React Native code in minutes. Generate your first screen for free and see how it works.
Ready to build your app?
Turn your idea into a production-ready React Native app in minutes.
Free tools to get you started
Free AI PRD Generator
Generate a professional product requirements document in seconds. Describe your product idea and get a complete, structured PRD instantly.
Try it freeFree AI App Name Generator
Generate unique, brandable app name ideas with AI. Get creative name suggestions with taglines, brand colors, and monogram previews.
Try it freeFree AI App Icon Generator
Generate beautiful, professional app icons with AI. Describe your app and get multiple icon variations in different styles, ready for App Store and Google Play.
Try it freeFrequently asked questions
What is RapidNative?
RapidNative is an AI-powered mobile app builder. Describe the app you want in plain English and RapidNative generates real, production-ready React Native screens you can preview, edit, and publish to the App Store or Google Play.
Can I export the code?
Yes. RapidNative generates clean React Native and Expo code that you can export at any time. No lock-in, no proprietary format. Hand it to your developers or keep building inside RapidNative.
Is RapidNative free to use?
Yes. You can build apps on the free plan with no credit card required. Paid plans unlock unlimited AI generations, code export, and direct publishing to the App Store and Google Play.
Do I need to know how to code?
No. Most users build apps by describing what they want in plain English. Developers can drop into the code whenever they want more control, but coding is optional.
How long does it take to build an app?
Most users have a working first screen in under a minute. A full MVP usually takes a few hours instead of the weeks or months traditional development requires.