How to Create an Expo App: The Founder's Guide to Building Faster
Learn how to create expo app with AI help. A practical guide covering setup, NativeWind UI theming, and deployment steps.
By Damini
31st Dec 2025
Last updated: 31st Dec 2025
If you're trying to get a new mobile app off the ground, the last thing you want is to get stuck in the weeds of complex native code. The good news? Tools like Expo are designed to handle the toughest parts of iOS and Android development for you. With a single command, you can create a new project and see it running on your own phone in minutes, not days.
Why Use Expo to Build Your App?

For founders, product managers, and designers, speed is everything. You need to test ideas, get real user feedback, and pivot fast without getting lost in technical rabbit holes. This is where Expo shines. It completely removes the need to install and configure heavy tools like Xcode or Android Studio, letting you focus on what actually matters: your product.
This "managed workflow" has a direct impact on your business. When you slash the initial setup time, you can jump straight into building features and proving your concept. In practical terms, this means:
- Faster Prototyping: Take a napkin sketch and turn it into a testable prototype on a real phone in a fraction of the time. This lets you validate ideas with users before committing to expensive development cycles.
- Reduced Costs: Less time spent on configuration and boilerplate code means lower development costs—a lifesaver for startups and bootstrapped teams.
- Easier Collaboration: When it’s easy to get the app running, everyone can participate. A product manager or designer can test the latest build simply by scanning a QR code, making feedback loops tighter and more effective.
How Does the "Managed Workflow" Help?
At its core, Expo is a set of tools and services built on top of React Native. Think of it as a helpful assistant that handles common app features—like accessing the camera, using location services, or sending push notifications—with reliable, pre-built libraries. This approach covers what most apps need right out of the box.
This simplicity has fueled massive adoption. The npx create-expo-app command can cut your time-to-market by up to 50% compared to a standard React Native setup. If you want to understand where this fits into the broader mobile landscape, our guide on the differences between native and hybrid app development breaks it down.
Key Takeaway: Expo’s real value is shortening the distance between your idea and a functional product. It empowers you to focus on the user experience instead of getting bogged down in platform-specific complexities.
Tools like RapidNative take this a step further. By generating clean, production-ready UI code specifically for Expo, they allow non-technical founders to describe an interface in plain English and see it materialize. You can test the generated screens almost instantly on any device just by scanning a QR code with the Expo Go app, creating an incredibly smooth path from concept to code.
Setting Up Your Development Environment
A solid setup is the difference between a smooth project and hours of frustration. Before you create your first Expo app, taking a few minutes to get your machine ready will pay off tenfold. This isn’t just for developers; it’s about creating a stable foundation that keeps things consistent for anyone on the team.
First, you'll need Node.js, the JavaScript runtime that powers everything. While you can download it from the Node.js website, it's better to use a version manager like nvm. This lets you switch between different Node.js versions easily, which is crucial if you work on multiple projects.
You'll also need Git for version control. If you're not using it, start now. Git tracks every change, lets you collaborate without overwriting work, and provides a safety net to roll back mistakes. It's non-negotiable for any serious project.
Your Essential Toolkit
Next, you need a code editor. In the React Native world, Visual Studio Code (VS Code) is the top choice. It’s free, powerful, and has a massive library of extensions.
Speaking of which, have your developer install these two immediately:
- ESLint: This acts like a spell-checker for code, catching potential bugs and style issues as you type. It helps maintain code quality from day one.
- Prettier: This automatically formats code to a consistent standard every time you save. It ends arguments about code style and is a must-have for team projects.
Why This Matters: A proper environment with tools like ESLint and Prettier isn't a "nice to have"—it's a professional standard. It enforces quality and consistency, making your app easier to maintain and scale later on.
Here's a quick checklist of what you'll need.
| Tool | Purpose | How to Get It |
|---|---|---|
| Node.js | The JavaScript runtime environment that executes your code. | LTS version via nvm |
| Git | Industry-standard version control for tracking code changes. | Official Git download page |
| Visual Studio Code (VS Code) | A powerful and highly extensible code editor. | Official VS Code website |
| ESLint & Prettier Extensions | For automatically linting and formatting your code inside VS Code. | VS Code Marketplace |
| Expo Go | A mobile app for previewing your project on a physical device. | Apple App Store or Google Play Store |
Finally, grab your smartphone and download the Expo Go app from the App Store or Google Play Store. This app is your direct link to seeing your project come to life on a real device. You just scan a QR code from your computer, and your app is running on your phone. It's the fastest way to get real-world feedback as you build.
Creating Your First Expo + TypeScript Project
With your environment ready, it's time to create your app. This is where your idea starts becoming a real, tangible product.
We're going to start a new Expo project with a single command. We’ll use TypeScript from the beginning—a decision that helps prevent bugs and makes the code more reliable as your app grows. It’s a professional standard for any serious project.
Open your terminal and run this command:
npx create-expo-app my-first-app -t with-typescript
This tells the Expo CLI to create a new app called my-first-app using the official TypeScript template.
Once it's done, navigate into your new project folder (cd my-first-app) and open it in VS Code. You'll see a clean folder structure, ready for you to start building.
Understanding the Project Structure
At first glance, the files might seem a bit overwhelming, but each has a specific job. Here's a quick look at the most important ones:
- The
app/directory: This is where you'll build your app's screens. Expo Router uses a file-based system, which is incredibly intuitive. Creating a file likeapp/profile.tsxautomatically creates a/profilescreen in your app. No complex configuration needed. package.json: This file lists all the libraries your app depends on and includes helpful commands, like how to start your development server.app.json: This is your app's main configuration file. You'll use it to set your app's name, icon, splash screen, and version number.
For a deeper dive into what each piece does, our guide on your first hour with Expo is a fantastic resource.
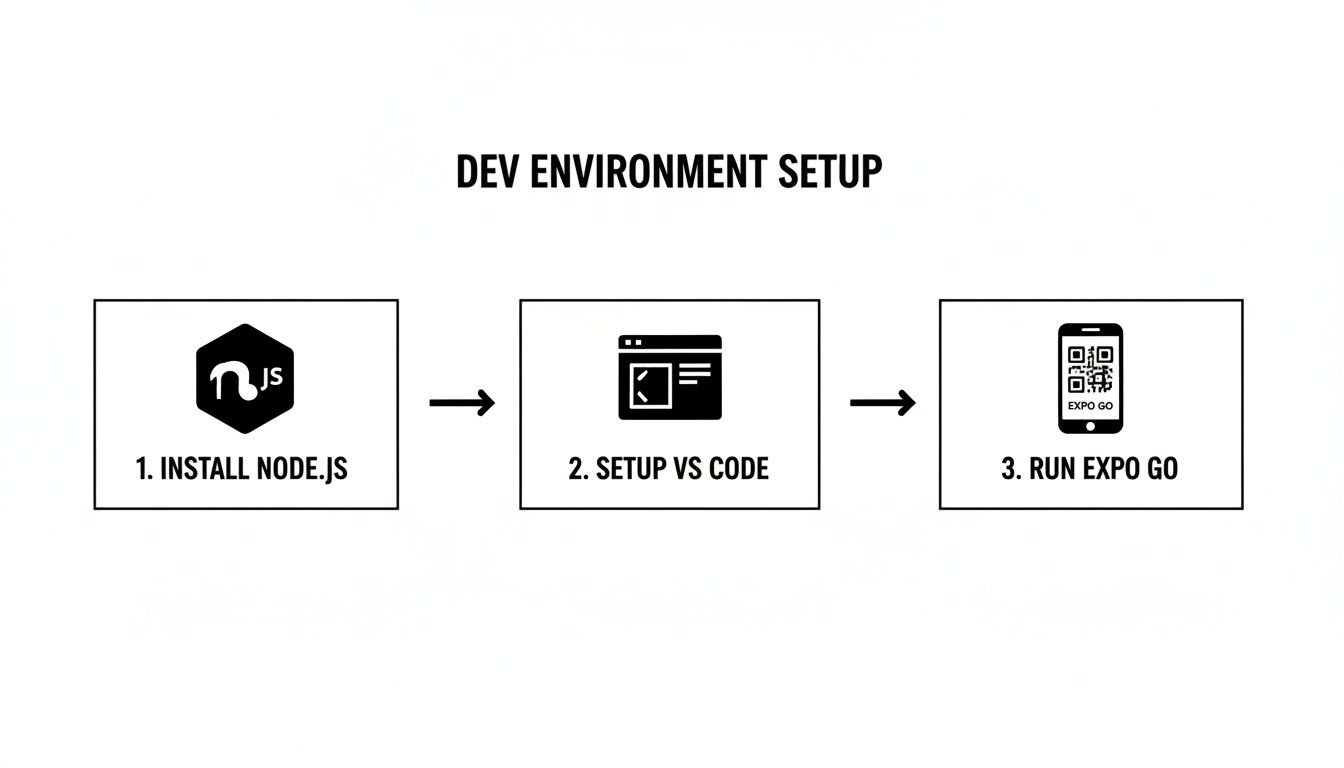
This flow—from installing Node.js to coding in VS Code to seeing your work live on your phone via Expo Go—is what makes the development experience so smooth.
Running Your App for the First Time
Now for the exciting part. In your terminal, run:
npx expo start
This command starts the Metro bundler, which prepares your code to be sent to your phone. After a moment, a QR code will appear in your terminal.
Pro Tip: Make sure your computer and phone are on the same Wi-Fi network. This is a common hiccup. The Expo Go app needs to be on the same local network to communicate with your computer.
Open the Expo Go app on your phone and scan the QR code. In seconds, you’ll see the starter app running live on your device. From now on, every time you save a change in your code, the app will instantly refresh. This tight feedback loop is what makes building with Expo so fast and enjoyable.
Building a Design System with NativeWind
Once your Expo project is running, the next challenge is making it look good. A consistent design system is critical for a great user experience, but building one from scratch is a huge time sink. This is where a tool called NativeWind comes in handy.

NativeWind brings the power of Tailwind CSS to React Native. Instead of writing complex style rules, you use simple class names directly in your code. It's a much faster and more intuitive way to style your app.
This is the exact same stack that AI tools like RapidNative use. It’s what allows them to generate clean, themeable code that matches your brand guidelines from a simple text prompt.
Adding NativeWind to Your Project
Getting NativeWind set up in your Expo project is straightforward. Open your terminal and run this command:
npx expo install nativewind
Next, install its companion, tailwindcss:
npm install --save-dev tailwindcss
Finally, create a configuration file for Tailwind with this command:
npx tailwindcss init
This generates a tailwind.config.js file in your project, which will become the central hub for your app's visual identity—colors, fonts, spacing, and more.
Configuring Your Brand's Theme
Open the new tailwind.config.js file. The first step is to tell NativeWind where to find your code. Update the content array to point to your app's files:
content: ["./app/**/*.{js,jsx,ts,tsx}"]
Now, you can define your brand's specific design tokens inside the theme.extend object. For example, you can set up a custom color palette:
// tailwind.config.js
module.exports = {
  content: ["./app/**/*.{js,jsx,ts,tsx}"],
  theme: {
    extend: {
      colors: {
        'primary': '#6366F1', // Your brand's primary color
        'secondary': '#10B981', // Your brand's secondary color
        'background': '#F9FAFB', // Your app's background color
      },
    },
  },
  plugins: [],
}
This file is now the single source of truth for your app's design. This approach is a huge advantage for speed and consistency. It's why teams using Expo often see up to a 40% faster time to market, and why it powers over 91 apps in the top-grossing charts. You can get more insights on Expo's growth from Evan Bacon's blog.
Why This Is a Game-Changer: By defining
primaryandsecondarycolors here, you can update your app's entire look by changing a single line of code. This makes rebranding or adding a dark mode incredibly simple and guarantees consistency everywhere.
With this setup, you can style components with your brand colors instantly, like <Text className="text-primary bg-secondary">. This workflow will radically speed up your UI development.
Accelerating UI Development with AI
You've set up a solid design system, which is a huge step forward. Now, let's shrink the UI development workflow from hours down to minutes. AI-powered tools act as a massive force multiplier for anyone building a mobile app, whether you're a seasoned developer or a founder with an idea.
Instead of building every screen by hand, you can use a tool like RapidNative to generate production-ready UI from a simple text prompt. This fundamentally changes the development cycle, allowing you to validate ideas almost as fast as you can think of them.
From Prompt to Production-Ready Code
Let's take a real-world example. Say you need a standard user authentication flow. A simple prompt like, "Create a login screen with email and password fields, SSO buttons, and a sign-up link," is all it takes. The AI generates clean, modular React Native code using the exact tech stack we've set up: TypeScript and NativeWind.
This isn't just a static image. You get a complete set of files—components, screens, and navigation—that are ready to be dropped right into your Expo project.
Here’s a look at the RapidNative interface turning a simple text prompt into a fully formed UI.
The real magic is the quality of the output. The code is organized, extensible, and follows best practices, making it a fantastic starting point. For non-technical founders, this offers a direct path from vision to a tangible product you can actually test. If you're curious about the mechanics, our guide on how an AI React Native generator works explains the process.
Integrating Generated Code into Your Expo App
Once you've downloaded the files, getting them into your app is simple. Just copy the new screens into your project's app/ directory and any new components into a components/ folder. Because the code is built on NativeWind, it automatically picks up the custom theme you defined in tailwind.config.js. Every new screen is perfectly on-brand right out of the box.
This fits perfectly with Expo's philosophy of rapid iteration. Developers using Expo report 3x faster iteration cycles thanks to features like Over-the-Air (OTA) updates. By adding AI to generate the initial UI, you're adding another accelerator, turning simple prompts into real, extensible code that's ready for testing on your device with Expo Go.
Expert Insight: AI-generated UI isn't about replacing developers. It's about empowering your team to skip the tedious boilerplate of screen creation. This frees up your engineers to focus on the complex logic and unique features that will make your product stand out.
As AI becomes a standard part of development, it pays to think strategically about managing software development in the AI era. By bringing these tools into your process, you can build an Expo app faster and more efficiently than ever before.
Got Questions About Building with Expo?
As you start building with Expo, you'll likely have a few questions. Here are answers to some of the most common ones.
Can I use custom native code with Expo?
Yes, absolutely. This is a common myth. While Expo's "managed workflow" is great for getting started quickly, you are never locked out of native code. When you need a custom native module, you can run the command npx expo prebuild. This generates the standard ios and android project folders, giving you the same level of control as a bare React Native project. It's the best of both worlds: Expo's development speed with the option to go fully native when needed.
What’s the difference between Expo Go and a real app build?
They are two different tools for different stages of your project.
- Expo Go: This is your development sandbox. It's an app you download from the App Store or Google Play that lets you preview your project by scanning a QR code. It's incredibly fast for prototyping and seeing your changes live without waiting for a full build to compile.
- Standalone Build: This is your finished product—the actual
.ipaor.apkfile you submit to the app stores. You create these using Expo Application Services (EAS), which bundles your code, assets, and the React Native framework into a self-contained app.
In short, you'll spend your development time in Expo Go and use EAS to create the builds for production.
Pro Tip: Don't mix these up. Expo Go is for quick iteration and testing on a real device. An EAS build is for shipping to the public. Knowing when to use which is fundamental to a smooth Expo workflow.
How do I make my app look good on different screen sizes?
This is where the combination of React Native and NativeWind really shines. React Native uses a layout system called Flexbox, which is designed to create flexible, responsive UIs. NativeWind builds on this with responsive utility classes. You can apply styles that only activate at certain screen sizes (for example, md:flex-row switches to a row layout on medium-sized screens). This lets you design layouts that look great on a small phone and gracefully adapt to a large tablet.
Is Expo ready for a large, production-level app?
Without a doubt. Expo powers apps for major companies like Shopify, Brex, and Cameo. It's a production-grade ecosystem built to handle applications with millions of users. Services like EAS provide a solid cloud infrastructure for building your app, submitting it to stores, and pushing updates. One of its most powerful features is Over-The-Air (OTA) updates, which let you push bug fixes and small feature updates directly to users, bypassing the slow app store review process. For a large app, that ability to react quickly is invaluable.
Ready to skip the boilerplate and see your idea come to life in minutes? With RapidNative, you can generate clean, production-ready React Native UI from a simple text prompt. Start building faster today.
Ready to build your app?
Turn your idea into a production-ready React Native app in minutes.
Free tools to get you started
Free AI PRD Generator
Generate a professional product requirements document in seconds. Describe your product idea and get a complete, structured PRD instantly.
Try it freeFree AI App Name Generator
Generate unique, brandable app name ideas with AI. Get creative name suggestions with taglines, brand colors, and monogram previews.
Try it freeFree AI App Icon Generator
Generate beautiful, professional app icons with AI. Describe your app and get multiple icon variations in different styles, ready for App Store and Google Play.
Try it freeFrequently asked questions
What is RapidNative?
RapidNative is an AI-powered mobile app builder. Describe the app you want in plain English and RapidNative generates real, production-ready React Native screens you can preview, edit, and publish to the App Store or Google Play.
Can I export the code?
Yes. RapidNative generates clean React Native and Expo code that you can export at any time. No lock-in, no proprietary format. Hand it to your developers or keep building inside RapidNative.
Is RapidNative free to use?
Yes. You can build apps on the free plan with no credit card required. Paid plans unlock unlimited AI generations, code export, and direct publishing to the App Store and Google Play.
Do I need to know how to code?
No. Most users build apps by describing what they want in plain English. Developers can drop into the code whenever they want more control, but coding is optional.
How long does it take to build an app?
Most users have a working first screen in under a minute. A full MVP usually takes a few hours instead of the weeks or months traditional development requires.