From Figma to Working App: A Practical Guide to Turning Design Into Code
Discover practical steps to design into code, turning Figma concepts into production-ready apps with smart AI tools and proven workflows.
By Riya
5th Jan 2026
Last updated: 5th Jan 2026

Turning a beautiful design into functional code used to be a tedious, manual process. A designer would perfect a layout in Figma, and a developer would then spend days meticulously translating every pixel into a working app screen. Now, AI-powered tools are completely changing this workflow. For anyone building a mobile product—founders, PMs, designers, or developers—this shift is a game-changer. It means you can go from an idea to an interactive React Native screen in minutes, not weeks.
This guide is for product teams who need to build and test mobile apps faster. We'll walk through a practical, modern approach that closes the gap between design and development, so you can get your vision into users' hands without the usual friction.
Closing the Gap Between Design and Development
The handoff from a designer to a developer is a classic friction point. It’s where details get lost, intentions are misinterpreted, and timelines stretch. A pixel-perfect Figma file doesn't magically become a smooth, interactive screen. It requires hours of manual coding to replicate every component, interaction, and style.
This bottleneck slows down innovation, especially for startups and product teams who need to iterate quickly. Founders and product managers often feel disconnected from the implementation phase, waiting days or even weeks to see their vision come to life. That kind of delay makes rapid iteration nearly impossible.
A Modern, AI-Powered Approach
Fortunately, that old way of working is becoming obsolete. The "design into code" movement, powered by mature frameworks like React Native, is gaining serious momentum. AI tools can now analyze visual inputs—like a screenshot of a Figma design or even a rough sketch—and generate clean, themeable UI code, saving teams a huge amount of time.
It’s no surprise that React Native holds a massive 32% share among cross-platform frameworks and powers over 40% of hybrid apps globally. Millions of developers rely on it every day.
This modern workflow simplifies the process dramatically.
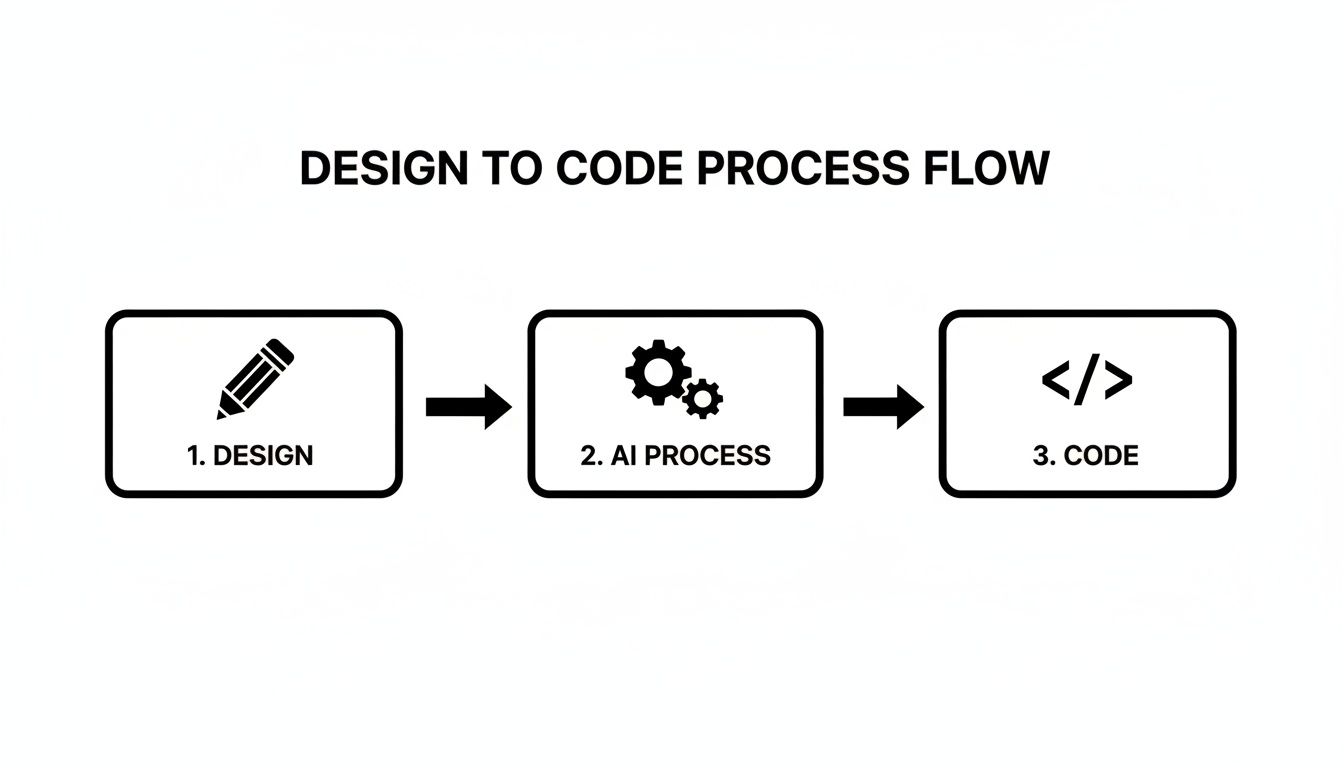
As the flowchart shows, there's a direct path from a simple design concept to functional code. AI acts as the bridge, automating the tedious steps in between. For teams looking to push automation further, learning how to use Cursor with Figma, GitHub, and MCP integration can offer a powerful setup for more complex projects.
The goal here isn't to create a disposable prototype. It's to generate a high-quality, extensible foundation of real code that your developers can immediately build upon. This accelerates the entire product lifecycle from day one.
So, how does this work in practice? Let's walk through the process, from a rough sketch to an interactive React Native app ready for your development team.
Turning Your First Idea Into an Interactive Screen
This is where a concept—whether it's scribbled on a napkin or mocked up in Figma—starts to feel like a real app. Your starting point can be a quick whiteboard drawing, a polished design, or even a simple sentence describing what you need. The goal is to bridge the gap between idea and interactive screen as fast as possible.
With users spending a staggering 4.2 trillion hours on mobile apps in 2024, speed to market is a massive competitive edge. This is why React Native remains a top choice, with 35% of developers worldwide using it. Tools like RapidNative accelerate this process, generating entire UI scaffolds from a prompt or image, built on a clean foundation of Expo and TypeScript. You can dig deeper into React Native's market position on esparkinfo.com.
From a Napkin Sketch to a Working Screen
Let's start with the classic "idea on a napkin." You're at a coffee shop and suddenly picture the perfect product screen for your e-commerce app. You sketch it out: a large image, a title, a price, a short description, and a bold "Add to Cart" button.
Traditionally, that sketch would go to a designer for a mockup, then to a developer for coding. With an AI-first approach, you just snap a photo of the napkin and upload it. The AI analyzes the visual hierarchy—it recognizes the big box as an image, the heavy text as a heading, and the rectangle at the bottom as a button.
In moments, it generates a real React Native screen that mirrors your drawing. It's not a static image; it's actual, editable code made from standard components you can work with immediately.

This process eliminates the manual overhead, letting you validate an idea almost instantly.
Working with Polished Figma Designs
What if you're starting with a polished design from Figma? Your designer has already perfected the layout, color palette, and typography. In the past, this meant a developer would spend hours redlining the design, measuring pixels, and translating design tokens into code.
With a tool like RapidNative, you can often just export an image of the Figma frame and upload it. The AI analyzes the colors, fonts, spacing, and component structure, generating a React Native screen that is a surprisingly faithful match. It preserves the design's integrity while automating the tedious grunt work.
My Two Cents: The real test isn't just if it looks right. The best tools produce clean, modular code. You want something that uses modern practices like TypeScript and Expo, so the output is something a developer can actually build on, not just a black box they have to throw away.
Crafting the Perfect Text Prompt
Sometimes, the most direct path is simply to describe what you want. This is a game-changer for anyone—especially non-technical founders or PMs—who needs to quickly scaffold a common UI pattern without waiting for a designer.
The trick is to be specific. A good prompt acts like a clear set of instructions for the AI.
Example Prompt for an E-commerce Product Screen:
- Layout: "Create a product details screen with a large, full-width image at the top."
- Text Content: "Below the image, add a product title 'Classic Leather Watch' in a large, bold font. Under that, show the price '$249.99' in a slightly smaller font."
- Body: "Follow that with a short paragraph of lorem ipsum for the product description."
- Call to Action: "Finally, add a primary 'Add to Cart' button at the bottom. Make it a solid color and have it stretch across the screen with a bit of margin."
This level of detail gives the AI a solid blueprint, leading to a much better result. We actually walk through this process in our guide to building a simple mobile application.
Whether you start with a sketch, a Figma file, or a text prompt, the goal is the same: slash the time it takes to get from vision to a working, interactive screen you can build on.
Refining Your UI With Conversational AI
Generating the first version of your screen is a huge step, but it's rarely the final one. The real magic of an AI-powered workflow kicks in during the next phase: rapid, conversational iteration. This is where the old barriers between an idea and a working component crumble.
Forget creating a new Figma file or writing a detailed ticket for a minor tweak. Now, you can just talk to your UI. This simple shift turns the tedious process of pixel-pushing into a live, interactive creative session. It’s less like coding and more like a conversation.
This is a game-changer for non-technical team members. Founders, PMs, and designers can give direct feedback and see their ideas come to life instantly, without needing to know a single line of code. This immediacy drastically speeds up the development cycle.
Real-World Scenarios for Instant UI Edits
Let's get practical. Think back to that e-commerce product screen we generated. It's a solid start, but it needs some polish. Here’s how you can use simple, natural language to refine it.
Scenario 1: Adjusting the Primary Call-to-Action
The "Add to Cart" button works, but the color is slightly off-brand after a marketing refresh.
- Your Prompt: "Change the primary button color to a vibrant indigo, like #5A67D8. Also, increase its vertical padding to make it feel more substantial."
Just like that, the AI modifies the stylesheet, recompiles the view, and you’re looking at the updated screen. No developer needed. No waiting for the next sprint. You just said what you wanted, and it happened.
Scenario 2: Adding a New UI Element
You realize the screen is missing a crucial piece of social proof: customer ratings.
- Your Prompt: "Add a star rating component directly below the product title. It should show 4.5 out of 5 stars."
Seconds later, a new component appears. The AI generates the actual React Native code for a star rating component, places it correctly in the component tree, and updates the UI.
The biggest win here is the massive reduction in friction. What used to be a whole process—briefing a designer, waiting for a mockup, and then handing it off to a dev—is now a single, immediate command.
This fluid interaction gives teams the freedom to experiment. Don't like that new button color? Ask for another one. Curious how the layout looks with the image on the right? Just describe it. This back-and-forth is how you turn a good design into an exceptional user experience.
Leveraging Theming for Consistency
Making one-off changes is great, but maintaining design consistency across an entire app is crucial. This is where a solid theming system, like the one built into NativeWind, is your best friend. When your AI tool can tap into your theme, you can make global style changes just as easily as local ones.
Let's say the branding team decides to update the company's primary color.
- Your Prompt: "Update the
primarycolor in the theme to a deep forest green, #22543D. Apply this to all primary buttons and active indicators."
A single command, and the change ripples through your entire application. Every button, every active state, every component tied to that primary theme color updates automatically. You've just saved hours of mind-numbing find-and-replace work. Of course, getting the most out of these AI interactions is a skill, and we have a helpful guide on prompt engineering tips that you can read here.
Adding Basic Interactivity on the Fly
This conversational approach isn't just for visuals. You can also wire up basic interactions to make your prototype feel more real during reviews.
For instance, you want to give users immediate feedback when they tap the "Add to Cart" button.
- Your Prompt: "When the 'Add to Cart' button is tapped, show a simple alert that says 'Item added!'"
The AI will add an onPress handler to the button component with the exact logic you asked for. It’s a small thing, but it transforms a static screen into an interactive prototype, helping stakeholders get a better feel for the user flow long before production code is written.
Building an App That Can Actually Scale
Getting a screen built in minutes is great, but the critical question is, "Can I actually build a real product with this?" A pretty UI is useless if the underlying code is a tangled mess. This is where the value of a good design into code process shows up—it's not about disposable prototypes, but about generating a solid, production-ready foundation.
A tool like RapidNative doesn't just spit out isolated components. It scaffolds an entire application structure, including navigation and styling, because that’s what a real-world project demands. This architectural foresight is what separates a neat trick from a genuine development accelerator.

From Screens to a Navigable App Flow
An app is a user journey, not just a collection of static screens. When you generate a handful of UIs, the next problem is connecting them. Modern AI tools anticipate this and set up common navigation patterns for you from the start.
This usually means you get pre-configured:
- Stack Navigators: For linear flows where one screen pushes over another, like tapping a product to see its details.
- Tab Navigators: The familiar bar at the bottom for major sections like Home, Search, and Profile.
By generating the boilerplate for a library like React Navigation, the tool saves your team from tedious, error-prone setup. You get a working skeleton of your app’s flow immediately, letting you focus on what's inside each screen instead of wrestling with navigation logic.
The Power of a Centralized Theming System
Design consistency is a constant battle. Without a proper system, changing a brand color means manually updating hex codes across dozens of files. This is why a tool like NativeWind is so crucial for any scalable front-end architecture. It brings the utility-first approach of Tailwind CSS to React Native, letting you define your entire design system—colors, fonts, spacing—in one central theme file.
Key Takeaway: A theming system creates a single source of truth for your app's visual identity. When you tell the AI to "use the primary color," it knows exactly where to look, ensuring every component feels like it belongs.
Imagine the marketing team decides to refresh the brand palette. Instead of a multi-day coding slog, it becomes a simple chat command: "Update the primary theme color to #4A90E2." The change is made once, and every component in the app updates instantly. That’s how you build an app that can evolve.
This approach is a perfect fit for fast-moving startups. The design-to-code bottleneck has always been a major pain point. Businesses already report up to 45% faster development cycles with React Native, and with costs 30-60% lower than native builds, it's a no-brainer for founders testing an MVP. By generating code with Expo, TypeScript, and NativeWind, AI-driven tools close that final gap. If you want to dive into the numbers, you can explore detailed reports on Intel Market Research.
Building with Modular and Reusable Components
Scalable code is modular code. A well-architected system won't generate one massive, monolithic file for an entire screen. Instead, it breaks the UI down into smaller, reusable pieces—a product card, a button, an input field should each be their own self-contained unit.
This component-first thinking pays dividends:
- Maintainability: Fix a bug in one component, and you’ve fixed it everywhere.
- Reusability: That button you styled for the login screen can be dropped right into the checkout page.
- Testability: Writing automated tests for small, isolated components is far easier than for a giant, complex screen.
By generating code that follows these best practices, AI tools deliver a foundation that is not just fast to create, but also clean, organized, and ready for a team to build on for the long haul.
Getting Your Code into Production
You've iterated with the AI, tweaked your design, and now have a screen that looks just right. The next step is getting this code out of the design tool and into your team’s development environment. This is where a design-to-code workflow proves its worth. We're not creating a pretty picture; we're generating real boilerplate that gives your project a massive head start.
The handoff from a visual tool to a live codebase is notoriously difficult. But when the output is clean, production-ready React Native source code, the process becomes surprisingly smooth. Instead of giving developers a technical puzzle, you’re giving them a solid foundation.
This is the fundamental difference between a true development accelerator and a typical no-code platform. You get the flexibility of real code without being trapped in a proprietary system. Your team can take the generated UI and immediately start plugging in the business logic that makes your app work.
From Export to Your IDE
First, you need to export the source code. Tools like RapidNative package everything into a standard project structure that any React Native developer will instantly recognize. You get a clean directory with everything needed to run the app locally.
Here’s what you can expect inside that exported folder:
screens/: Your generated UI components, neatly organized by screen.components/: Smaller, reusable UI bits like custom buttons or info cards.navigation/: The pre-configured stack and tab navigators for your app's flow.theme/: Yourtailwind.config.jsfile, which defines your NativeWind design tokens.package.json: A list of all project dependencies, like React Native and Expo.
Once you download the project, the next steps are second nature for any developer. They just need to open a terminal, cd into the project folder, and run a single command.
The point is to make this ridiculously simple. A developer should be able to clone the repo, install the dependencies, and see a live, interactive UI on their simulator in under five minutes.
Connecting the Dots: Where Your Dev Team Takes Over
With the UI running locally, your development team can step in to breathe life into it. The generated code is the visual front door; now, they build the engine that powers everything behind the scenes.
Their initial work typically involves:
- Installing Dependencies: Kicking things off with
npm installoryarn install. - Launching the App: Running
npx expo startto get the app running in a simulator. - Hooking Up APIs: Swapping placeholder data with real API calls to pull content from your backend.
- Managing State: Integrating a state management library like Redux or Zustand to handle user data.
- Adding Business Logic: Implementing the core logic that makes your app valuable—like what actually happens when a user adds an item to their cart.
Think of the generated UI as high-quality boilerplate. It’s the starting line for development, saving your team from the tedious task of translating static designs into components and freeing them up to focus on complex, high-value engineering challenges.
Common Mistakes and Pro Tips for the Best Results
Turning a design into code with AI is a huge leap forward, but it's not magic. Expecting a flawless, one-click conversion will lead to frustration. The trick is to understand its strengths and weaknesses to get the most out of the process.
A common mistake is writing lazy, vague prompts. "Make a modern profile screen" is a recipe for a generic result. You have to be specific to get something specific back.
Another pitfall is trying to offload tasks AI isn't ready for yet. It's a beast at generating static UI and setting up basic navigation. But ask it to code a complex, multi-stage animation or handle sensitive business logic, and you'll end up with a mess you have to fix yourself.

Finally, don't let rapid iteration lead to chaos. It’s tempting to make dozens of small tweaks via chat—"change this button to blue," "make that font bigger"—but without discipline, your design will drift. Always circle back and update your central NativeWind theme file to keep your UI consistent.
Pro Tips for Getting It Right the First Time
Think of yourself as a director giving an actor clear stage directions. The better your instructions, the better the performance. Your prompts need to be clear, direct, and detailed.
Here’s how to get great results from the start:
- Structure First, Style Second: Begin by prompting for the big-picture layout—the main containers, navigation bar, and primary content sections. Once that skeleton is in place, you can flesh it out with colors, fonts, and icons.
- Be Explicit with Numbers: Vague requests lead to vague outcomes. Instead of saying "make the button bigger," get specific: "Increase the button's vertical padding to 16px and horizontal padding to 32px."
- Use Chat for Quick A/B Tests: Can't decide between two layouts? The conversational interface is perfect for this. You can ask, "Show me this screen with the image on the left," then immediately follow up with, "Now show it with the image on the right" to compare ideas in real time.
To get the most out of your prompts, it helps to see what works and what doesn't. Here’s a quick cheat sheet.
Prompting Best Practices for Optimal UI Generation
| Guideline | Do (Example) | Don't (Example) |
|---|---|---|
| Be Specific | "Create a card with a 12px border radius, a light gray shadow, and an image at the top." | "Make a nice card." |
| Define Layout | "Use a vertical stack with three sections: a header, a scrollable list, and a footer." | "Lay out the screen elements." |
| Provide Context | "This is an e-commerce app. The card should display a product with its price and an 'Add to Cart' button." | "Add a button to the card." |
| Iterate Clearly | "Change the primary button's background color to 'brand-blue' from our theme." | "Make the button blue." |
By following these guidelines, you provide the AI with the clarity it needs to execute your vision precisely.
The real power comes from knowing where the AI's job ends and the developer's begins. Use it for what it's great at—scaffolding high-quality UI at incredible speed—and let your engineering team wire up the complex logic.
This partnership between human expertise and AI efficiency is how you truly accelerate your workflow.
Common Questions on Turning Designs into Code
When you start talking about using AI to turn designs into code, a few questions always pop up. It's a new way of working, so it’s natural for founders, designers, and developers to wonder how it all fits together. Let's tackle some of the most common ones.
How Is This Different From a No-Code Builder?
This is the most frequent question, and the distinction is critical. The biggest difference is the output. No-code tools are closed systems designed to help non-technical users build simple apps without seeing code.
This process, on the other hand, is about accelerating professional development. You aren't locked into a proprietary platform. You get clean, production-ready React Native code that your developers can immediately take, extend, and integrate into your existing codebase. It’s a launchpad for your engineering team, not a walled garden.
Can I Use My Existing Design System?
Absolutely. In fact, you should. Any tool worth using in this space is built to adapt to your established brand guidelines.
The best systems integrate with theming libraries like NativeWind. This means you can point the AI to your specific color palette, fonts, and spacing tokens from the start. The components it generates will feel native to your project, making them easy to drop into your team’s component library.
What Parts Still Need a Developer?
AI is fantastic at scaffolding the entire UI layer—components, styling, and basic screen navigation. But an app is much more than what you see. A skilled developer is still essential for bringing that UI to life.
Here's where your developers will still focus their expertise:
- Backend Integration: Hooking up the UI to your APIs and databases.
- Complex Business Logic: Writing the custom rules and workflows that make your app unique.
- Native API Calls: Tapping into device hardware like the camera, GPS, or file system.
- Advanced Performance Tuning: Fine-tuning the app to ensure it runs smoothly as it scales.
Think of it this way: the AI handles the "what it looks like," freeing up your developers to concentrate on the high-impact "how it works."
Ready to bridge the gap between your vision and a working prototype? RapidNative turns your designs into interactive screens in minutes, not weeks. Start building faster today at RapidNative.
Ready to build your app?
Turn your idea into a production-ready React Native app in minutes.
Free tools to get you started
Free AI PRD Generator
Generate a professional product requirements document in seconds. Describe your product idea and get a complete, structured PRD instantly.
Try it freeFree AI App Name Generator
Generate unique, brandable app name ideas with AI. Get creative name suggestions with taglines, brand colors, and monogram previews.
Try it freeFree AI App Icon Generator
Generate beautiful, professional app icons with AI. Describe your app and get multiple icon variations in different styles, ready for App Store and Google Play.
Try it freeFrequently asked questions
What is RapidNative?
RapidNative is an AI-powered mobile app builder. Describe the app you want in plain English and RapidNative generates real, production-ready React Native screens you can preview, edit, and publish to the App Store or Google Play.
Can I export the code?
Yes. RapidNative generates clean React Native and Expo code that you can export at any time. No lock-in, no proprietary format. Hand it to your developers or keep building inside RapidNative.
Is RapidNative free to use?
Yes. You can build apps on the free plan with no credit card required. Paid plans unlock unlimited AI generations, code export, and direct publishing to the App Store and Google Play.
Do I need to know how to code?
No. Most users build apps by describing what they want in plain English. Developers can drop into the code whenever they want more control, but coding is optional.
How long does it take to build an app?
Most users have a working first screen in under a minute. A full MVP usually takes a few hours instead of the weeks or months traditional development requires.