How to Build a Prototype for Your Mobile App in One Week
Step-by-step guide to building a product prototype in 2026. Learn the best tools, methods, and tips to validate your idea before investing in full development.
By Sanket Sahu
10th Jan 2026
Last updated: 17th Feb 2026
Building a prototype for a mobile app used to be a long, drawn-out affair involving months of back-and-forth between designers and developers. Now, thanks to AI, you can go from a simple idea to a functional starting point with real code in about one to two weeks, completely sidestepping the old bottlenecks. This guide will show you exactly how, making it faster and cheaper than ever for founders, PMs, and designers to validate a mobile product idea.
Why Modern Prototyping Starts with AI
If you’ve ever tried to build a mobile app, you know the old playbook. You’d spend weeks or even months perfecting designs in a tool like Figma, only to hand them off to an expensive agency or freelancer to turn those static images into a clickable prototype. It was slow, costly, and the final mockup was often just a throwaway asset with no code shared with the actual product.
That whole model is on its way out. The real point of a prototype isn't just to look pretty; it's to test a hypothesis with real users as quickly as possible. AI-powered tools like RapidNative are changing the game by closing the gap between your idea, a testable prototype, and the production-ready code you’ll eventually need.
The New Economics of Building a Mobile App
The money and time required to build that first prototype have shrunk dramatically. A decade ago, it wasn't uncommon for founders to sink $20,000–$50,000 into a clickable mobile prototype from a traditional design agency.
Today, while professional agencies still charge a hefty $5,000–$30,000 for a similar service, modern SaaS tools have brought that cost down to between $0–$500. This massive price drop means you no longer need a huge venture-backed budget to test your mobile app idea.
It's not just about the money, either. It’s about speed. A basic low-fidelity prototype can now be pieced together in just one to two weeks—a timeline that was simply unthinkable before.
Prototyping Methods At a Glance
The table below contrasts the typical timeline of a traditional agency with a modern, AI-first workflow for building a mobile prototype. The difference in speed and handoffs is stark.
| Phase | Traditional Agency Workflow (8-12 Weeks) | RapidNative AI Workflow (1-2 Weeks) |
|---|---|---|
| Discovery & Scope | 2-3 Weeks (Workshops, research) | 1-2 Days (Define scope & user flows) |
| UX/UI Design | 3-5 Weeks (Wireframes, mockups, revisions) | 2-4 Days (AI generates screens via prompts) |
| Prototyping | 2-4 Weeks (Clickable mockups in Figma/InVision) | 1-2 Days (Iterate with chat, test on device) |
| Developer Handoff | 1 Week (Prep assets, explain designs) | Instant (Export production-ready code) |
As you can see, the AI workflow doesn't just cut down the time; it fundamentally changes the nature of each step, making the process more direct and efficient for mobile product teams.
From Static Mockups to Real Code
Perhaps the biggest win with an AI-first approach is what you get at the end. Instead of a dead-end Figma file, you walk away with a tangible asset: clean, modular React Native code. This completely reframes the purpose of your prototype.
- It’s no longer disposable. The code generated for your prototype becomes the foundation for your actual mobile application.
- It speeds up development. Your engineers aren't starting from scratch; they’re building on top of a fully-formed UI scaffold.
- It enables true validation. You can put a real, native-feeling app into users' hands, not just a series of linked images.
For founders, product managers, and designers, this means you can build, test, and validate your core user flows without writing a single line of code. You’re not just visualizing an idea—you’re building its first real version.
The impact of this shift is huge. Teams can iterate on user feedback faster, pivot without scrapping months of work, and move with the kind of agility that's essential today. By using natural language to generate and refine your UI, you're directly involved in the creation process, making sure the final product truly matches your vision. To learn more, check out our guide on the role of AI in mobile prototyping.
Defining Your Scope and Core User Flows
A great prototype begins with clear thinking, long before you touch any design tool. Before you can build something that truly tests your app idea, you have to nail down exactly what it needs to do. This means fighting the temptation to cram in every cool feature you've dreamed up and instead focusing on the one core problem you're trying to solve.
The point isn't to build a miniature version of your final app. It's to validate a single, crucial hypothesis. What is the one job your user is "hiring" your app to do? Getting this right is the bedrock of the entire process.
From Feature Lists to User Journeys
Instead of starting with a laundry list of features, think in user flows. A user flow is simply the path a person takes through your app to get something done. It’s a story with a beginning, a middle, and a valuable outcome at the end. Mapping this out gives you a concrete blueprint for your prototype.
For instance, the core value of a new fitness app isn't its fancy settings screen; it's the journey of a user successfully logging their very first workout.
The most effective prototypes stick to the "critical path"—the absolute shortest sequence of actions a user needs to take to understand why your app is valuable. Anything else is just noise at this stage.
A tightly defined scope ensures your prototype answers the big question: "Does this actually solve a real problem for someone?" This focused approach is a lifesaver for product managers and founders who need to validate ideas without wasting time or money. For a more in-depth look, our guide on mobile prototyping for product managers offers some great frameworks.
Sketching Your Critical Path
You don’t need anything fancy for this. A whiteboard, a notebook, or a tool like Miro works perfectly. The goal is to get the flow out of your head and into a visual format, screen by screen.
Let's walk through two quick examples for mobile apps to see how this works in practice.
Example 1: A Meal Delivery App The critical path here is getting a hungry user from browsing to ordering. A quick sketch of that flow would look something like this:
- Home Screen: User sees restaurant categories and a search bar.
- Restaurant Menu: They tap a restaurant and see a list of dishes.
- Dish Detail Page: They tap a dish to see details and an "Add to Order" button.
- Cart: They review their order and tap "Checkout."
- Checkout: They enter payment details and confirm the order.
Example 2: A Language Learning App For a learning app, the critical path is getting a user to complete their first lesson and feel a sense of accomplishment.
- Dashboard: User sees their progress and a "Start Today's Lesson" button.
- Lesson Screen: They're presented with a series of interactive exercises (e.g., matching words, filling in blanks).
- Lesson Complete Screen: They get a confirmation and points for finishing.
- Dashboard Refresh: They land back on the dashboard and see their progress updated.
This simple, low-fidelity map becomes your most valuable guide. It gives you the narrative that will direct the AI, making sure the screens it generates are part of a connected, logical experience, not just a random collection of designs. Getting this clarity upfront saves a ton of rework and keeps your prototype focused on what really matters.
Generating Your App Screens with AI Prompts
Alright, you’ve mapped out your user flows. Now for the fun part—turning those ideas into actual mobile screens. This is the moment your app starts to feel real, and with a tool like RapidNative, you can bring it to life using simple, plain-English prompts.
You don’t need a design degree or a background in coding for this. Seriously. If you can describe what you want, you can build it. The trick is to be clear and specific, just like you would if you were explaining your vision to a designer sitting next to you.
The time you spent defining your scope will pay off big time here. That clarity makes the building process incredibly fast.
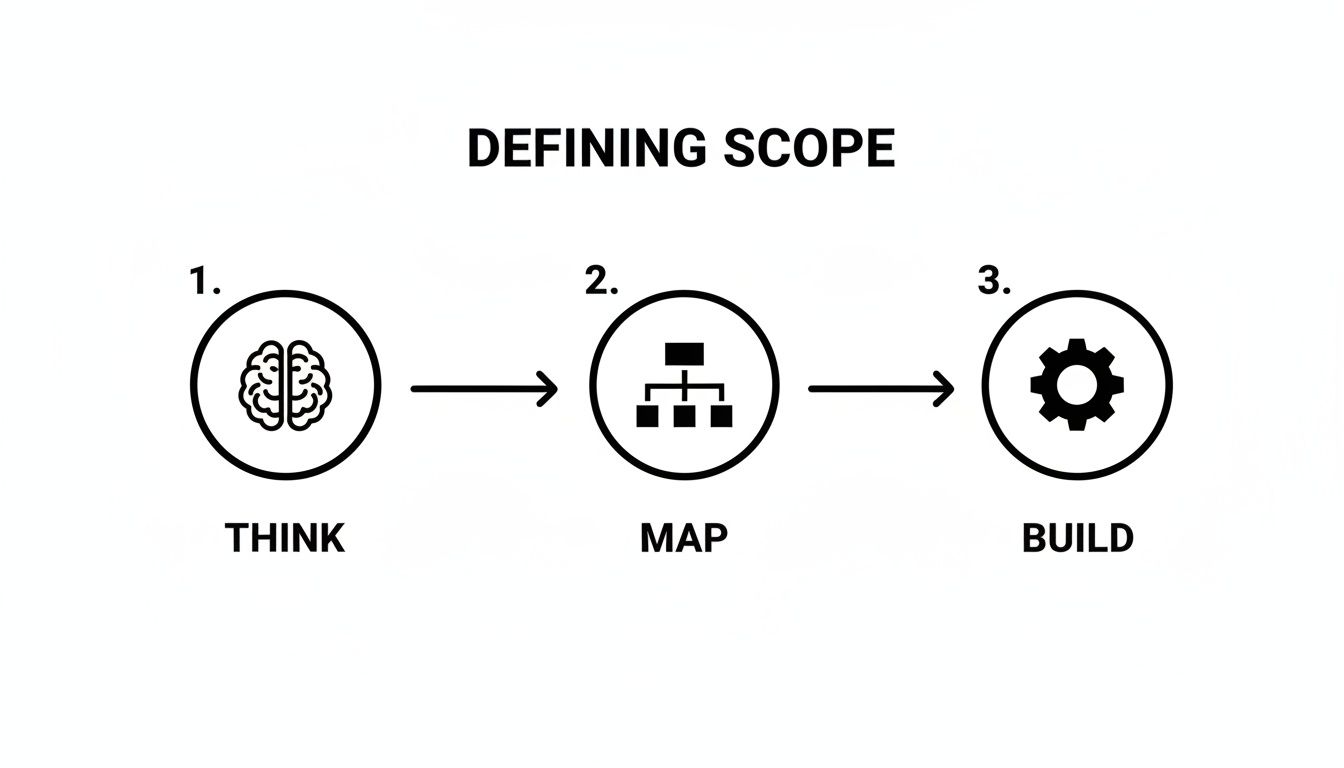
This simple model—think, map, then build—is the secret to moving from a high-level concept to a working prototype without getting bogged down in unnecessary details.
Crafting Prompts That Actually Work
Here’s the deal: the quality of the screens you get is a direct reflection of the quality of your prompts. Vague requests will get you generic, uninspired results. The key is to describe not just the what but also the where—the content, the structure, and the key interactive elements.
Think of it like ordering a custom coffee. Just saying "make me a coffee" is a gamble. But if you say, "I want a large iced oat milk latte with one shot of vanilla," you're going to get exactly what you want. It's the same idea here.
I’ve found a few things really help when writing prompts:
- State the Screen's Purpose: Kick it off by saying what the screen is for, like "a user login screen" or "a product detail page."
- List the Key Ingredients: Call out all the must-have elements. Be specific: input fields, buttons, images, icons, and text blocks.
- Hint at the Layout: You don't need to be a UX architect, but simple directions help. Use phrases like "a header at the top," "a list of items in the center," or "two buttons side-by-side at the bottom."
- Define Your Calls to Action: Tell the AI exactly what your buttons should say, like "Sign In," "Add to Cart," or "Subscribe Now."
Getting good at this is a huge leg up. If you really want to level up your skills, diving into some specific prompt engineering tips can help you get even more precise results from the AI.
Example Prompts for Common App Screens
To make this super practical, here are some prompts you can basically copy and paste to generate the screens you'll almost certainly need for your mobile app. These examples show how a non-technical founder can guide the AI to build a solid foundation for their prototype.
This table provides a few starting points for writing effective prompts.
| Screen Type | Example AI Prompt for RapidNative |
|---|---|
| Login Screen | "Create a login screen with a logo at the top. Below the logo, include two input fields for 'Email' and 'Password.' Add a primary 'Log In' button. Underneath, include a text link that says 'Forgot Password?' and another one for 'Sign Up.'" |
| Social Feed | "Generate a social feed screen with a header that says 'Feed.' The main content should be a vertical scrollable list of user posts. Each post should be a card with a user avatar, username, an image, and icons for like, comment, and share." |
| Product Detail Page | "Build a product detail page for an e-commerce app. It needs a large product image at the top, followed by the product name and price. Below that, show a short description, a color selector, and a prominent 'Add to Cart' button at the bottom." |
| Settings Dashboard | "Design a settings screen with the title 'Settings.' Create a list of options: 'Edit Profile,' 'Notifications,' 'Privacy Policy,' and 'Log Out.' Each option should have a simple icon to its left." |
As you can see, these prompts are descriptive enough for the AI to understand the structure and hierarchy, giving you a fantastic starting point to work from.
Remember, the goal right now is not pixel-perfection. It's about quickly generating a functional scaffold that you can iterate on. Just focus on getting the core structure right.
Once you have these initial screens, you're already halfway there. The next step is to breathe life into them, which often involves moving from static visuals to functional code. This is where AI code generation can bridge the gap, helping turn your designs into a developer-ready codebase and saving a ton of time down the road.
Refining Your Prototype with Conversational Edits
Your first AI-generated screens are a fantastic starting point, but think of them as a first draft. The real magic happens next, during the rapid, conversational iteration phase. This is where you’ll shape that raw output into a polished, interactive prototype that actually feels like your app—all without writing a single line of code.
Gone are the days of sending revision notes to a designer, waiting for updates, and then reviewing a new set of mockups. Now, you can make changes on the fly. The feedback loop shrinks from days to seconds. It’s less like a traditional design process and more like having a conversation with a highly skilled assistant who executes your commands instantly.
This incredible speed is why prototyping has shifted from a "nice-to-have" to a core part of building modern mobile products. While a highly polished, interactive prototype from an agency could take months, the entire software market is betting on speed. In fact, the global low-code development platform market is projected to skyrocket from $10.3 billion in 2019 to $187 billion by 2030, which shows you just how big this shift toward faster iteration is.
Making Adjustments Through Simple Commands
The beauty of this iterative process lies in its simplicity. You use direct, natural language to refine your UI. Everything from colors and spacing to typography and layout can be tweaked with a straightforward request. This opens up UI refinement to anyone on the team, whether you're a product manager, a founder, or a designer.
Here are a few real-world examples of the kinds of conversational edits you might make:
- Styling a Button: "Change the primary button color on the login screen to our brand's blue, #3B82F6."
- Adjusting Layout: "Add more vertical spacing between the items in the product list to make it less crowded."
- Modifying Text: "Make the main headline on the home screen bold and increase the font size to 24pt."
- Swapping Icons: "Replace the placeholder gear icon on the settings page with a user profile icon."
This chat-driven workflow creates an incredibly fluid and creative process. You can experiment with different ideas in real-time, see the results instantly, and make decisions based on what looks and feels right, not just what you thought might work on paper.
The goal isn't just to make the prototype look good; it's to make it feel intuitive. Conversational edits let you quickly fix awkward layouts or confusing UI elements that would slow down user testing.
Connecting Screens to Create a User Flow
A collection of beautiful screens is just a gallery, not a prototype. To bring it to life, you need to connect those screens into a navigable user flow that mirrors the actual app experience. This is the step that turns static designs into something you can truly test and feel.
With an AI tool like RapidNative, you can even link screens together conversationally.
Imagine you're building a simple login flow. Here’s how you’d do it:
- Start on the Login Screen: First, select the "Sign Up" text link.
- Make the Connection: Then, instruct the AI, "When a user taps 'Sign Up,' navigate to the user registration screen."
- Complete the Flow: On the registration screen, you’d select the main "Create Account" button and tell the AI, "After a successful signup, take the user to the main dashboard."
By repeating this process for each step, you can quickly map out your entire critical path, from onboarding to the core action. What you end up with is a fully interactive prototype that you can test directly on a device. This gives you and your stakeholders a genuine sense of how the app will function in a user's hands. For prototypes that require more advanced interactions and animations, dedicated tools like Protopie can be invaluable. This ability to create a tangible, testable experience is what separates modern prototyping from old-school static mockups.
Preparing for a Smooth Developer Handoff
You’ve built an interactive prototype, tested your assumptions, and validated the core user flows. This is often where things get tricky. The jump from a final mockup to the first line of production code is a notorious stumbling block where many great product ideas lose momentum.
But what if your prototype wasn’t just a picture of an app? What if it was the app itself?
When you build with an AI that generates real, standards-based React Native code, the handoff isn't a translation exercise—it's a launchpad. Unlike a static design file from a tool like Figma, you're delivering a tangible software asset. Your prototype becomes Version 0.1 of your application, not a disposable mockup that gets tossed aside.
This is a game-changer. Your development team gets to skip the painstaking process of converting pixels into components, which can eat up a massive chunk of initial engineering time. They can hit the ground running with a codebase that’s already structured, styled, and partially interactive.
From Prototype to Project
So, what does this handoff actually look like in practice? It's refreshingly simple. You're essentially exporting the complete source code from your AI prototyping tool and getting it into a professional development environment.
Here’s how to package it up for your developers:
- Export the Source Code: First, find the export option in your tool. This will bundle up all your screens, components, navigation logic, and styling into a neat, downloadable archive.
- Create a Git Repository: The gold standard here is to initialize a new Git repo on a platform like GitHub or GitLab. Commit the exported code and share access with your team. This immediately establishes a clean version history.
- Provide the "Why": Don't just dump the code and run. Include a simple README file or a short document outlining the core user flows you prototyped. If you have them, link back to your whiteboard sketches or user journey maps to give developers the full picture.
The most valuable handoff isn’t just a folder of code; it’s a shared understanding. By providing the user flows and the functional code together, you give developers the "what," the "why," and the "how" all at once.
Setting Clear Expectations for Your Team
To make this transition work, you have to be crystal clear about what this code is and what it isn't. An AI-generated prototype gives you an incredible head start on the front end, but it's not a finished, production-ready application.
The code is an accelerator, not a replacement for your developers' expertise.
What’s Included in the Handoff:
- UI Components: All the visual building blocks—buttons, cards, input fields, lists—are ready to go as modular React Native components.
- Screen Layouts: The structure and design of every screen are fully coded and styled, often using a framework like NativeWind for consistency.
- Navigation Scaffolding: The basic logic for moving between screens is already wired up. Tapping a button to go to another screen just works.
What Your Developers Will Add Next:
- Backend Logic: This is the heavy lifting—connecting the UI to a database, handling user authentication, and managing all server-side operations.
- API Integrations: Your team will need to fetch real data from third-party services to bring feeds, product lists, or user profiles to life.
- State Management: For complex apps, they'll implement a robust state management solution to handle how data flows through the application.
- Native Modules: If your app needs deep OS-level features like the camera, GPS, or background services, they'll write custom native code for that.
This handoff is where many teams get bogged down, and it's a major reason why so many app ideas never see the light of day. A recent survey of iOS developers found that 41% hadn't launched an app in the previous 12 months. At the same time, industry reports show 76% of developers are already using or planning to use AI in their workflows.
By using AI to generate real code, you dramatically shorten this critical handoff phase and build a powerful structural advantage from the very beginning. For more insights into developer trends, check out these iOS app development statistics on rentamac.io.
Got Questions? Let's Talk AI Prototyping
When I first started showing people how to build mobile prototypes with AI, the same handful of questions always popped up. Let's tackle them head-on, because they get right to the heart of what this process is really about.
So, Can I Build a Super Complex App This Way?
Let's be clear about where AI shines and where you still need a human expert. AI prototyping is phenomenal for building out the entire user-facing side of your app—all the screens, buttons, navigation, and user flows that people will actually see and touch. It generates real front-end code for you.
But what about the heavy lifting behind the scenes? Things like complex business logic, connecting to a database, or integrating with a third-party service like Stripe? That’s where your developers come in. The AI gives them a massive head start on the UI, but the "brains" of the operation still need to be coded traditionally.
Is the Exported Code Actually Any Good?
Yes, and this is a huge deal. Anyone who’s dealt with code from older visual builders knows the pain of getting a messy, unusable pile of code. That's not what we're talking about here.
Modern tools like RapidNative generate clean, production-ready React Native code. It’s organized just like a developer would structure it, which means they can jump right in, understand it, and start building on top of it without a huge learning curve. It saves them a ton of time on the tedious UI setup.
The big shift in thinking is this: an AI-generated prototype isn't a disposable mockup. It’s the first real version of your app’s codebase, built with the exact same tech you’ll use in production. It’s a foundational asset, not a throwaway.
How Is This Different from Just Using Figma?
I love Figma. It’s an incredible design tool for creating pixel-perfect, interactive mockups. But a Figma prototype and an AI-generated prototype are fundamentally different things.
Think of it this way: a Figma prototype simulates an app. It looks and feels like the real thing. An AI-generated prototype, however, is the beginning of the real app. It’s a functional software foundation you can immediately build upon. One is a picture of a house; the other is the actual foundation and framing.
Ready to turn your idea into a functional prototype with real, developer-ready code? RapidNative lets you build mobile UI screens from simple prompts in minutes. Start building your app today.
Ready to build your app?
Turn your idea into a production-ready React Native app in minutes.
Free tools to get you started
Free AI PRD Generator
Generate a professional product requirements document in seconds. Describe your product idea and get a complete, structured PRD instantly.
Try it freeFree AI App Name Generator
Generate unique, brandable app name ideas with AI. Get creative name suggestions with taglines, brand colors, and monogram previews.
Try it freeFree AI App Icon Generator
Generate beautiful, professional app icons with AI. Describe your app and get multiple icon variations in different styles, ready for App Store and Google Play.
Try it freeFrequently asked questions
What is RapidNative?
RapidNative is an AI-powered mobile app builder. Describe the app you want in plain English and RapidNative generates real, production-ready React Native screens you can preview, edit, and publish to the App Store or Google Play.
Can I export the code?
Yes. RapidNative generates clean React Native and Expo code that you can export at any time. No lock-in, no proprietary format. Hand it to your developers or keep building inside RapidNative.
Is RapidNative free to use?
Yes. You can build apps on the free plan with no credit card required. Paid plans unlock unlimited AI generations, code export, and direct publishing to the App Store and Google Play.
Do I need to know how to code?
No. Most users build apps by describing what they want in plain English. Developers can drop into the code whenever they want more control, but coding is optional.
How long does it take to build an app?
Most users have a working first screen in under a minute. A full MVP usually takes a few hours instead of the weeks or months traditional development requires.