Prototyping a Website: A Practical Guide for Mobile Teams
Learn prototyping a website to secure buy-in and speed development with goals, tools, testing, and clear developer handoff.
By Rishav
29th Jan 2026
Last updated: 29th Jan 2026
Before your team writes a single line of code, a website prototype acts as a clickable, interactive model of your final product. It’s the critical step where you turn static designs into a tangible experience, letting you gather real user feedback, validate your assumptions, and get your entire team—from founders to developers—aligned. For mobile product teams, this practice is the fastest way to de-risk your project and avoid building the wrong thing.
Why Prototyping Is Your Team's Secret Weapon
Ever tried to get investor buy-in or team alignment using just a slide deck? It’s tough. A prototype is your answer. This isn't just a task for designers; it’s a core strategy for founders, PMs, and developers building mobile-first products.
The goal is to bridge the gap between an idea in a document and a functional product on a screen. A well-crafted prototype lets stakeholders see, click, and feel how your mobile website is supposed to work. For example, you can test a new onboarding flow by putting a clickable prototype directly into a user's hands. That tangible interaction is infinitely more powerful than any description you could write.
Beyond Static Mockups
The good news is that modern tools have made prototyping accessible to everyone, regardless of technical skill. You don't need to be a developer to build a compelling demo of your mobile site. This is a game-changer for non-technical founders and product managers, who can now actively shape the user experience from day one.
The true value of a prototype is its ability to start a conversation. It forces abstract ideas into concrete questions and answers, aligning your team, users, and investors around a shared understanding of what you're building.
This alignment is everything. Misinterpreted ideas are notorious for causing expensive rework. For instance, a simple clickable prototype might reveal that the gesture-based navigation that looked brilliant on a designer's screen is completely confusing to a first-time user on their phone. Discovering this before development saves weeks of wasted effort.
Build Momentum Before Writing Any Code
Think of prototyping as your first, best chance to reduce risk and build genuine momentum. It’s how you:
- Validate Your Concept: Get early confirmation that your mobile solution actually solves a real user problem.
- Improve User Experience: Uncover usability flaws on small screens and refine user flows based on how people actually interact with your model.
- Secure Stakeholder Buy-In: Nothing sells a vision and secures funding like a working prototype that someone can try on their own phone.
- Accelerate Development: Handing developers an interactive, tested prototype is the clearest set of instructions they can get, removing ambiguity and speeding up the build.
Ultimately, prototyping is about learning as fast as possible. This guide offers a practical process for turning your vision into a clickable experience that pushes your mobile project forward.
Matching Your Prototype's Fidelity to Your Goals
Before you open any software, ask the most important question: What problem is this prototype supposed to solve?
Your answer will determine how detailed—or “high-fidelity”—your prototype needs to be. The goal isn’t to build a perfect digital replica. It’s to build just enough to learn what you need to know, fast.
For example, are you just trying to map out how a user navigates from a product list to the checkout screen on a mobile device? A few linked wireframes will do the trick. But if you’re pitching to investors, you’ll need a polished, high-fidelity prototype that looks and feels like a real, functioning mobile site.
Aligning Detail with Your Objective
Think of "fidelity" as a spectrum of detail. Low-fidelity prototypes use simple shapes and placeholders to focus on structure and flow. High-fidelity prototypes include pixel-perfect visuals, branding, and sophisticated interactions. Choosing the right level is a strategic move that saves time and money.
If you're testing the core sign-up process for your mobile web app, you don't need final brand colors or slick animations. In fact, those details can distract users. A simple, low-fidelity wireframe forces them to focus on the flow itself, giving you clean feedback on the core task. It's about asking the right questions at the right time.
A prototype's success isn't measured by how beautiful it looks. It's measured by how much you learn. The real goal is to get the most insight for the least amount of effort.
This strategic thinking helps you choose the most efficient path for turning your idea into a tangible product.
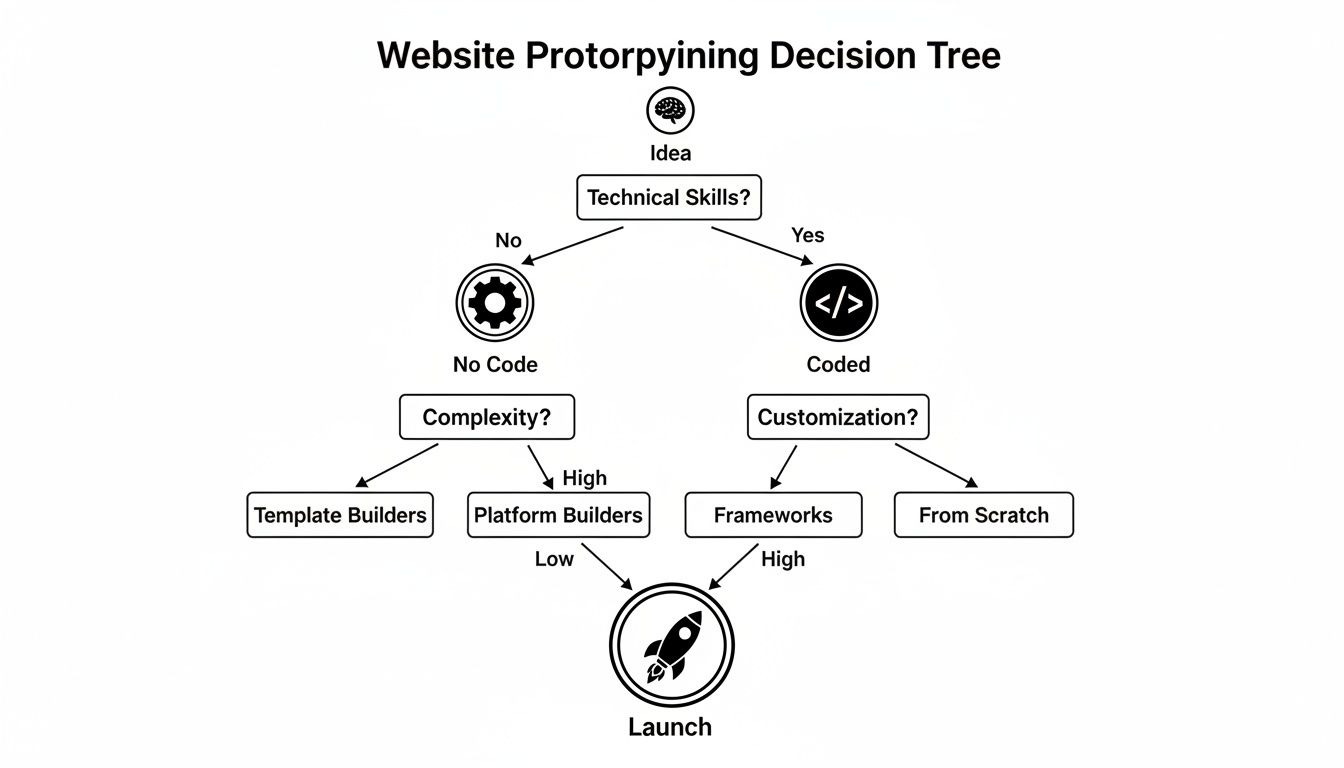
As this flowchart shows, whether you’re a developer or prefer no-code tools, the strategy is always about moving efficiently from a rough concept to a polished launch.
Choosing the Right Tools for the Job
The explosion of prototyping tools shows just how critical this step has become. The market was valued at USD 14.25 billion in 2025 and is projected to hit USD 36.01 billion by 2034. It's no surprise that cloud-based solutions now make up 68% of the market, as they make team collaboration seamless.
With so many options, how do you pick the right one? Match the tool to your immediate goal.
Matching Prototype Fidelity to Your Goals
Use this table to decide which level of prototype fidelity is right for your current objective and to see examples of tools suited for each stage.
| Fidelity Level | Primary Goal | Best For | Example Tools |
|---|---|---|---|
| Low-Fidelity | Validating structure and user flow | Internal team brainstorming, early-stage user journey mapping | Pen & Paper, Balsamiq, Miro |
| Mid-Fidelity | Testing usability and layout | Interactive wireframes for user testing sessions, refining information architecture | Figma, Sketch, Adobe XD |
| High-Fidelity | Securing buy-in and testing UI details | Investor demos, stakeholder presentations, final usability tests before handoff | Figma, Proto.io, Framer |
This breakdown should make it clearer how your objective directly informs your choice of tool.
If you’re curious about specific software, our guide on mobile app prototyping software is a great resource—many of the tools and principles are just as relevant for web projects.
By deliberately matching your fidelity to your goals, you ensure every hour spent prototyping moves your project forward.
From Sketch to Interactive Blueprint
This is where your idea stops being a concept and starts taking shape. The path from a thought to a tangible, interactive wireframe isn't about being a great artist; it's about methodical thinking and bringing your vision down to earth, one screen at a time.
I always tell teams to start with the lowest-tech tools: a pen and paper. Sketching your main mobile screens—the homepage, a product page, the checkout process—is the fastest way to explore different layouts. You won't get hung up on pixels or fonts. It's fast, disposable, and frees you up to think about the user's journey.
This sketching phase is purely about making decisions. Should the primary call-to-action be a sticky footer? Is the sign-up process two steps or three? Figuring this out on paper takes minutes. Figuring it out in code can take days.
Creating Your Digital Wireframe
Once you've landed on a rough flow that feels right, it’s time to jump into a digital tool and build your wireframes. A wireframe is the architectural blueprint for your website—a simple, black-and-white layout focused on structure and priority.
At this stage, you're focused on:
- Structure: Using basic shapes to map out the core layout of each screen.
- Information Hierarchy: Deciding what’s most important and making it visually prominent.
- User Flow: Charting the specific path a person will take to complete a task.
For a mobile e-commerce site, the product page wireframe would ensure the product image, price, and "Add to Cart" button are the stars of the show, easily accessible without scrolling. The checkout would be broken into simple, sequential steps to minimize cart abandonment on a small screen.
Building an effective wireframe benefits from a solid grasp of layout design. Knowing these principles helps you create a structure that's not just logical but also visually compelling. If you want to sharpen those skills, a primer on understanding layout design can provide a great foundation.
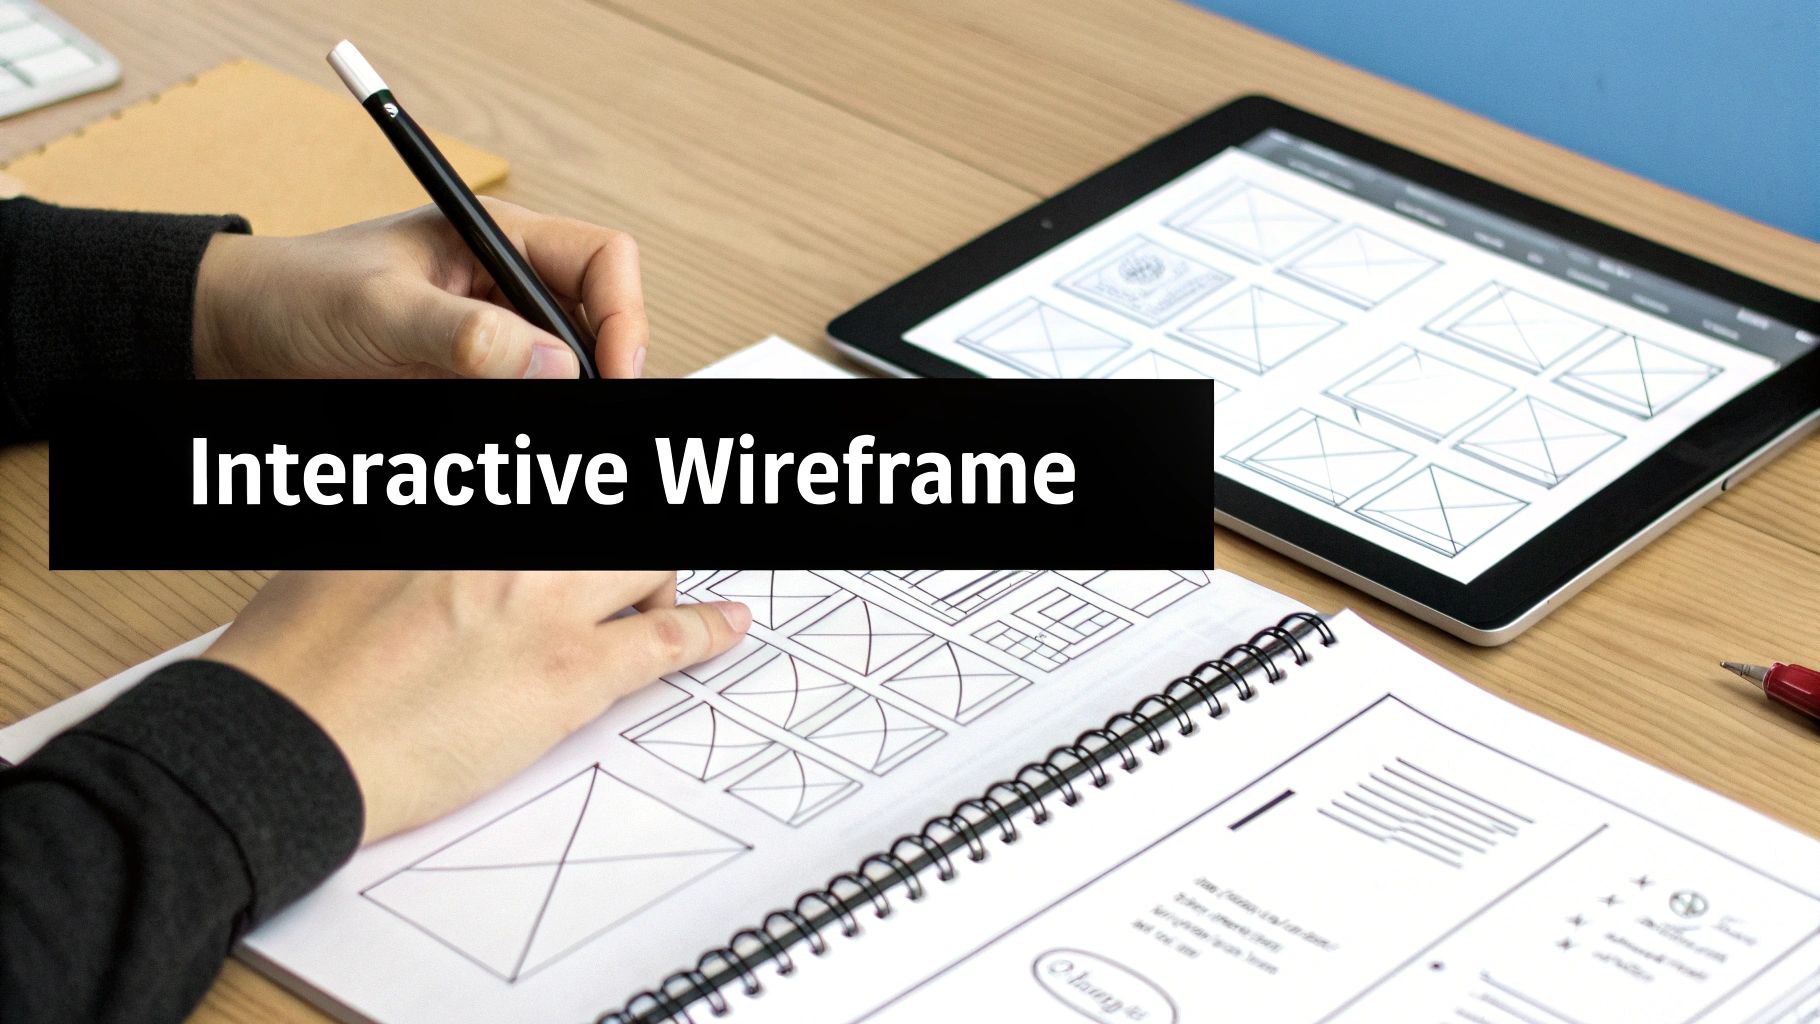
Making It Clickable
A static wireframe is a good start, but an interactive one is where you really start to see things click. This part of prototyping a website transforms your static screens into a story. Modern tools like Figma or Adobe XD make this surprisingly easy. No code required—you’re just connecting the dots.
You simply create "hotspots" on your wireframes that act as links. For example, connect the "Shop Now" button on your homepage wireframe to the product listings page. From there, link a specific product image to its detailed view.
A clickable prototype turns a pile of static screens into a story. It lets people experience the flow instead of just looking at the layout. This is where you’ll uncover your most valuable insights, guaranteed.
This simple interactivity is incredibly powerful because it immediately exposes flaws in your logic. You’ll suddenly realize you missed a "back" button or that the path to checkout has a confusing dead end. Finding these problems now is infinitely cheaper and faster than discovering them after a developer has started building.
Don’t underestimate the impact of a smooth mobile experience. 75% of users judge a company’s credibility by its website design, and with 63% of web traffic now coming from mobile devices, an intuitive flow isn’t just a nice-to-have; it’s absolutely essential.
How to Get Honest Feedback with User Testing
A prototype that hasn't been tested by real users is just a well-educated guess. The most important part of this process is putting your prototype in front of actual people to see what works, what breaks, and what confuses them. This is user testing, and it's less of a formal experiment and more of a conversation.
The goal is to get raw, unfiltered reactions. You're not there to sell your idea or defend your design choices—you're there to observe and listen. A handful of focused sessions can expose massive blind spots or, conversely, prove your best ideas are on track. This feedback can save you from spending weeks building a feature nobody wants.

Finding the Right Users on a Budget
Don't worry, you don't need a massive budget or a professional focus group. In the early stages, it’s all about being scrappy.
Here are a few ways to find great testers without breaking the bank:
- Your Extended Network: Think friends-of-friends or old colleagues who fit your target user profile. A personal connection often makes people more willing to give honest feedback.
- Niche Online Communities: Go where your audience hangs out, like specific subreddits, Slack communities, or LinkedIn Groups. Offering a small incentive, like a coffee gift card for 20 minutes of their time, goes a long way.
- Your Existing Waitlist: If you've been collecting emails from interested users, you're sitting on a goldmine. These people are already eager to see what you're building.
You only need to find 5 to 7 users who represent your target audience. After a few sessions, you'll start to hear the same feedback repeatedly—that's how you know you've found the most critical issues.
Conducting an Effective Test Session
Once you've lined up your participants, a little structure makes a world of difference. Your goal isn't to give them a guided tour; it's to give them a task and see what happens.
I like to use a simple script with clear, goal-oriented tasks. The trick is to avoid step-by-step instructions.
Example Task Script for a Mobile Site:
- "Imagine you're trying to figure out our pricing. Show me how you'd find that on your phone."
- "Okay, now go ahead and try to sign up for a new account."
- "Let's say you wanted to add this item to your cart. How would you do that?"
During the session, your most important job is to stay quiet and watch. It's tempting to jump in and help if they get stuck, but don't! That moment of confusion is exactly the data you’re looking for.
Ask open-ended questions that get them to think aloud. Instead of, "Do you like this button?" ask, "What do you expect to happen when you tap this?" The first gets you a yes/no; the second reveals their thought process.
Turning Feedback into Action
After a few sessions, you’ll have a notebook full of observations. Distill that raw feedback into concrete improvements for your next prototype iteration. Look for patterns and prioritize issues based on how badly they prevent someone from completing a core task.
If you're looking for more structured ways to analyze the data, you can explore various user experience testing methods to find a system that fits your team.
This cycle of building, testing, and learning is the heart of smart product development. It turns prototyping from a design exercise into a powerful way to reduce risk and build a mobile website people will love to use.
Preparing Your Prototype for a Smooth Developer Handoff
The moment of truth arrives: handing your design to the development team. This is where a brilliant prototype can either flourish into a real product or get lost in translation. A great handoff isn't just tossing a Figma file over a digital wall; it's a conversation that ensures your vision is built as intended.
Gone are the days of static mockups and hundred-page spec documents. Modern design tools act as a single source of truth, cutting down on guesswork. This shift is why solid prototyping is no longer optional. The market reflects this, with projections showing the rapid prototyping industry growing from USD 4.01 billion in 2025 to over USD 24.71 billion by 2035. You can dig into the numbers and growth of the rapid prototyping market on Precedence Research.
Documenting the Details Developers Need
To make your prototype buildable, you need to provide more than just pretty pictures. Think of yourself as a tour guide for your design, pointing out the crucial details that aren't immediately obvious. The goal is to anticipate developers' questions and answer them before they have to ask.
Here’s a checklist of what developers find invaluable:
- Key User Flows: Don't just show a collection of screens. Map out critical user journeys, like the sign-up process or checkout flow. Annotate the steps so they can see exactly how a user gets from A to B.
- Interaction Specs: How should that button react on hover or tap? What's the transition animation between pages? Be explicit about these micro-interactions. If you don't define them, the developer will have to guess.
- Edge Cases: What happens when a user enters a long name in a form field? What does the page look like when there are no search results? Thinking through these "unhappy paths" saves everyone a lot of headaches later.
Creating a Reusable Component Library
One of the most impactful things you can do for your engineering team is build a well-organized component library. This isn't just a design task; it's the foundation of a scalable system that saves an incredible amount of time.
A design handoff isn’t just about delivering pixels; it's about delivering a system of logic. By defining reusable components and clear interaction rules, you empower developers to build faster and more consistently.
Instead of designing dozens of one-off buttons, create a single "Button" component with clearly defined states: default, hover, focused, disabled. Do the same for form fields, cards, and navigation elements. This not only ensures visual consistency across the entire website but also makes future updates a breeze. This systematic thinking is a cornerstone of effective product design. If you want to go deeper, check out our guide on how to design a web app.
When you treat the handoff as a partnership built on clear communication and thorough documentation, you set the stage for a final product that is a faithful, functional, and high-quality version of your prototype.
Common Questions About Website Prototyping
To wrap things up, let's go over a few common questions I hear from founders, PMs, and designers new to prototyping.
How Much Does It Cost to Prototype a Website?
It can range from $0 to thousands of dollars. The biggest cost is almost always your team's time.
You can sketch a paper prototype for the cost of a pen. Low-fidelity digital wireframes can also be done for free, thanks to the generous free tiers on tools like Figma or Miro. Costs start to creep up with high-fidelity prototypes that demand paid software subscriptions for advanced features, which might run a few hundred dollars a month.
The real goal isn't to spend the least money, but to get the most valuable learning for the least amount of investment.
What’s the Difference Between a Prototype and a Wireframe?
This one comes up a lot. A wireframe is the architectural blueprint for a webpage. It’s about structure—using simple shapes to map out the layout and information hierarchy. It answers, "What goes where?"
A prototype is the interactive simulation you build from those blueprints. It’s all about function and answers, "How does this actually work?" You can create a simple prototype by linking static wireframes together or build a high-fidelity version that feels nearly identical to the real thing.
A wireframe shows what the website contains, while a prototype demonstrates how a user interacts with it. One is a map; the other is a test drive.
How Long Should Website Prototyping Take?
This completely depends on the prototype's complexity and detail.
A simple user flow can be sketched on a whiteboard in under an hour. A comprehensive, high-fidelity interactive prototype for a large website could take a designer several days or even a full week.
But the guiding principle should always be speed. Your goal is to get something testable in front of real users as fast as possible. For a new concept, I always tell teams to aim for their first interactive prototype within a week.
Can I Use My Prototype as the Final Website?
In almost every case, the answer is a hard no. Prototypes built in design tools are essentially a clever collection of interactive images. They look real, but there's no "there" there.
They’re missing all the critical stuff: no functional backend code, no databases, no server logic. Prototypes are built for testing and communicating a vision—not for handling real traffic. Once you get sign-off, your developers will need to write production-ready code from scratch, using your prototype as their guide.
Ready to build your interactive prototype without the friction? With RapidNative, you can turn your ideas, sketches, or product docs into a shareable React Native app in minutes. Generate real, production-ready code that your developers will love, and get from concept to clickable prototype faster than ever before. Start building for free at RapidNative.
Ready to build your app?
Turn your idea into a production-ready React Native app in minutes.
Free tools to get you started
Free AI PRD Generator
Generate a professional product requirements document in seconds. Describe your product idea and get a complete, structured PRD instantly.
Try it freeFree AI App Name Generator
Generate unique, brandable app name ideas with AI. Get creative name suggestions with taglines, brand colors, and monogram previews.
Try it freeFree AI App Icon Generator
Generate beautiful, professional app icons with AI. Describe your app and get multiple icon variations in different styles, ready for App Store and Google Play.
Try it freeFrequently asked questions
What is RapidNative?
RapidNative is an AI-powered mobile app builder. Describe the app you want in plain English and RapidNative generates real, production-ready React Native screens you can preview, edit, and publish to the App Store or Google Play.
Can I export the code?
Yes. RapidNative generates clean React Native and Expo code that you can export at any time. No lock-in, no proprietary format. Hand it to your developers or keep building inside RapidNative.
Is RapidNative free to use?
Yes. You can build apps on the free plan with no credit card required. Paid plans unlock unlimited AI generations, code export, and direct publishing to the App Store and Google Play.
Do I need to know how to code?
No. Most users build apps by describing what they want in plain English. Developers can drop into the code whenever they want more control, but coding is optional.
How long does it take to build an app?
Most users have a working first screen in under a minute. A full MVP usually takes a few hours instead of the weeks or months traditional development requires.