How to Create a React Native App from Idea to Launch
Learn how to create a React Native app with our end-to-end guide. Go from a simple idea to a functional prototype using modern tools, no code required to start.
By Rishav
16th Jan 2026
Last updated: 16th Jan 2026
Building a new mobile app is a big decision, and picking the right technology from the start can be the difference between a fast launch and a stalled project. Choosing to create a React Native app isn't just a technical choice; it's a strategic move that lets you build for both iOS and Android simultaneously, saving a ton of time and money right out of the gate. This means you can get your idea in front of users faster and tap into a massive, supportive developer community.
Why React Native Is Your Smartest First Move
Before we jump into the setup and coding, let's talk strategy. In a world where getting to market quickly is everything, your tech stack is a massive business advantage. For founders, product managers, and even designers, the real goal is simple: get a great-looking, functional app into people's hands as efficiently as possible. This is where React Native truly delivers.
Think about the traditional way of building apps. You'd need to build one app for the Apple App Store (using Swift or Objective-C) and a completely separate one for Google Play (using Kotlin or Java). That means two teams, two codebases, and twice the headaches when it comes to maintenance and updates. React Native flips that script, letting you write your code once and ship it to both platforms.
This "write once, run anywhere" approach is exactly why giants like Shopify, Instagram, and Discord rely on it. They aren't cutting corners; they're just being smart about how they use their resources.
The Core Business Advantages
For anyone not deep in the code, the benefits are crystal clear and hit the bottom line directly. Forget abstract technical jargon; here are the practical wins:
- Slash Your Development Costs: By not needing separate iOS and Android teams, you can cut development costs by up to 40%. That’s a massive saving, whether you're a lean startup or a large enterprise.
- Get to Market Faster: A single codebase means you build features once and ship them to all your users at the same time. This is huge for testing your MVP, getting crucial feedback, and iterating way more quickly.
- Hire a Team More Easily: You only need to find developers who know JavaScript and React. That talent pool is enormous compared to hunting for specialized Swift and Kotlin experts.
The real magic of React Native is that it lets your team focus on what your app actually does for the user. You'll spend more time perfecting the user experience and less time chasing down platform-specific bugs.
React Native vs Native Development at a Glance
For those who need a quick visual breakdown, this table highlights the key differences and shows why React Native is so often the right call, especially for new projects.
| Factor | React Native (Cross-Platform) | Traditional Native (iOS/Android) |
|---|---|---|
| Development Cost | Significantly lower. One team, one codebase. | High. Requires two separate teams and codebases. |
| Speed to Market | Fast. Build and deploy to both stores simultaneously. | Slower. Sequential or parallel development doubles the timeline. |
| Team Management | Simpler. Hire from a large pool of JavaScript/React devs. | Complex. Need specialized Swift/Objective-C and Kotlin/Java devs. |
| Code Maintenance | Efficient. Update one codebase for both platforms. | Redundant. Fixes and updates must be done twice. |
| Audience Reach | Maximum. Launch on iOS and Android from day one. | Limited. Often forces a choice to launch on one platform first. |
Ultimately, React Native gives you a massive head start without sacrificing quality.
More Than Just a Framework
React Native has come a long way since its early days. Today, it’s a mature, robust ecosystem packed with tools and libraries for everything from slick animations to complex navigation, all while delivering a user experience that feels completely native. For the vast majority of apps, the performance is indistinguishable from one built the "traditional" way.
It provides a solid foundation for almost any mobile project. For a deeper dive into what’s possible, check out our guide on https://www.rapidnative.com/blogs/mobile-development-react.
Of course, choosing the framework is just one piece of the puzzle. It's also smart to understand the broader challenges and solutions for mobile apps to see the full picture. By starting with React Native, you're setting your project up for an efficient, scalable, and successful launch.
Your 15-Minute Development Environment Setup
Let’s be honest, the initial setup for a new app project can be a real slog. It’s often a maze of complex installations and cryptic configurations that can stop an idea in its tracks. We're going to sidestep all of that. My goal here is to get you from a blank slate to a running React Native app on your phone in about 15 minutes. Seriously.
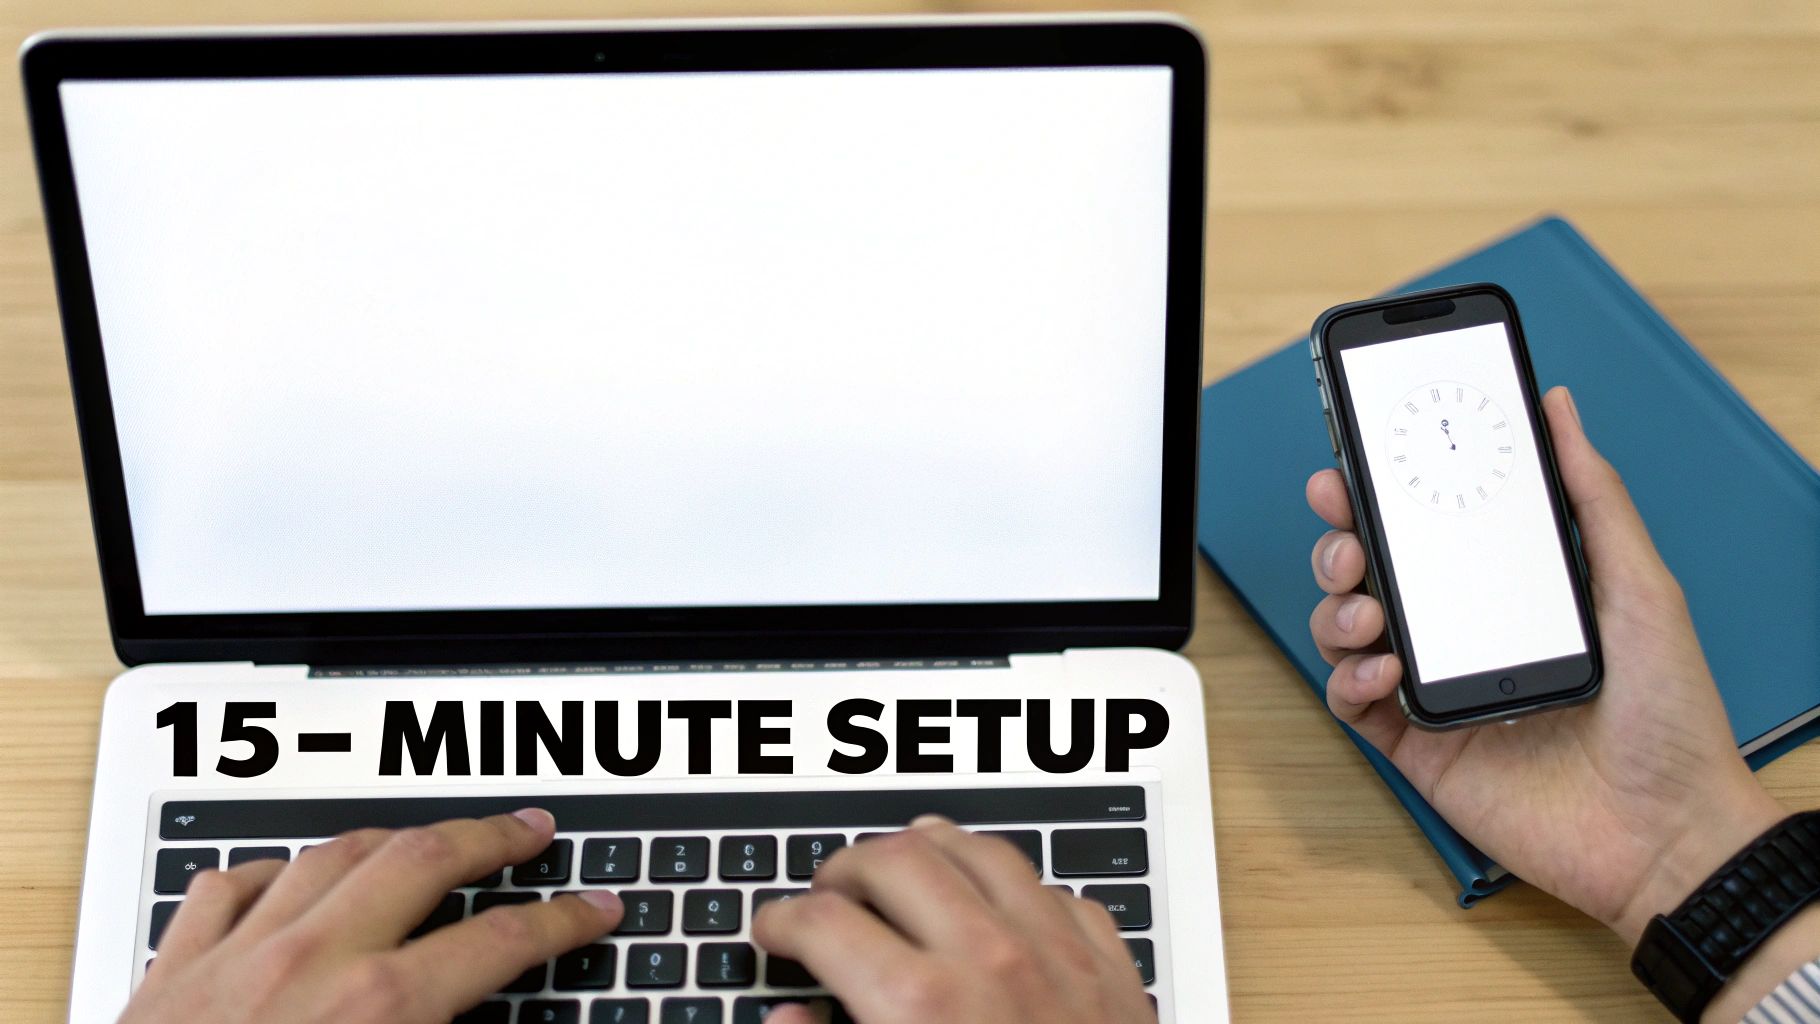
The magic ingredient for this speedy start is an app called Expo Go. Think of it as a sandbox on your phone that can instantly load and run the app you’re building on your computer. This completely removes the need to install and configure heavy-duty tools like Xcode or Android Studio—a process that can easily eat up hours and is often a major roadblock, especially for non-developers.
The Only Two Tools You Need
To pull this off, you only need two things installed on your computer. The good news is, the process is dead simple and works the same whether you’re on a Mac, Windows, or Linux machine.
- Node.js (LTS version): This is the JavaScript engine that actually runs React Native. Head over to the official Node.js website and grab the version marked "LTS" (Long-Term Support). Just click through the installer, and you're good to go.
- Expo CLI: This is the command-line assistant that helps you create and manage your projects. With Node.js installed, you can pop open your terminal and install it with one simple command.
To install the Expo Command Line Interface (CLI), open your terminal (on Mac) or Command Prompt/PowerShell (on Windows) and run this:
npm install -g expo-cli
This command uses npm (Node Package Manager), which comes bundled with Node.js, to install the Expo tools globally on your system. That just means you can run the expo command from any folder.
A Quick Note for Founders & PMs: Don't let the term "command line" scare you off. For our purposes, it’s just a place to copy and paste a couple of commands. This small step is your bridge from a static Figma design to a real, interactive product you can hold in your hand.
Creating Your First Project
With those tools in place, it’s time to create the actual app. A single command will generate a new folder with a basic, ready-to-run project inside.
First, navigate in your terminal to wherever you want to keep your project, like your Desktop. You can do that by typing cd Desktop. Once you're there, run this command:
npx create-expo-app MyFirstApp
The script will ask you to pick a template. Just hit Enter to select the default "blank" template. It will then chug away for a minute, downloading all the necessary files into a new folder called MyFirstApp. If you want to dive deeper into the different templates, our guide on how to create an Expo app has a great breakdown.
Once it's done, you're just two commands away from seeing your app. First, move into the new project directory with cd MyFirstApp. Then, kick off the development server:
npm start
You'll see a big QR code pop up in your terminal. Now, just open the Expo Go app on your phone (which you can grab from the App Store or Google Play), scan that code, and voilà! Your brand-new app will load right on your screen. You’ve just gone from zero to a fully functioning development setup.
Building Your First Screen with a Simple Prompt
Alright, with your development environment set up and running, we get to the fun part. This is where we pivot from the traditional, code-first way of doing things and step into a workflow that feels more like having a conversation with a design-savvy developer. Forget writing dozens of lines of code; you're about to build your first screen using plain English.
This process completely changes the game, especially for founders, product managers, or anyone who wants to see their ideas come to life without waiting on a full development cycle. We'll use RapidNative to translate a simple idea directly into a working UI component.
Turning an Idea into a Component
Let's say we're building a new fitness app. The first thing any user will see is the login screen. Typically, this means a designer drafts a mockup in Figma, which a developer then painstakingly translates into code. We're going to skip all that.
First, you'll need to sign up on the RapidNative platform and kick off a new project. You’ll be greeted by a simple input area that looks a lot like a chat window. This is your canvas. Here, you'll describe the UI you want to build. The trick is to be descriptive but not overly complicated.
For our fitness app, a good starting prompt would be something like this:
"Create a login screen with a header that says 'Welcome Back'. It should have an email field, a password field, and a large login button. Below the button, add a small text link for 'Forgot Password?'"
Once you hit enter, the AI kicks into gear. In just a few seconds, it generates a fully functional React Native screen that perfectly matches your description.
You can see the prompt on the left and the resulting UI preview on the right.
What you’re looking at isn't just a static picture. It’s a live, interactive preview of a real React Native component, ready to be dropped right into your project.
Iterating and Refining with Follow-Up Commands
Of course, the first draft is rarely the final one. This is where a chat-driven workflow really proves its worth. You don't have to open a design tool or mess with style sheets to make adjustments. You just keep the conversation going.
Let's say that default login button is a bit bland. We can match it to our fitness app's brand in seconds.
- Prompt: "Make the login button a vibrant purple and change the button text to 'Let's Go'."
- Result: The button color and text update instantly in the live preview.
Maybe the header doesn't pop enough.
- Prompt: "Increase the header font size to be much larger and bold."
- Result: The "Welcome Back" text immediately becomes more prominent.
This back-and-forth is incredibly efficient. You can tweak spacing, colors, fonts, and even the layout with simple text commands. It empowers designers and product folks to experiment with UI variations on their own, dialing in the look and feel without writing a single line of code.
This approach completely transforms prototyping. Instead of talking about abstract changes in a meeting, you can make them on the fly and see the results instantly. UI creation shifts from a rigid, step-by-step process to a dynamic and collaborative one.
The Power of an AI-Accelerated Workflow
This way of building UI is quickly becoming the new normal. The incredible growth of React Native already shows a huge industry shift toward building apps faster and cheaper. When you pair that with AI, things get really interesting. With nearly 40% of GitHub React repositories now using AI-assisted tools, it's clear that AI builders like RapidNative are a natural fit. For more insights on this trend, check out these ReactJS statistics from esparkinfo.com.
This synergy is what enables a non-technical founder to spin up a React Native prototype that looks and feels like it was built by a seasoned team. And these aren't just flimsy mockups—they're built on a solid, production-ready foundation.
What’s Happening Under the Hood
It's worth taking a moment to understand what RapidNative is actually building for you. When you enter a prompt, the AI isn't just spitting out a picture; it's generating several key assets:
- Clean, Readable Code: The output is a high-quality React Native component written in TypeScript, the standard for any serious, scalable project.
- Consistent Styling: It manages all styling with NativeWind, a utility-first CSS framework for React Native. This keeps your design system consistent and makes it dead simple for developers to customize later.
- A Real Component: The generated screen is a standard
.tsxfile, ready to be dropped into any React Native project built with Expo.
By generating production-quality code right from the start, this workflow gets rid of that all-too-common problem where prototypes get thrown away and rebuilt from scratch by engineers. You're creating the actual building blocks of your application from day one.
Assembling a Multi-Screen App with Navigation
A single screen is a great start, but a real app is a journey. Users need to move seamlessly from a login page to a dashboard, browse content, and manage their settings. This is where navigation comes in, and let's be honest, it's traditionally one of the more tedious parts of building a mobile app. Wiring up different screens and managing user flows can be a significant undertaking.
But what if you could handle the heavy lifting in minutes? Building on the fitness app login screen we just created, let's construct the rest of the core user experience.
The entire workflow boils down to a simple, powerful loop: prompt, generate, and refine.
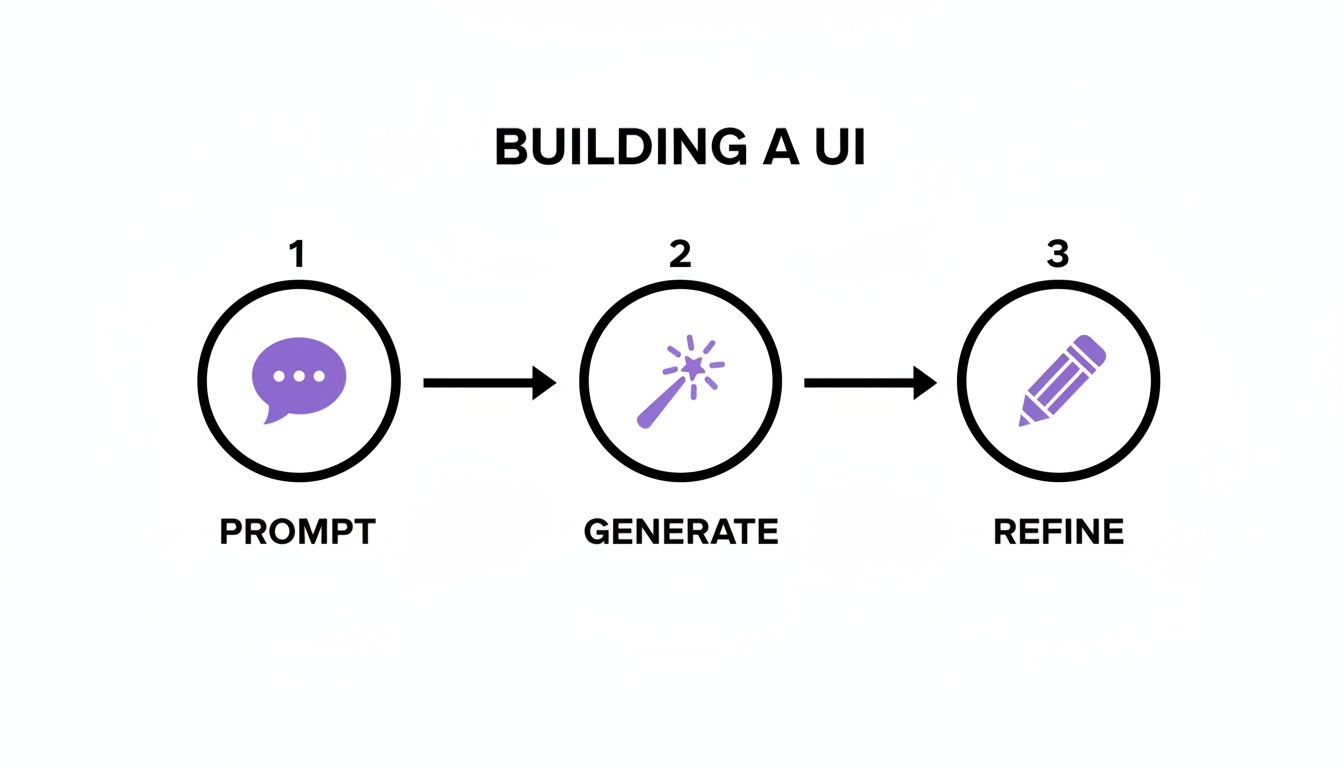
As you can see, app creation becomes less about rigid technical steps and more about a fluid, iterative dialogue. You move from a simple text idea to a generated component and then fine-tune it, all within a conversational loop.
Expanding Your App with More Screens
Our fitness app obviously needs more than just a login page. We'll want a main dashboard, a place to browse workouts, and a profile section. Using the same prompt-based approach, we can generate these screens one by one.
Here are the prompts I used:
- Dashboard: "Create a dashboard screen with a welcome message at the top, followed by a summary card showing 'Today's Workout'. Below that, add a horizontal list of cards for 'Recommended Classes'."
- Workout Library: "Design a screen titled 'Workout Library'. Include a search bar at the top and a vertical list of workout items. Each item should have an image, a title like 'Full Body Strength', and the duration."
- Profile Page: "Build a user profile screen. It should display a circular user avatar at the top, the user's name, and a list of options like 'My Stats', 'Settings', and 'Log Out'."
Just like that, we've scaffolded the three core views for our application. Each one is a distinct, well-structured React Native component, ready for the next step.
Wiring It All Together with Tab Navigation
Okay, we have our screens. Now we need a way for users to switch between them. The most common pattern here is a tab bar at the bottom—something you see in almost every app. Manually coding this involves installing navigation libraries, configuring a navigator, and linking each tab to the correct screen component.
Instead, we can just describe what we want.
Prompt: "Add a tab bar navigation with icons for Dashboard, Workouts, and Profile. Set the Dashboard as the default home screen."
In a matter of seconds, the tool generates all the necessary navigation code. It understands concepts like stack navigators (for flows where you move forward and back) and tab navigators (for switching between main sections). The result is a fully interactive prototype where you can tap between the Dashboard, Workouts, and Profile screens we just created.
This approach is so effective because the React Native ecosystem is incredibly mature. React Native currently holds 32% of the cross-platform framework market share, well ahead of competitors like Ionic. This strong foundation allows tools like RapidNative to generate UI from prompts, images, or even Figma designs, letting you test flows on a real device almost instantly. You can find more framework comparisons over at Bacancy Technology.
Validating the Entire User Journey
The real magic here isn't just the speed; it's the ability to validate a complete user experience before a developer has written a single line of custom navigation logic.
- For Founders: You can now present a clickable prototype to investors that shows the entire app flow, not just a collection of static screens.
- For Product Managers: You can test the logic of your navigation. Does the flow make sense? Is anything missing?
- For Designers: You get to feel how the app works in your hand, spotting awkward transitions or confusing layouts early in the process.
This ability to quickly piece together a React Native app's navigational skeleton is a game-changer. It closes the gap between static design and a functional product, allowing you to test, iterate, and perfect the core user journey with incredible efficiency.
From Prototype to Production-Ready Code
This is where the magic really happens—the moment a concept graduates from a simple prototype into a real, scalable product. Once you've pieced together your screens and navigation, the next move is exporting the code. With a tool like RapidNative, what you get isn't some dead-end design file or a locked-in project. It's clean, professional React Native code that a developer can pick up and run with.
This isn’t just about moving fast; it’s about starting with quality. The exported code is built on a foundation that professional developers not only respect but expect.
- TypeScript: Right out of the gate, the code is type-safe. This makes it far more robust and easier for a team to maintain as the app inevitably grows.
- Expo: The entire project is scaffolded using the Expo framework, which dramatically simplifies the development, build, and deployment process for both iOS and Android.
- NativeWind: For styling, it relies on NativeWind, a utility-first CSS framework that makes the UI consistent and incredibly easy to customize without writing tons of stylesheet code.
The end result is a codebase that feels like it was written by hand. Developers aren't left untangling a messy, machine-generated knot. They're handed a well-organized starting point that saves them from the soul-crushing work of setting up boilerplate.
A Quick Look at the Code Quality
Even if you're not a developer, it's easy to see the difference clean code makes. The project structure is logical and human-readable, which means an engineer can jump right in and know exactly what’s going on.
Here’s a small snapshot of what a generated component might look like. Notice how clear and descriptive everything is—no guesswork required.
import { View, Text, TextInput, TouchableOpacity } from 'react-native';
import { styled } from 'nativewind';

const StyledView = styled(View);
const StyledText = styled(Text);
const StyledTextInput = styled(TextInput);
const StyledTouchableOpacity = styled(TouchableOpacity);

export function LoginScreen() {
  return (
    <StyledView className="flex-1 items-center justify-center bg-gray-50 p-4">
      <StyledText className="text-3xl font-bold mb-8 text-gray-800">
        Welcome Back
      </StyledText>
      <StyledTextInput
        className="w-full h-12 border border-gray-300 rounded-lg px-4 mb-4"
        placeholder="Email"
        keyboardType="email-address"
      />
      <StyledTouchableOpacity className="w-full h-12 bg-purple-600 rounded-lg items-center justify-center">
        <StyledText className="text-white font-bold text-base">
          Let's Go
        </StyledText>
      </StyledTouchableOpacity>
    </StyledView>
  );
}
This clean foundation is what sets a project up for long-term success, making it easy to build upon and maintain.
Bridging the Gap for Every Role
The true power of this export function is how it closes the gap between idea, design, and engineering. It's a translator that turns a vision into a tangible, actionable asset that benefits everyone on the team.
The handoff is where ideas become reality. Instead of giving a developer a static design and a list of requirements, you’re handing them a running start with the foundational UI already built and structured correctly.
This workflow is a game-changer for the complex journey of turning pixels into a product, a process we dive into deeper in our guide to converting designs into functional code.
For a Founder or Product Manager Your goal is to get your vision into the hands of users, fast. With an exported codebase, you can hire a freelancer or agency and give them a massive head start. Instead of burning budget on having them build login screens and settings pages from scratch, their time is focused on what really matters: your app’s core business logic, backend connections, and API integrations.
For a Designer The handoff to development is notorious for misinterpretation. Details get lost, animations are clunky, and the final product feels... off. By providing an interactive prototype and its underlying code, you remove the ambiguity. The engineering team can see, touch, and feel how the app is supposed to work, ensuring the final product is faithful to your intent.
For a Developer Let's be honest: when you create a React Native app, the initial setup and UI boilerplate can be a grind. This workflow eliminates that friction. You can dive straight into the interesting work—state management, API integrations, and performance tuning. You get to focus on the complex engineering that delivers real value, not on recreating buttons and forms for the hundredth time.
Once you have this solid foundation, a comprehensive guide can be a lifesaver for the next steps. This practical Expo React Native tutorial for production-ready apps is an excellent resource for tackling the journey from a working prototype to a polished application.
A Few Common Questions We Get
As you start turning your idea into a real app, some practical questions always pop up. Let's tackle a few of the most common ones we hear to help you figure out what comes next.
Do I Need to Be a Coder to Do This?
Not at all. You can generate all your initial screens and navigation without writing a single line of code. This workflow is a game-changer for founders and designers who want to build out a functional prototype on their own.
However, once you're ready to add the real brains to the operation—things like backend logic, database connections, or custom features—you'll want to hand the exported code over to a developer. The big win here is that you're giving them a clean, structured codebase, not just a static design file.
What's the Difference Between Expo Go and an App Store Build?
Think of Expo Go as your personal development sandbox. It's a fantastic tool that lets you run and test your project on your phone almost instantly, skipping the complicated build process. It’s built for quick, iterative changes.
When you're ready to go public, you'll use a service like EAS Build to create the final production files—an
.ipafor iOS and an.aabfor Android. These are the official packages you submit to the app stores. Our guide sticks with the Expo Go workflow to keep things fast and simple.
Can I Add This Code to an App I Already Have?
Absolutely. The screens and components you generate are self-contained and follow standard React Native conventions. A developer can easily copy the new UI files into an existing project and wire them into the navigation.
This makes it a really effective way to quickly add new features to an established app, not just for building something from the ground up.
Okay, I've Generated the UI. What Now?
Once the UI is ready, the next step is to bring it to life by adding functionality. This is where a developer typically steps in to connect the screens to a backend server or an API.
These connections are what power the features your users will actually interact with, like signing in, saving data, or making payments. The code you've already generated gives them the perfect foundation to start building this logic right away, which saves a ton of time and effort.
Ready to turn your app idea into a functional prototype in minutes? RapidNative lets you generate production-ready React Native code from simple text prompts. Start building for free at https://www.rapidnative.com.
Ready to build your app?
Turn your idea into a production-ready React Native app in minutes.
Free tools to get you started
Free AI PRD Generator
Generate a professional product requirements document in seconds. Describe your product idea and get a complete, structured PRD instantly.
Try it freeFree AI App Name Generator
Generate unique, brandable app name ideas with AI. Get creative name suggestions with taglines, brand colors, and monogram previews.
Try it freeFree AI App Icon Generator
Generate beautiful, professional app icons with AI. Describe your app and get multiple icon variations in different styles, ready for App Store and Google Play.
Try it freeFrequently asked questions
What is RapidNative?
RapidNative is an AI-powered mobile app builder. Describe the app you want in plain English and RapidNative generates real, production-ready React Native screens you can preview, edit, and publish to the App Store or Google Play.
Can I export the code?
Yes. RapidNative generates clean React Native and Expo code that you can export at any time. No lock-in, no proprietary format. Hand it to your developers or keep building inside RapidNative.
Is RapidNative free to use?
Yes. You can build apps on the free plan with no credit card required. Paid plans unlock unlimited AI generations, code export, and direct publishing to the App Store and Google Play.
Do I need to know how to code?
No. Most users build apps by describing what they want in plain English. Developers can drop into the code whenever they want more control, but coding is optional.
How long does it take to build an app?
Most users have a working first screen in under a minute. A full MVP usually takes a few hours instead of the weeks or months traditional development requires.