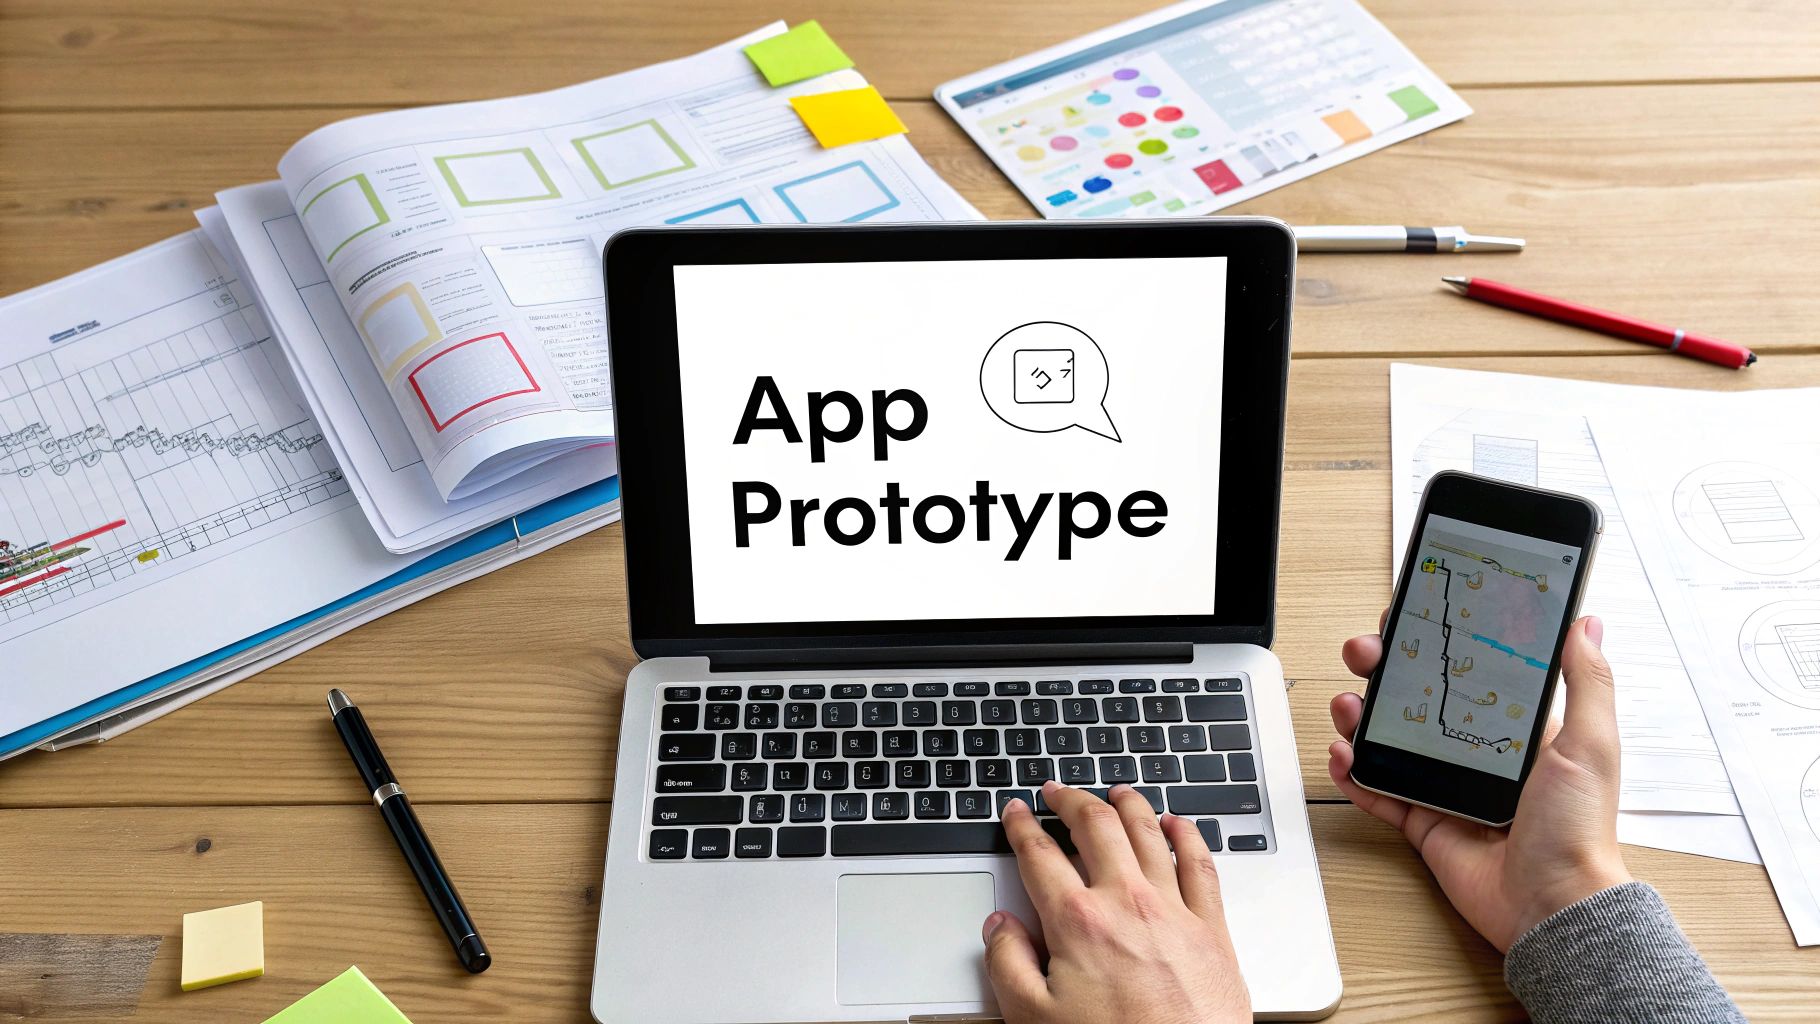
How to Make a Prototype That Brings Your App Idea to Life
A practical guide on how to make a prototype for your app. Go from a rough idea to a testable React Native UI with actionable steps and real-world examples.
By Paridhi
8th Jan 2026
Last updated: 8th Jan 2026
So, you have an idea for a mobile app. In the past, the next step was a long, expensive process of hiring designers and developers. But today, you can use AI-powered tools to turn a text description into a functional mobile UI in minutes. This guide is for founders, product managers, and designers who need to get a testable app concept off the ground fast, without writing a single line of code. The goal is to get from a thought to an interactive demo you can hold in your hand as quickly as possible.
The Modern Way to Make a Prototype
Staring at a blank screen with a great app idea can be daunting. For a long time, the journey from concept to a clickable prototype was a slow, expensive grind that could take months of design and coding work. That's just not the reality anymore. The tools available today have completely changed the game, making it possible for anyone to build and test a mobile product idea in a hurry.
This guide will walk you through exactly how to create a mobile prototype in this new landscape. We’ll show you how AI platforms have flipped the script, turning a simple idea into an interactive app you can actually use. To make this concrete, we'll build a basic fitness tracking app together. You'll see firsthand how to get a working UI ready for feedback in a tiny fraction of the time it used to take.
From Idea to Product in Record Time
The modern prototyping workflow is all about a direct, iterative loop. This visual gives you a sense of just how quickly an idea can become a real product when you have the right tools at your disposal.
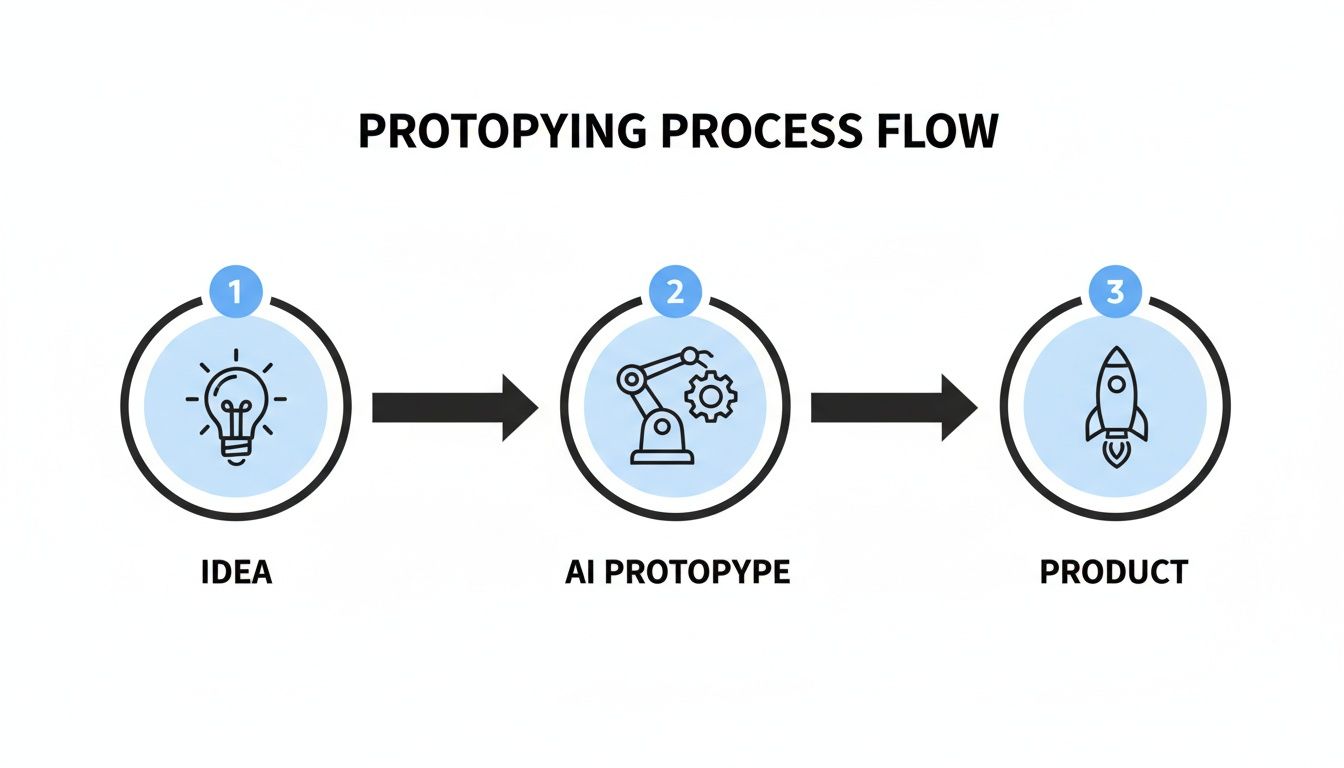
This streamlined approach means prototyping is no longer locked away for just designers or engineers. It's now a practical tool for innovation that the entire product team can use.
The Shift to Accelerated Development
This change is more than just a new tool; it's a fundamental shift in how mobile apps get built. The move toward low-code and no-code platforms is one of the biggest shakeups in the industry. Projections show that by 2026, more than 50% of app prototypes and MVPs will be created using these faster methods. This is completely reshaping how product teams test their ideas before sinking major time and money into development.
Here’s a quick look at how the old and new ways of prototyping stack up against each other.
Prototyping Approaches: Old vs. New
| Aspect | Traditional Prototyping | AI-Powered Prototyping |
|---|---|---|
| Speed | Weeks or months | Minutes or hours |
| Required Skills | UI/UX design, coding (Swift/Kotlin) | Idea articulation, prompt writing |
| Output | Static design files (Figma, Sketch) | Interactive UI, exportable code |
| Iteration Cost | High (requires dev/design time) | Low (adjust a prompt and regenerate) |
| Accessibility | Limited to technical teams | Open to founders, PMs, designers |
As you can see, the new approach removes significant barriers, making prototyping faster and more inclusive for the whole team.
The real magic of this modern approach is that your prototype isn't a dead end. Unlike old design tools that just spit out static images, AI-driven platforms like RapidNative generate real, exportable React Native code. This bridges the gap between prototyping and actual production.
For a great deep dive, check out this actionable guide on how to build a product prototype from Aakash Gupta. It lays out some practical steps that pair nicely with the AI-first methods we're covering here.
And if you want to get a better handle on the tools out there, we've put together a breakdown of the top mobile app prototyping software you should know about. In this new reality, prototyping becomes a dynamic, valuable step for everyone involved.
Defining Your App's Core User Flow
Before you can build anything, you need a plan. It’s tempting to jump straight into designing screens, but a little upfront thinking about your user's journey will save you from headaches and rework later. This plan is your app’s core user flow—the essential path a user takes to solve their main problem.
This isn’t about creating pixel-perfect wireframes. It's about mapping out the must-have steps. Think of it like outlining the chapters of a book before you start writing; you need to know the beginning, middle, and end for the story to make sense. A clear flow ensures your prototype feels logical and gives the AI a solid roadmap to follow.
Let's stick with our fitness app example. The main goal is for a user to track a workout. So, what are the absolute must-have screens to make that happen?
- Login/Sign-up Screen: The front door. Everyone needs a way in.
- Dashboard: The home base, where users see a quick summary and can kick off a new activity.
- Workout Log Screen: This is where the core action happens—the screen for actually inputting exercise details.
- Progress Tracker: A straightforward view to see their history or recent achievements.
These four screens are our critical path. Everything else—a settings page, a social feed, a detailed nutrition calculator—is noise for now. We can worry about those later.
Sketching a Simple Flow Diagram
Once you've listed your key screens, it's time to visualize how they connect. You don't need fancy software. A whiteboard, the back of a napkin, or a simple tool like FigJam works perfectly. The goal is to create a simple diagram showing the navigation between screens.
For our fitness app, the flow is straightforward:
- A user opens the app and lands on the Login Screen.
- After a successful login, they're taken to the Dashboard.
- On the Dashboard, they tap a "Start Workout" button, which navigates them to the Workout Log Screen.
- After they finish and save the workout, they are sent to the Progress Tracker to see their latest entry added to the list.
This simple map instantly clarifies the relationships between your screens. It becomes the instruction manual you'll use when writing your prompts, ensuring the AI builds a connected experience instead of just a pile of unrelated UIs.
A well-defined user flow is the single most important input you can give an AI prototyping tool. It turns your abstract idea into a concrete, buildable structure and leaves no room for the AI to guess wrong.
Prioritizing Features for Your First Prototype
I’ve seen this happen a hundred times: a team gets excited and tries to cram every feature from their grand vision into the very first prototype. That's the fastest way to get bogged down. A prototype’s job isn't to be the final product; it's to validate the core idea as quickly and cheaply as possible. You have to be ruthless with your prioritization.
Just ask yourself one question: "What is the absolute bare minimum a user needs to test my core concept?"
For our fitness app, logging a workout is essential. Viewing a complex, multi-year progress chart? Definitely not. Adding friends is a "nice-to-have," but a functional dashboard is a "must-have." By focusing on this core loop, you keep the prototype lean, which means the feedback you get will be focused on what truly matters. This clarity is what lets you go from a rough sketch to a testable app that gives you real, valuable insights in no time.
Generating Your UI with Effective Prompts
Okay, you’ve mapped out your user flow. Now for the fun part: bringing those ideas to life and actually building the screens. This is where you tell the AI exactly what you want your prototype to look and feel like. The quality of your prompts here is everything. Think of it like an architect giving a blueprint to a construction crew—the more detail you provide, the closer the final build will be to your vision.
If you just say, "make a login screen," you're going to get something bland and generic. It'll work, but it won't be your app. A great prompt is descriptive, specific, and doesn't leave room for guesswork. It tells the AI not just what to build, but how to build it.

From Vague Ideas to Specific Instructions
Let's put this into practice with our fitness app. We'll start with the login screen, which is the front door to the whole experience. Instead of being lazy, we'll get specific about the layout, components, and style.
Vague Prompt (The kind to avoid):
Create a login screen.
This forces the AI to guess about your brand, what users need, and the overall design. The result is usually underwhelming.
Effective Prompt (This is what you're aiming for):
Create a login screen with a dark theme. It should have a large app logo at the top. Below the logo, include two text input fields: one for 'Email Address' and one for 'Password'. Underneath the inputs, add a primary call-to-action button that says 'Log In', styled with a bright blue background. Finally, add a small, light gray text link at the bottom that says 'Forgot Password?'.
See the difference? The second prompt gives the AI the critical details: color themes, component types, exact text for labels, and even a basic visual hierarchy. This is how you get a screen that looks intentional and feels right from the very first try.
Prompting Key Screens for Our Fitness App
Let's use this detailed approach to build out the rest of the core flow. You can use these prompts as a starting point for your own projects.
- Dashboard Prompt:
- "Generate a dashboard screen titled 'My Activity'. It should feature a large summary card at the top showing 'Today's Workout' with placeholder stats for duration and calories. Below this, include a list of 'Recent Workouts', where each item displays the workout name, date, and a small right-arrow icon to indicate it's tappable. Add a floating action button in the bottom-right corner with a plus icon for starting a new workout."
- Workout Log Prompt:
- "Design a 'Log New Workout' screen. Start with a text input for 'Workout Name'. Add a section with plus and minus stepper controls to set 'Duration (in minutes)'. Include a large text area for 'Notes'. At the bottom, place two buttons side-by-side: a primary 'Save Workout' button and a secondary 'Cancel' button."
Notice how these prompts don't just list elements. They describe relationships and imply functionality, which is crucial for getting back a useful UI structure.
The goal of a good prompt isn't just to describe what the screen looks like, but to imply how a user will interact with it. Mentioning icons, button states, and navigational cues helps the AI generate more intuitive and functional code.
Describing Navigation and Visuals
A solid prototype is more than a folder of static screens; it's an interconnected system. Your prompts should reflect that. When prompting the dashboard, mentioning that the "plus icon" is for "starting a new workout" gives the AI valuable context about its purpose, making it much easier to hook up the navigation flow later.
Adding visual elements like icons is just as straightforward. Don't just say "add an icon." Be specific:
- "Use a gear icon for the settings button."
- "Place a magnifying glass icon inside the search bar."
- "Show a calendar icon next to the date."
This level of detail ensures the AI uses symbols that people instantly recognize, making your UI much easier to scan and use. This ability for AI to understand nuanced requests is becoming the norm. In fact, 63% of mobile app developers are already using AI features in their development process. It's not just for behind-the-scenes automation, either—about 70% of mobile apps now use AI to directly improve the user experience. You can read more about how AI is shaping mobile app development to see where things are headed.
Turning a Sketch into a Coded Screen
Sometimes, words don't cut it. For those moments when you've already sketched an idea on a whiteboard or in a notebook, you can use that image as your prompt.
Tools like RapidNative can look at a visual layout and translate it directly into code. Instead of writing out a long text prompt, you can upload a picture of your sketch and just say:
"Build a React Native screen based on this drawing."
The AI will analyze the shapes, text, and structure in your image to generate the UI. This is a game-changer for visual thinkers and teams that love to brainstorm on whiteboards. It completely closes the gap between a rough napkin sketch and a digital, interactive screen, letting you make a prototype from the rawest version of your idea.
Refining Your Prototype with AI Chat
Getting that first screen generated is a great start, but it's just that—a start. The real magic happens in the back-and-forth, the quick, conversational tweaks that come next.
Think of the AI as a junior developer you can direct in plain English. This completely changes the iteration cycle. Instead of waiting for a designer's schedule to open up or for a developer to push a new build, you can dial in your UI with simple commands, making changes as fast as you can type them.
This immediate feedback loop is where your ideas come to life. You can go from a decent first draft to a polished screen in just a few minutes. It's the perfect way to incorporate feedback from stakeholders or just follow your own gut instincts without ever needing to touch a line of code. Let's run through a real-world refinement cycle for our fitness app's dashboard to see how this plays out.
Making Small Stylistic Tweaks
Let's say the AI generated a dashboard with a default blue color scheme, but your brand guide is all about green. Or maybe the text feels a little too crowded. These are the small-but-critical details that used to mean firing up Figma and sinking time into minor edits.
Not anymore. Now, you just ask.
You can make incredibly precise adjustments with simple chat prompts:
- "Change the primary button color to a vibrant green, hex code #10B981."
- "Increase the font size for the 'My Activity' title to 24px and make it bold."
- "Add 16px of vertical spacing between the items in the 'Recent Workouts' list."
Every command instantly updates the UI you see on screen. But this isn't just a visual trick; the underlying React Native code is being rewritten on the fly. This gives you the freedom to experiment with different styles and layouts until the screen feels just right.
Reconfiguring the Screen Layout
What about bigger changes? Beyond tweaking colors and fonts, you can perform major surgery on your screen's layout. After looking at the dashboard, maybe you realize the summary stats are the most important thing and need to be front and center.
You can rearrange, add, or remove entire components just as easily:
- "Move the summary stats card to the very top of the screen."
- "Add a new icon button for 'Settings' in the top-right corner of the header, using a gear icon."
- "Remove the floating action button entirely."
This conversational approach to editing is so powerful because it mirrors how product teams actually think. Ideas rarely start as detailed specs; they start as simple questions. "What if we moved this up here?" or "Could we add a search bar?" Now, your prototyping tool understands and executes those ideas instantly. This fluid process is a huge advantage when building internal tools, where speed and function often take priority. We cover this in more detail in our guide on how to prototype internal tools for mobile apps.
The real win with chat-driven refinement is how it completely removes the friction between an idea and its implementation. You don't need a translation layer. Your thoughts, spoken in natural language, become the direct input for changing the UI.
Adding New Components on the Fly
But what if you realize the dashboard is missing a key piece of functionality? For our fitness app, let's say we want to add a weekly goal tracker to keep users motivated. Instead of going all the way back to the drawing board, you can just describe the new component you need.
You could prompt the AI with something like this:
"Below the 'Today's Workout' card, add a new section titled 'Weekly Goal'. Inside, put a progress bar showing 75% completion. Under the bar, add a small text label that says '3 out of 4 workouts completed'."
The AI gets to work, generating the new React Native components for the title, progress bar, and label, and then seamlessly slots them into the existing screen layout. This ability to build a complex UI piece by piece is what makes this approach so effective. You can start with a basic skeleton and layer on more detail and functionality as your idea takes shape. It makes the entire process feel more organic and a lot less rigid than a traditional design sprint.
Testing Your Prototype on a Real Device
A design that looks perfect on your big monitor is one thing. How it feels in your hand is something else entirely. Until you get your prototype onto an actual device, it's all just a collection of pretty pictures. The real magic—and the real test—happens when your app makes that jump from screen to smartphone.
This is where the rubber meets the road. Using a tool like RapidNative, you can push your creation directly to an iOS or Android phone in minutes. We're not talking about a laggy web preview; this is a live, interactive build running natively on your device. In this real-world context, you’ll immediately spot the things you can’t see on a desktop, like awkward button placements or confusing navigation flows.
How to Get Feedback That Actually Helps
With the app on a phone, your next job is to get it in front of actual people. Forget the formal usability lab with two-way mirrors. Just grab a colleague, a friendly customer, or even a family member who fits your target audience. The aim here is fast, informal feedback you can act on immediately.
Hand them the phone and give them a simple scenario. For our fitness app example, you might say, "Pretend you just got back from a run. Show me how you'd log it."
Then comes the most critical part: be quiet and watch.
Pay attention to where their finger goes, where they pause, and what they try to tap. Their unfiltered actions will tell you more than their words ever could.
A pro tip: Avoid leading questions like, "Was that easy?" It just encourages people to be nice. Instead, ask something open-ended, like, "What did you think would happen when you tapped that button?" This prompts genuine insight, not just validation.
Key Questions to Focus Your Testing
To make these quick sessions productive, you need to know what you're looking for. You're trying to validate the usability, the overall flow, and the design's effectiveness.
Here are a few questions to guide the process:
- Does the main flow make sense? Can someone new to the app complete the most important task without any help?
- Is the navigation clear? Can users move between screens easily, or do they look lost?
- Are the interactive elements obvious? Is it clear what's a button and what's just text or an image?
- Does the layout feel right on a phone? Is the most critical information on each screen impossible to miss?
Thankfully, this whole cycle is much faster than it used to be. Modern tools and cross-platform frameworks have completely changed the game. Flutter, for instance, now has around 1 million monthly active developers and is behind an estimated 30% of apps on iOS alone. That’s a huge shift, showing how building for multiple platforms at once is now the standard. You can dive deeper into these trends in this article on the future of mobile apps from OpenForge.io.
What this really means is you can now build a prototype, test it with real users, and incorporate their feedback all in the same afternoon. A process that once took weeks can now be done in hours. Finding and fixing those usability problems early saves a massive amount of time and money down the line.
Exporting Production-Ready Code
This is where AI prototyping truly separates itself from traditional design tools. With most tools, the design process hits a dead end. You’re left with a collection of pretty pictures that developers have to painstakingly rebuild from scratch. But with a tool like RapidNative, your AI-generated prototype is the first step of your actual product.
The final move is to export clean, modular, and production-ready React Native code, bridging that all-too-common gap between a testable concept and a real, scalable application.
For non-technical founders or product managers, this changes everything. You’re not just handing over a folder of static mockups; you're delivering a well-structured, working project. And for developers? This export shaves days, if not weeks, off the initial setup. They get to skip the grunt work of building UI from the ground up and jump straight into extending a functional codebase.

What Your Developer Receives
When you export, you're not getting a few isolated code snippets. You are getting a complete, runnable React Native project. This is a crucial distinction.
The exported folder comes with everything a developer needs to hit the ground running:
- Organized Component Files: Every UI element you created—buttons, cards, input fields—is already a separate, reusable component. This makes the app far easier to maintain and scale.
- Screen and Navigation Structure: The screens you laid out are properly scaffolded, and the navigation logic is already wired up. So, that button on the dashboard that’s supposed to lead to the workout log? It already works.
- Dependencies and Configuration: The
package.jsonfile and all other necessary configurations are included. A developer can literally just runnpm installand launch the app in a simulator.
This out-of-the-box usability is a massive win. It completely sidesteps the tedious, error-prone task of translating a visual design into code, which is often a major bottleneck when teams make a prototype. To dive deeper into this workflow, check out our guide on turning design into code.
The biggest advantage of an AI-driven, code-first approach is that there is zero wasted effort. Every refinement made during the prototyping phase is directly reflected in the final source code, ensuring a smooth handoff and a much faster path to production.
This seamless transition from idea to code is what makes this process so powerful. You can move from a concept to an interactive prototype and then to a developer-ready codebase without ever losing momentum. The initial build becomes a simple command, not a multi-week project, freeing up your team to focus on building features instead of boilerplate UI.
Your Prototyping Questions Answered
Even with tools that feel like magic, jumping into prototyping can bring up a lot of questions. Let's clear up some of the most common ones.
Who really gets the most out of AI prototyping?
While developers can get a speed boost, the game truly changes for the non-technical folks: founders, product managers, and UX designers. For the first time, they have a direct path to build and test their ideas without getting stuck in the engineering queue.
This whole approach democratizes the creation process. It means anyone with a solid vision can make a prototype that people can actually tap through on a real phone. It’s all about moving faster and figuring out if an idea has legs before you sink a ton of money into development.
Can I actually edit the design the AI creates?
Absolutely. But it’s a different mindset than you might be used to. Instead of nudging pixels around in a design tool like Figma, you refine the design using conversational prompts or by exporting the actual React Native project.
The key takeaway here is that your prototype isn't just a pretty picture destined to be thrown away. It’s the living, breathing foundation of your app, built from the start to be edited and expanded like a real software project.
Once you’ve got the prototype feeling right and you’ve tested it out, you’ll naturally start thinking about what’s next. A polished, functional prototype is your single most powerful asset when you start the process of searching for investors to fund the full build-out.
Ready to stop talking about your idea and start building it? Get started with RapidNative and generate your first React Native screen from a simple prompt in minutes. Build faster at https://www.rapidnative.com.
Ready to build your app?
Turn your idea into a production-ready React Native app in minutes.
Free tools to get you started
Free AI PRD Generator
Generate a professional product requirements document in seconds. Describe your product idea and get a complete, structured PRD instantly.
Try it freeFree AI App Name Generator
Generate unique, brandable app name ideas with AI. Get creative name suggestions with taglines, brand colors, and monogram previews.
Try it freeFree AI App Icon Generator
Generate beautiful, professional app icons with AI. Describe your app and get multiple icon variations in different styles, ready for App Store and Google Play.
Try it freeFrequently asked questions
What is RapidNative?
RapidNative is an AI-powered mobile app builder. Describe the app you want in plain English and RapidNative generates real, production-ready React Native screens you can preview, edit, and publish to the App Store or Google Play.
Can I export the code?
Yes. RapidNative generates clean React Native and Expo code that you can export at any time. No lock-in, no proprietary format. Hand it to your developers or keep building inside RapidNative.
Is RapidNative free to use?
Yes. You can build apps on the free plan with no credit card required. Paid plans unlock unlimited AI generations, code export, and direct publishing to the App Store and Google Play.
Do I need to know how to code?
No. Most users build apps by describing what they want in plain English. Developers can drop into the code whenever they want more control, but coding is optional.
How long does it take to build an app?
Most users have a working first screen in under a minute. A full MVP usually takes a few hours instead of the weeks or months traditional development requires.