How to Build a Mobile App From Idea to UI in Minutes
Learn how to build a mobile app with AI. This guide provides a practical, end-to-end workflow for turning an idea into a production-ready React Native UI.
By Rishav
9th Feb 2026
Last updated: 9th Feb 2026
Forget the old way of building apps—the one bogged down by months of planning, pixel-perfect mockups, and slow, meticulous coding. What if you could turn a rough idea scrawled on a whiteboard into an interactive UI in minutes? That’s exactly what an AI-native workflow makes possible.
This guide is for anyone with an app idea: founders, product managers, designers, and developers. We'll show you how to turn simple text prompts or a quick photo of a sketch into a functional React Native app you can actually use.
This isn't about cutting corners; it's about being smarter and faster. It’s about getting your vision out of your head and into the hands of users, stakeholders, and your engineering team—almost instantly.
The New Way to Build an App
The mobile app world is booming, with projections showing it will swell to over $1.1 trillion by 2034. That creates immense pressure to build and ship faster than ever.
Traditionally, this meant months of work. With an AI-native builder, you can shrink that timeline dramatically. For example, a product manager can turn a requirements doc into a shareable React Native prototype in the time it takes to grab a coffee, getting immediate feedback from the team.
This simplified process shows just how fast an idea can move from a basic sketch to coded, interactive screens.
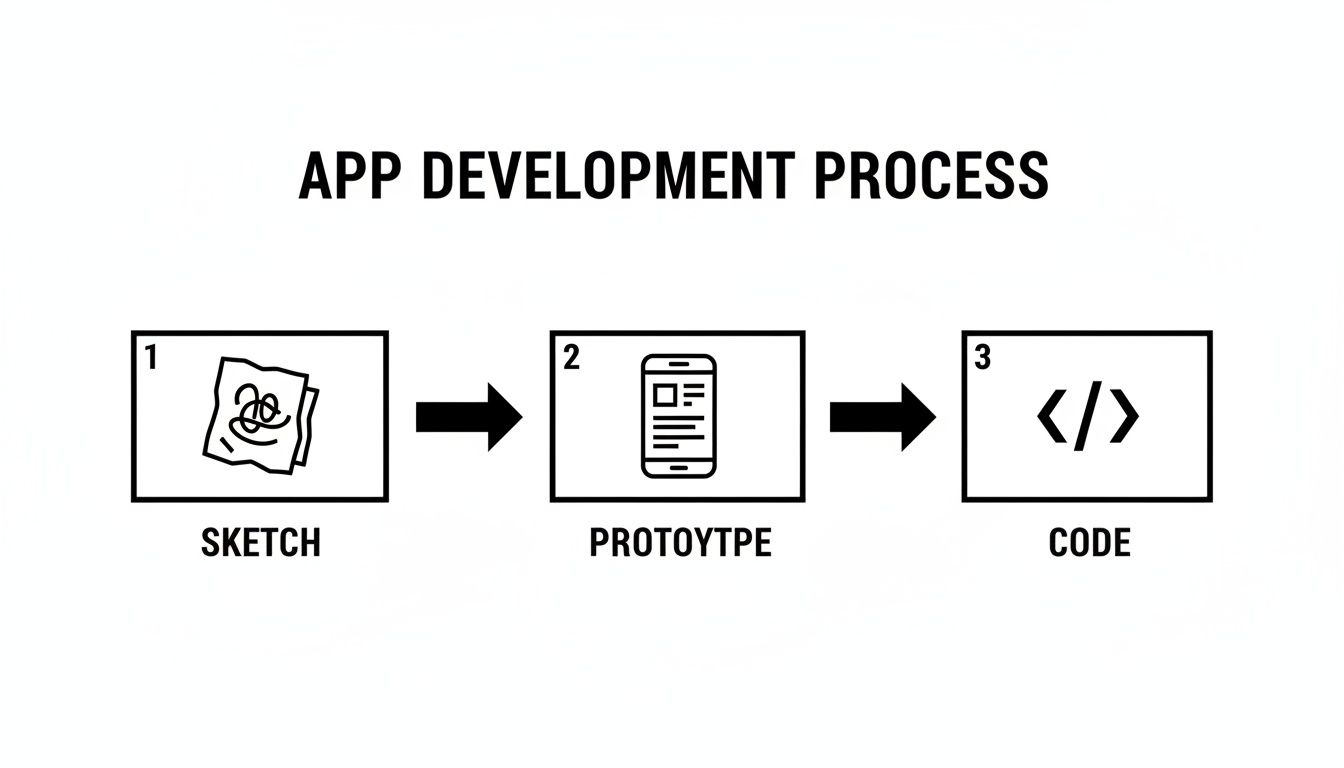
The real takeaway here is how much the path from concept to a tangible, testable product has been shortened. It’s a complete game-changer for product teams.
A Quick Look at the Old vs. New Workflow
To grasp the difference, let's compare the traditional development slog with the new, AI-accelerated approach.
Traditional vs. AI-Native App Building Workflow
| Stage | Traditional Method (Weeks/Months) | AI-Native Method (Minutes/Hours) |
|---|---|---|
| Ideation & Sketching | Days of meetings, wireframing in Figma | Minutes with a whiteboard or a simple text prompt |
| Prototyping & UI/UX | Weeks to create static, clickable mockups | Minutes to generate a fully interactive prototype |
| Stakeholder Feedback | Weeks of asynchronous reviews on static designs | Hours of real-time collaboration on a live app |
| Frontend Coding | Months of hand-coding from scratch | Hours to export and refine clean, generated code |
The table makes it clear: we're talking about a fundamental shift in speed and efficiency, letting teams focus on what truly matters—building a great product.
Why This Workflow Actually Works
The magic of this method is how accessible and efficient it is. A founder who can't code can sketch an idea on a napkin, snap a picture, and see a working prototype minutes later. A product manager can describe a user flow in plain English and instantly get an interactive version to share for feedback.
This approach puts everything on the fast track:
- Idea Validation: You can quickly test if your concept clicks with real users before sinking significant time and money into development.
- Team Alignment: Get designers, PMs, and developers on the same page from day one by rallying around a live prototype instead of static images.
- Faster Iteration: Making changes based on feedback is immediate. See the results instantly and build a culture of constant, rapid improvement.
The big win here is that you're getting critical user feedback right at the beginning. By generating a functional UI first, you can polish the user experience and core features long before a single line of backend code is written. Think of the hours of rework that saves.
Ultimately, this workflow helps you answer the most important questions about your product faster than ever. If you're looking to explore this initial phase in more detail, our guide on rapid prototyping techniques is a great next step.
Now, let's get hands-on and start planning the core user journey for our app.
Map Your User Journey Before Prompting the AI
It’s tempting to jump right into an AI tool and start firing off prompts, but a great mobile app begins with a clear vision, not a perfect line of code. Before you write a single command, you need to map out the core experience you want to create. This planning phase is your blueprint; it gives the AI direction, cuts down on endless revisions, and makes sure you're building something people will actually use.
Think of it this way: you wouldn't ask a builder to start on a house without architectural plans. In the same way, giving an AI specific, thoughtful instructions that come from a well-defined user journey will give you exponentially better results than just making it up as you go.
This is where you translate your big idea into a logical sequence of actions and screens. It’s less about pixel-perfect design right now and more about understanding how someone will move through your app to get things done.
Define Your Core User Flows
Let's use a simple habit tracker app as our running example. The goal is to help users build and stick to good habits. So, what are the absolute essential things a user must be able to do for the app to be useful?
Start by listing them out. These become your primary user flows.
- Onboarding: A new user signs up and gets a quick tour.
- Creating a Habit: They can add a new habit they want to track, like "Drink 8 glasses of water."
- Tracking a Habit: There's a super simple way to mark a habit as complete for the day.
- Viewing Progress: Users can see their streaks and consistency over time.
These four flows are the backbone of our app. Every screen we ask the AI to generate should serve one of these core journeys. Keeping this list small and focused is the best way to avoid feature creep and build the most important stuff first.
Sketch the Essential Screens
Once you know the core flows, you can start to picture the screens needed to make them happen. You don't need fancy design software for this. A whiteboard or a notebook works perfectly fine. The goal here is just to create simple sketches, what we call low-fidelity wireframes.
For our habit tracker, the must-have screens might be:
- Dashboard Screen: This is the home base, showing today's habits with checkboxes. It's the user's daily command center.
- Add New Habit Screen: A simple form with a text input for the habit's name, maybe some options for frequency (daily, weekly), and a "Save" button.
- Progress/Stats Screen: This is where you'd show off streaks, completion percentages, and perhaps a calendar view of their activity.
This simple act of sketching forces you to think through the layout and what components you'll need for each part of the journey. It gives you a visual guide that makes writing your AI prompts so much more effective. If this part feels daunting, getting input from a UI/UX design consultant can ensure you're creating an intuitive and user-friendly foundation.
Key Takeaway: This planning phase isn't a bottleneck; it’s an accelerator. A few hours spent mapping flows and sketching screens will save you days of frustrating revisions and AI-generated dead ends. It locks in your vision and gives you a clear roadmap to follow.
This structured plan, combining your flows with rough screen sketches, becomes the ultimate source material for your AI prompts. Now, instead of vaguely asking the AI to "make a habit app," you can give it precise, actionable instructions to build the exact screens and navigation you've already envisioned.
Bringing Your Core Screens and Navigation to Life with AI
Alright, you've got your user journey mapped out. Now for the fun part: turning those plans into something real and interactive. This is where an AI tool shines, letting you translate your ideas and user flows into actual React Native screens, often with just a few well-crafted text prompts.
The idea here isn't to just spit out static images. We're aiming to generate a solid UI foundation. That means getting the individual screens built, the navigation that connects them, the reusable components that form your design system, and the styling that gives your app its personality. It's taking your vision from a concept to something you can actually tap through on a device.
How to Write Prompts That Actually Work
The secret to getting great results from an AI is being specific. Vague prompts get vague, generic results. Let's stick with our habit tracker example and see how to craft prompts that get you exactly what you envisioned.
A lazy prompt like "Make a dashboard" is going to give you a lazy result. A much better approach is to be descriptive:
"Create a dashboard screen for a habit tracker app. It should have a title 'Today's Habits' at the top. Below the title, display a vertical list of habit cards. Each card should contain the habit name, an icon, and a checkbox on the right side."
See the difference? This gives the AI concrete instructions. You’re not just asking for a screen; you're dictating its structure, its key elements, and how the content should be organized.
Here are a couple more examples for our habit tracker:
- For the "Add Habit" screen: "Generate a form screen titled 'Add New Habit.' Include a text input field labeled 'Habit Name,' a section with selectable icons for the habit, and a primary button at the bottom that says 'Save Habit.'"
- For the "Progress" screen: "Build a stats screen called 'My Progress.' It needs a summary section at the top showing 'Current Streak' and 'Completion Rate.' Below that, add a calendar view that highlights the days a habit was completed."
These prompts work so well because they’re direct translations of your user flow plan. If you want to get really good at this, digging into techniques for writing effective one-shot prompts is a skill that pays off big time.
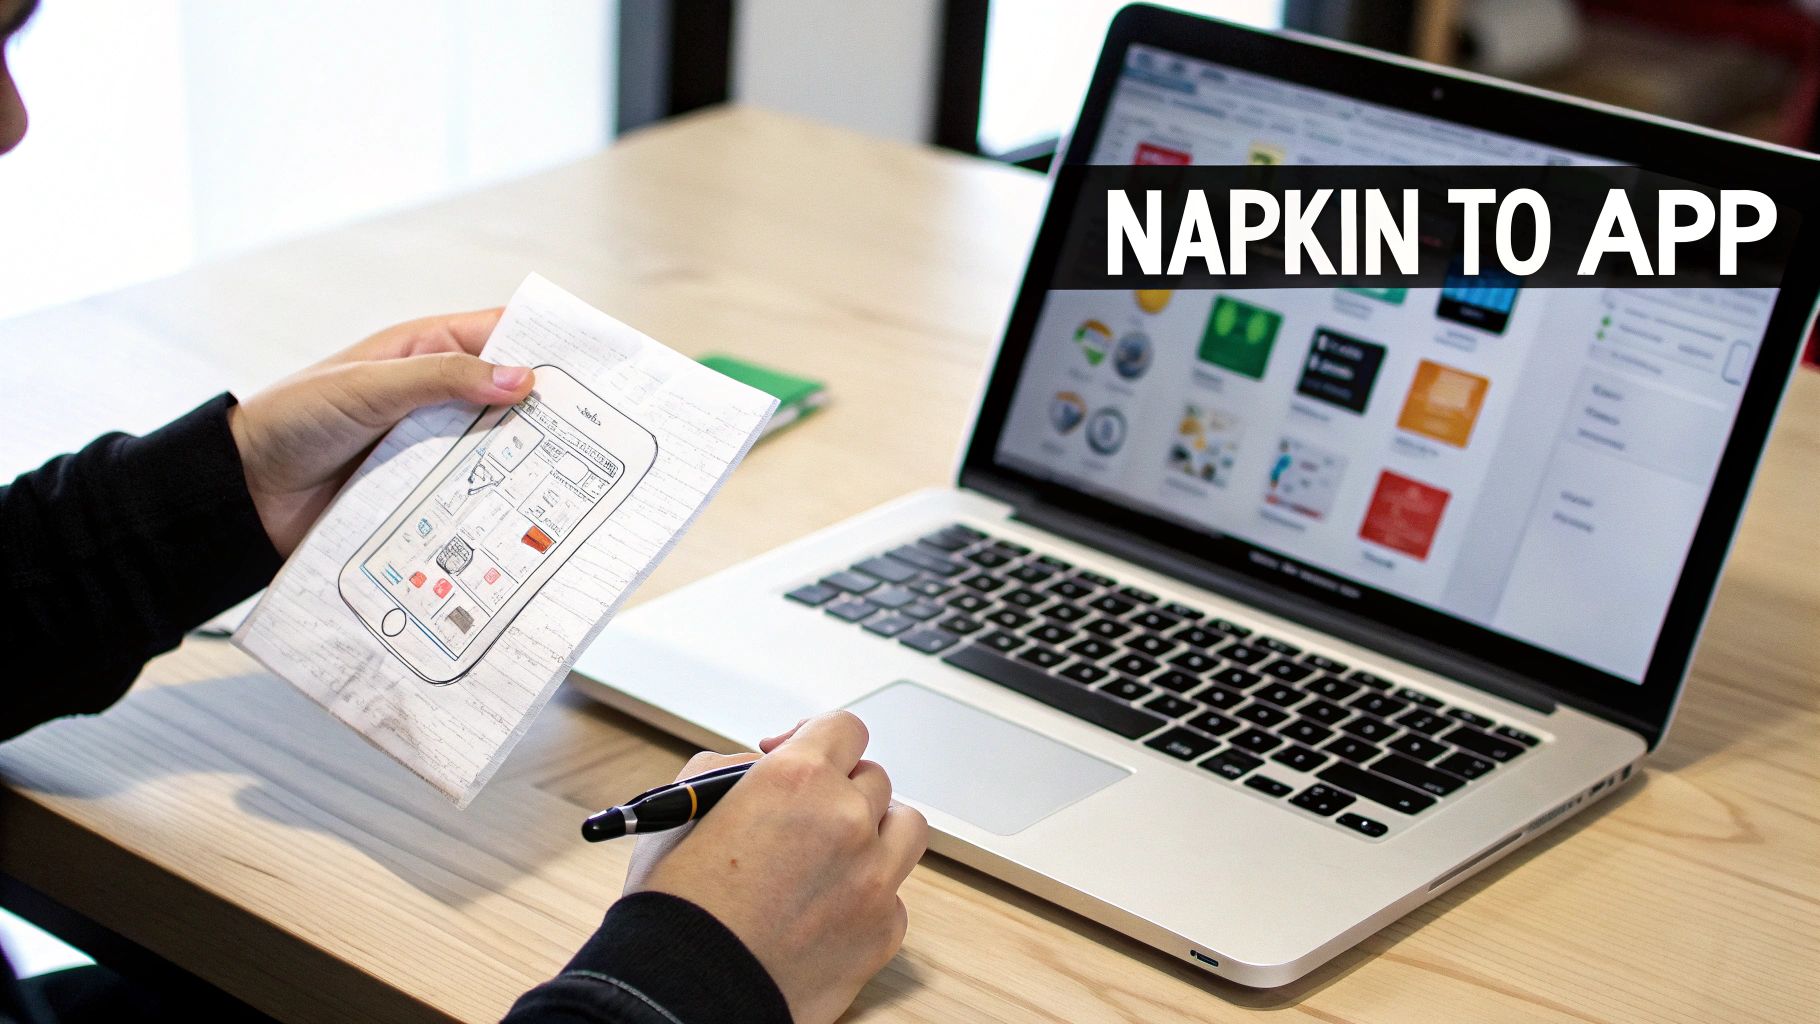
From a Whiteboard Sketch to Working Code
One of the most powerful workflows is going straight from a visual plan to code. Most product teams love to brainstorm on a whiteboard, drawing boxes for screens and arrows for navigation. With modern AI tools, you can just snap a photo of that drawing and have it build the app structure for you.
This "whiteboard-to-app" workflow is incredibly intuitive. It doesn't matter if you're a designer, a product manager, or a developer; everyone understands a drawing. It completely closes the gap between a collaborative brainstorm and a clickable prototype, cutting out the tedious step of translating visual ideas into text prompts.
Building Out Navigation and Reusable Components
An app is more than just a pile of screens. The real magic is in how a user moves between them. When you're prompting the AI, you can—and should—define this navigation logic.
For example, once you have the dashboard and "Add Habit" screens, your next prompt could be:
"Add a floating action button with a plus icon to the bottom right of the dashboard. When this button is tapped, it should navigate to the 'Add New Habit' screen."
This command doesn't just create a button; it wires it up correctly, making your prototype feel like a real app. You can do the same thing for creating reusable components.
"Create a reusable component called 'HabitCard' with a placeholder for an icon, a text label, and a checkbox. Use this component to display the list of habits on the dashboard."
This is a core principle of modern app development. It keeps your app consistent and makes future changes a thousand times easier. Instead of rebuilding the same element on ten different screens, you define it once and reuse it everywhere. This principle is a cornerstone of low code development, which focuses on using pre-built, reusable blocks to speed up creation.
Applying a Modern Style Stack
Finally, your app needs to look good. You can guide the AI on the overall aesthetic by telling it which styling framework to use. A great, modern choice for React Native is NativeWind, which brings the power of Tailwind CSS to mobile.
You can even bake styling instructions right into your prompts:
"Style the 'Save Habit' button with a blue background (bg-blue-500), white text, rounded corners (rounded-lg), and padding."
This is huge because it gives non-developers an easy way to influence the design using simple, human-readable terms. It also means the generated code uses a consistent, maintainable styling system that developers will love. The end result is a clean, polished UI from the very first generation.
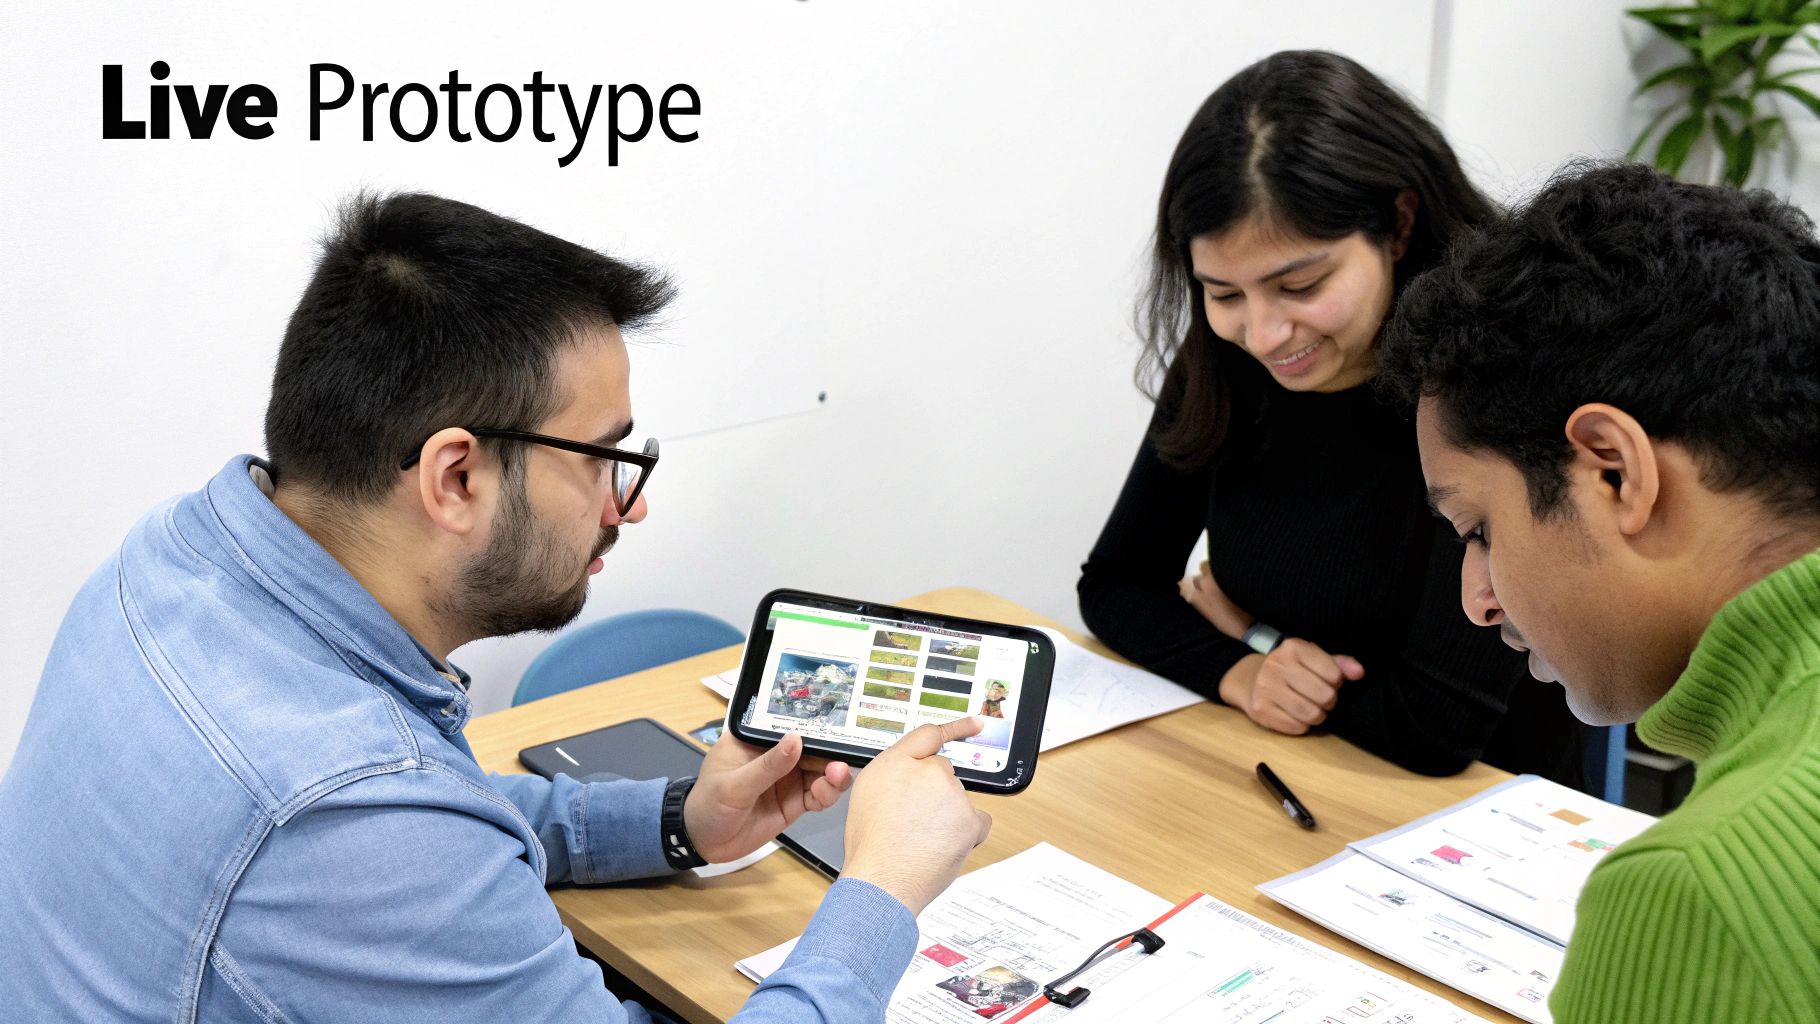
Iterate on Your Live Prototype With Your Team
That first AI-generated draft is a huge win, but it’s just the starting point. The real magic happens in the rapid, back-and-forth iteration with your team. This is where you close that frustrating gap between a static design file and a real user experience.
Forget endless email chains and annotated screenshots. With a live prototype, you can send a working version of your app to the whole team with a simple link or QR code. Instantly, everyone from the founder to the designer is tapping through the app on their own phone, giving you immediate, in-context feedback.
This constant feedback loop turns development from a slow, waterfall process into a dynamic huddle where everyone’s voice shapes the final product in real-time.
Foster a Culture of Live Feedback
When your team interacts with a live prototype, the quality of their feedback skyrockets. It becomes incredibly specific and actionable.
Think about these common scenarios:
- From the Designer: "The main CTA button feels a bit weak. Can we try a more vibrant shade of blue and bump up the font size?"
- From the Product Manager: "After going through onboarding, I feel like we need a 'Skip for now' option on screen three. It’s creating too much friction."
- From the Founder: "The home screen headline is okay, but let’s rephrase it. Instead of 'Track Habits,' let's try 'Build Life-Changing Habits.'"
In a traditional workflow, each suggestion would kick off a chain reaction: updating Figma files, exporting assets, and waiting for a developer. With a tool like RapidNative, you can make these tweaks directly in the editor, and your team sees the results on their phones instantly.
Use Chat-Driven Iteration to Refine the UI
Instead of digging into code for every minor adjustment, you can keep using chat-based prompts to iterate. This is a game-changer because it empowers non-technical team members to directly influence UI improvements.
Think of the AI as your pair programmer for the front end. You guide it with simple, conversational instructions to polish the design.
Let's refine our habit tracker app based on that team feedback:
- Change button color:
"Find the primary button on the 'Add New Habit' screen and change its background color to a vibrant blue." - Add a new element:
"On the third onboarding screen, add a secondary, ghost-style button below the main one with the text 'Skip for now.'" - Update text copy:
"Update the main title on the dashboard screen to say 'Build Life-Changing Habits.'"
This chat-driven approach is not just about speed; it's about inclusivity. It allows anyone to contribute to the design process using plain English, making sure the final product is a true reflection of the team's collective vision.
This iterative cycle is where you find product-market fit on a micro-level. By testing copy, layouts, and flows in real-time with your internal team, you can solve dozens of small usability issues before a real user ever sees the app.
This shift is happening across the industry, with trends showing that tools enabling this kind of rapid, high-quality iteration are the future. You can check out more mobile app development trends to see just how quickly this space is moving.
Get Everyone Aligned Before Handoff
The whole point of this phase is to get the entire team on the same page before a developer writes a single line of production code by hand. By the time you're ready to export, there should be zero surprises.
- Designers feel confident that the visual language is spot-on.
- Product Managers have walked through and validated every user flow.
- Founders know the app clearly communicates their core vision and message.
This collaborative prototyping phase fundamentally de-risks the entire project. You’re not just building an app faster; you’re building the right app with confidence. This means that when the code finally gets handed off to engineering, they’re starting with a polished, pre-vetted UI, saving countless hours of rework.
From Prototype to Production-Ready Code
An interactive prototype is a fantastic starting point, but its real value comes from being able to turn it into a shippable product. This is where an AI-native workflow demystifies the crucial handoff from a validated UI to your engineering team.
Unlike older no-code platforms that often trap you in their ecosystem, this modern approach is built on a simple promise: you own your code. The goal isn't just to create a pretty simulation; it's to generate clean, modular React Native code that's genuinely ready for production.
That fundamental difference means you’re never locked in. The exported code is yours to keep, modify, and build upon, giving your team total control.
What Your Developers Actually Get
When you export from an AI-native tool, you’re not handing over a jumble of files. You’re giving your developers a well-structured React Native project built on a modern stack they already know and love.
Here’s what that typically includes:
- Clean Component Structure: Every screen and UI element—buttons, cards, inputs—is neatly broken down into its own reusable component file. This makes the codebase a breeze to navigate and maintain.
- Modern Styling with NativeWind: The code uses NativeWind, a utility-first framework based on Tailwind CSS that developers appreciate for its speed and consistency.
- Logical Navigation: The routing between screens is already configured, so the app’s flow works right out of the box.
- Standard Project Setup: The entire project is built on Expo, a framework that simplifies developing, building, and deploying React Native apps.
The handoff becomes a moment of acceleration, not translation. Developers aren’t trying to decipher a visual mockup; they're starting with a working codebase that follows best practices they already use.
This approach cuts down on friction enormously. Your engineering team can immediately integrate the generated UI into an existing project or use the export as a rock-solid foundation for a brand-new app. We cover more on this in our detailed guide about converting web design to code.
Bridging the Gap to a Full-Fledged Application
Think of the AI-generated UI as the front-end skeleton of your app. The next step is for your developers to connect this skeleton to the "brain and nervous system"—the backend services and native device features that will bring your app to life.
This is where your engineering team takes the lead, diving into the logic that makes your app truly functional.
Their main focus will be on tasks like:
- Connecting to a Backend API: They’ll wire up the UI to fetch and send data. For our habit tracker, this means connecting the dashboard screen to an API endpoint that pulls the user's list of habits.
- Managing State: Developers will implement a state management solution (like Redux or Zustand) to handle how data flows through the app. This ensures that when a user marks a habit as complete, the progress screen updates instantly.
- Implementing Native Features: This is where they integrate device-specific functions, like push notifications to remind users to track their habits or accessing the camera for profile pictures.
- Adding Authentication: They will build the sign-up and login flows, securing user accounts and their personal data.
Cross-platform development with a modern stack is powerful because it helps teams get to market faster by focusing on quality and speed. You can find more insights into mobile app development strategy on clariontech.com.
By automating the initial UI build, you free up your technical team to focus their valuable time on these more complex, high-impact tasks. They can skip the tedious parts of front-end setup and get straight to building the core functionality that makes your app unique.
Answering Your Questions About Building Apps With AI
Jumping into AI-assisted app development brings up some practical questions. It's a different way of working, and it's smart to understand where it fits, what its limitations are, and how it can really help. Let's walk through some of the things people usually ask.
Can I really build a complete, functional app using only AI?
Not quite. AI tools are incredible accelerators for your app's front end. You can generate entire, fully interactive React Native UIs—screens, navigation, and components—in minutes. This is a massive head start that covers a huge chunk of the initial build.
But for a truly functional app, you'll still need a backend. The backend is the engine that handles data storage, user accounts, and all the business logic. Think of the AI as getting you 80% of the way there on the UI, freeing up your developers to focus on the harder parts.
Is the code generated by AI actually good?
Yes, but you need to choose the right tool. The best platforms produce clean, modern, and production-ready React Native code using standard libraries like Expo and NativeWind.
Unlike proprietary no-code platforms, top-tier AI tools give you code that's meant to be exported and owned by you. It's structured logically so your developers can pick it up and integrate it into their existing workflow without headaches.
The goal of a good AI-native tool isn't to replace developers but to empower them. It automates the repetitive, time-consuming parts of UI creation so they can focus on higher-level engineering challenges.
What’s the difference between no-code and AI-native tools?
This is a really important distinction. No-code builders usually lock you into their own closed ecosystem with drag-and-drop editors. They're great for simple projects, but you often hit a wall when it comes to customization, scalability, or trying to export your code.
An AI-native tool, on the other hand, works directly with code. It translates your plain-English prompts into real, human-readable React Native code that you can see, edit, and export. You get the speed of AI generation combined with the power and flexibility of a genuine codebase.
How much can this actually cut down on app development costs?
Quite a bit. An AI-assisted workflow can dramatically lower your initial build costs, which for a traditional custom app can easily run from $50,000 to over $500,000. Many AI platforms offer free tiers so you can build prototypes without spending a dime.
From there, paid plans are typically subscription-based and cost a fraction of what you'd pay an agency or freelancer for the initial UI/UX and front-end work. This makes it far more accessible for startups and product teams to test ideas before committing a huge budget.
Ready to turn your idea into an interactive app in minutes? With RapidNative, you can generate production-ready React Native UIs from simple prompts or sketches. Start building for free and see your vision come to life.
Ready to build your app?
Turn your idea into a production-ready React Native app in minutes.
Free tools to get you started
Free AI PRD Generator
Generate a professional product requirements document in seconds. Describe your product idea and get a complete, structured PRD instantly.
Try it freeFree AI App Name Generator
Generate unique, brandable app name ideas with AI. Get creative name suggestions with taglines, brand colors, and monogram previews.
Try it freeFree AI App Icon Generator
Generate beautiful, professional app icons with AI. Describe your app and get multiple icon variations in different styles, ready for App Store and Google Play.
Try it freeFrequently asked questions
What is RapidNative?
RapidNative is an AI-powered mobile app builder. Describe the app you want in plain English and RapidNative generates real, production-ready React Native screens you can preview, edit, and publish to the App Store or Google Play.
Can I export the code?
Yes. RapidNative generates clean React Native and Expo code that you can export at any time. No lock-in, no proprietary format. Hand it to your developers or keep building inside RapidNative.
Is RapidNative free to use?
Yes. You can build apps on the free plan with no credit card required. Paid plans unlock unlimited AI generations, code export, and direct publishing to the App Store and Google Play.
Do I need to know how to code?
No. Most users build apps by describing what they want in plain English. Developers can drop into the code whenever they want more control, but coding is optional.
How long does it take to build an app?
Most users have a working first screen in under a minute. A full MVP usually takes a few hours instead of the weeks or months traditional development requires.