React Native Component Testing: Setup, Queries and Mocks
Learn react native component testing with Jest and React Native Testing Library: setup steps, queries, async tests, mocks and CI gates.
By Riya
2nd Nov 2026
Last updated: 2nd Nov 2026
Your signup tests are green, but someone on the team opens the app on a small Android phone and can't reach the button behind the keyboard. Meanwhile, a harmless component refactor breaks a pile of snapshots. You're testing the app, but the failures don't line up with the risks.
React Native component testing works best when the team agrees on what each test proves. Start with observable behavior, choose queries that expose accessibility semantics, and reserve device checks for behavior JavaScript alone can't validate.
Where Component Tests Fit Among Your Other Tests
A signup button can pass a Jest test and still overlap the keyboard on a phone. The test may correctly prove that pressing the button submits valid details, without proving that a person can reach it on that device.
Component tests run as JavaScript in Node.js, not inside the native mobile runtime. The React Native testing overview distinguishes rendering checks from interaction checks and explains that these tests don't exercise the native platform code underneath React Native components.
Test layers and what each one catches
| Layer | Runs on | Catches | Typical tool |
|---|---|---|---|
| Component test | Node.js with Jest | Rendering, props, state, press and text input behavior | React Native Testing Library |
| Device or end-to-end test | Simulator or physical phone | Native module behavior, permissions, real layout | Detox or Maestro |
| Visual diff test | Rendered screenshot per screen or component | Unintended pixel and style changes | Visual regression service |
Put most routine rendering and interaction coverage at the component layer. Run it on every commit, then use targeted device journeys for risks such as keyboard behavior, camera permissions, and native navigation integration. A broader mobile application testing strategy helps keep those checks complementary rather than duplicative.
Make selectors part of the boundary
The React Native Testing Library query guide maps role queries to role and accessibilityRole, label queries to accessibility labeling props, text queries to Text children, and test-ID queries to testID. That makes selector choice more than a test-maintenance decision: it can reveal whether a control exposes useful semantics.
Practical rule: If a bug depends on a prop, state transition, or accessible label, start with a component test. If it depends on a native permission dialog or a keyboard on a phone, use a device test.
A passing semantic query gives you evidence about the component's accessibility contract. It doesn't certify the entire screen as accessible.
How to Set Up Jest and React Native Testing Library
Start with a render test, not a shared test framework full of custom helpers. You want to establish that your project's configuration can load a component, render it, and report an understandable failure.
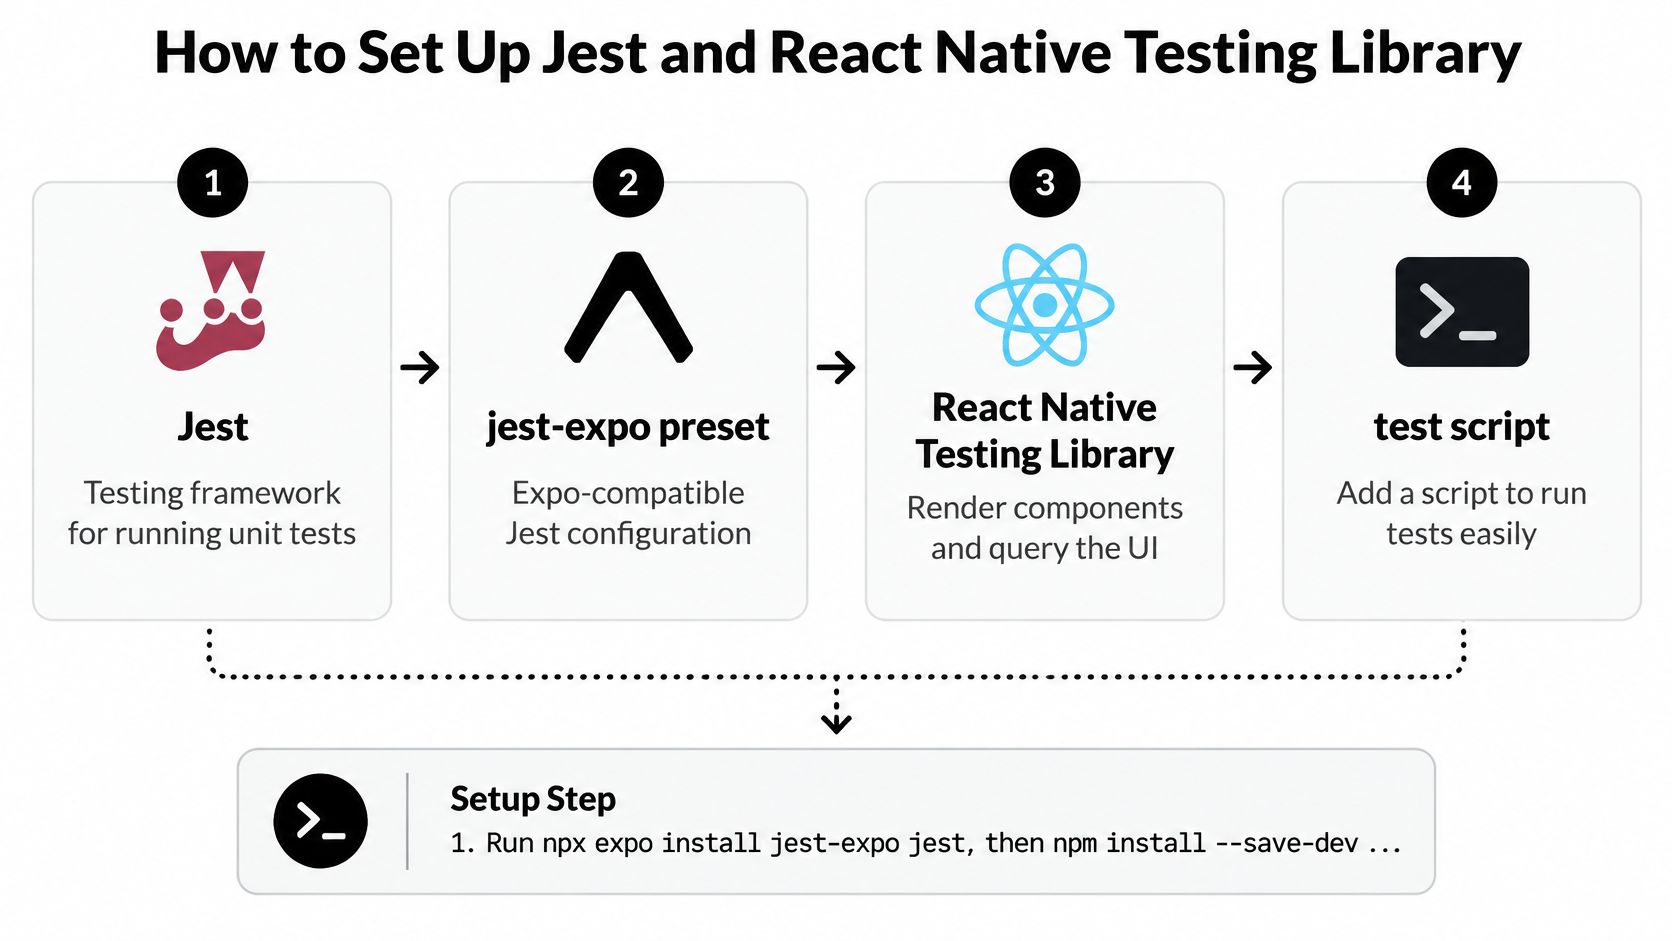
The setup has a small set of responsibilities: run tests, adapt the environment, render components, and expose a command developers can use.
Get the first test running
-
Install the Expo-compatible tools. Run
npx expo install jest-expo jest, thennpm install --save-dev @testing-library/react-native. Keep package versions compatible with your project's React and React Native versions rather than copying dependencies from an unrelated repository. -
Configure the runner. In
package.json, add"test": "jest"insidescriptsand a top-level"jest": { "preset": "jest-expo" }configuration. For a bare React Native project, use thereact-nativepreset instead of assuming Expo configuration applies. -
Create a nearby test file. Put
Button.test.tsxbeside the component, or use a__tests__folder consistently. Importrenderandscreenfrom@testing-library/react-native, along with the component you're testing. -
Assert something visible. For a component that renders a Save label, render it and assert
expect(screen.getByText('Save')).toBeOnTheScreen(). Current library releases include common Jest matchers, so don't automatically install a separate matcher package from an older tutorial. -
Run the smallest suite. Execute
npm testand confirm the render test passes before adding interactions. If Jest can't parse an imported dependency, inspect that dependency and adjusttransformIgnorePatternsnarrowly rather than disabling transforms indiscriminately.
Jest's integration isn't an optional bolt-on to the React Native ecosystem. The official Jest React Native tutorial documents that projects initialized with React Native 0.38, released in 2016, included Jest configuration by default.
Keep setup failures separate from product failures
A syntax error in a dependency isn't evidence that your button is broken. Fix configuration problems with the smallest test possible, then introduce application providers only when the component needs them.
For a visual walkthrough of the testing workflow, use this demonstration alongside your local setup.
Keep your first assertion deliberately ordinary. Once the runner works, a failing interaction test should point toward application behavior, not leave the team guessing whether the test environment ever worked.
Choosing Queries and Testing Props and State
Find the element through its user-facing meaning, and reach for testID last. A query that names a button's role and accessible name checks both that the control exists and that the component exposes those semantics.
This doesn't mean every query exactly reproduces screen-reader behavior. It means your test relies on information assistive technology needs, rather than an identifier users never encounter.
Best query for each element type
| Element | Best query | Why | Avoid |
|---|---|---|---|
| Save button | getByRole('button', { name: 'Save' }) | Matches the role and name assistive technology uses | getByTestId on the Pressable |
| Validation error message | getByText('Email is required') | Checks the text the user reads | getByTestId on the Text |
| Labeled email input | getByLabelText('Email') | Uses the accessibility label | Matching the placeholder only |
| Decorative search icon | getByTestId('search-icon') | No role or visible text exists | Asserting on style values |
| Custom touchable View | getByRole after accessible={true} and an appropriate role | Requires an exposed semantic role | Querying by testID alone |
For the Save button, retrieve screen.getByRole('button', { name: 'Save' }), then call fireEvent.press with that element. If the accessible name changes to Submit, the assertion should fail: someone changed a user-facing contract, and the team needs to decide whether that change was intentional.
For validation, assert the actual error message rather than a container's existence. For the email input, prefer its persistent label over placeholder text that disappears during entry.
A decorative icon is different. Only test its presence if that presence matters to the requirement; don't make decoration accessible merely to simplify a query.
Test the contract, not the state variable
A custom View used as a control needs more than a press handler. Give it the appropriate accessible grouping, role, name, and state; a failed role query can expose a missing semantic property rather than a selector problem.
For prop changes, use the rerender returned by render to supply disabled={true}. Assert the button is disabled with toBeDisabled(), and ensure a custom control exposes accessibilityState={{ disabled: true }} as well as preventing the action.
For internal state, press a toggle and assert the new visible text or checked state. Don't inspect a hook's internal value. A useful test-case writing approach turns each requirement into an action and an observable result.
Before selecting a query, ask:
- Visible meaning: What does the user see?
- Accessible meaning: What should a screen reader announce?
- Control purpose: What role does this element play?
When those answers identify the element unambiguously, you usually don't need a test ID.
Testing Async Updates and Timers Without Waiting
A test presses Submit and immediately looks for a success message. It may appear reliable with an immediately resolving mock, then fail when the request fixture or scheduling changes in CI. The assertion is asking for the result before the component has finished producing it.
Choose the query according to when the result should exist, not according to which function you remember.
Which query to use for timing and presence
| Query | When nothing matches | Use it for | Example |
|---|---|---|---|
getBy | Throws immediately | Content that must already be on screen | Screen title |
queryBy | Returns null | Asserting something is absent | Loading spinner gone after load |
findBy | Returns a Promise and retries | UI that appears after async work | Success message after submit |
The Testing Library query documentation defines these timing and failure differences. Use await screen.findByText('Account created') after submitting, then assert the returned element is on screen.
Use expect(screen.queryByText('Saving…')).not.toBeOnTheScreen() when absence is the requirement. Calling getByText in that assertion would throw before the matcher could evaluate absence.
Advance application time explicitly
Timers are a separate problem from waiting for a request result. Consider a hypothetical search field that debounces API calls for 300 milliseconds after the last keystroke, an example described in the Jest timer-mocks documentation.
Set up that test in execution order:
- Replace timers before rendering. Call
jest.useFakeTimers()so the component schedules work against the mocked clock. - Enter the search term. Use
fireEvent.changeText(screen.getByLabelText('Search'), 'coffee'). - Check the delay contract. Assert that the mocked search API hasn't been called.
- Advance the clock. Inside
act, usejest.advanceTimersByTimewith the component's debounce interval, or usejest.runOnlyPendingTimers()when you intend to flush currently pending work. - Verify the request. Assert that the API received the typed text, then await any resulting UI update.
- Restore the environment. In
afterEach, handle remaining scheduled work deliberately and calljest.useRealTimers()so the next test doesn't inherit a fake clock.
Wait for the condition the user cares about. Don't sleep for an arbitrary duration and hope the condition has become true.
For ordinary asynchronous UI, prefer findBy with an appropriate timeout. For a timer-driven requirement, control the timer. Mixing real sleeps with fake timers makes the failure harder to diagnose and can leave tests waiting for time that won't advance.
Mocking Native Modules and Checking Snapshots Safely
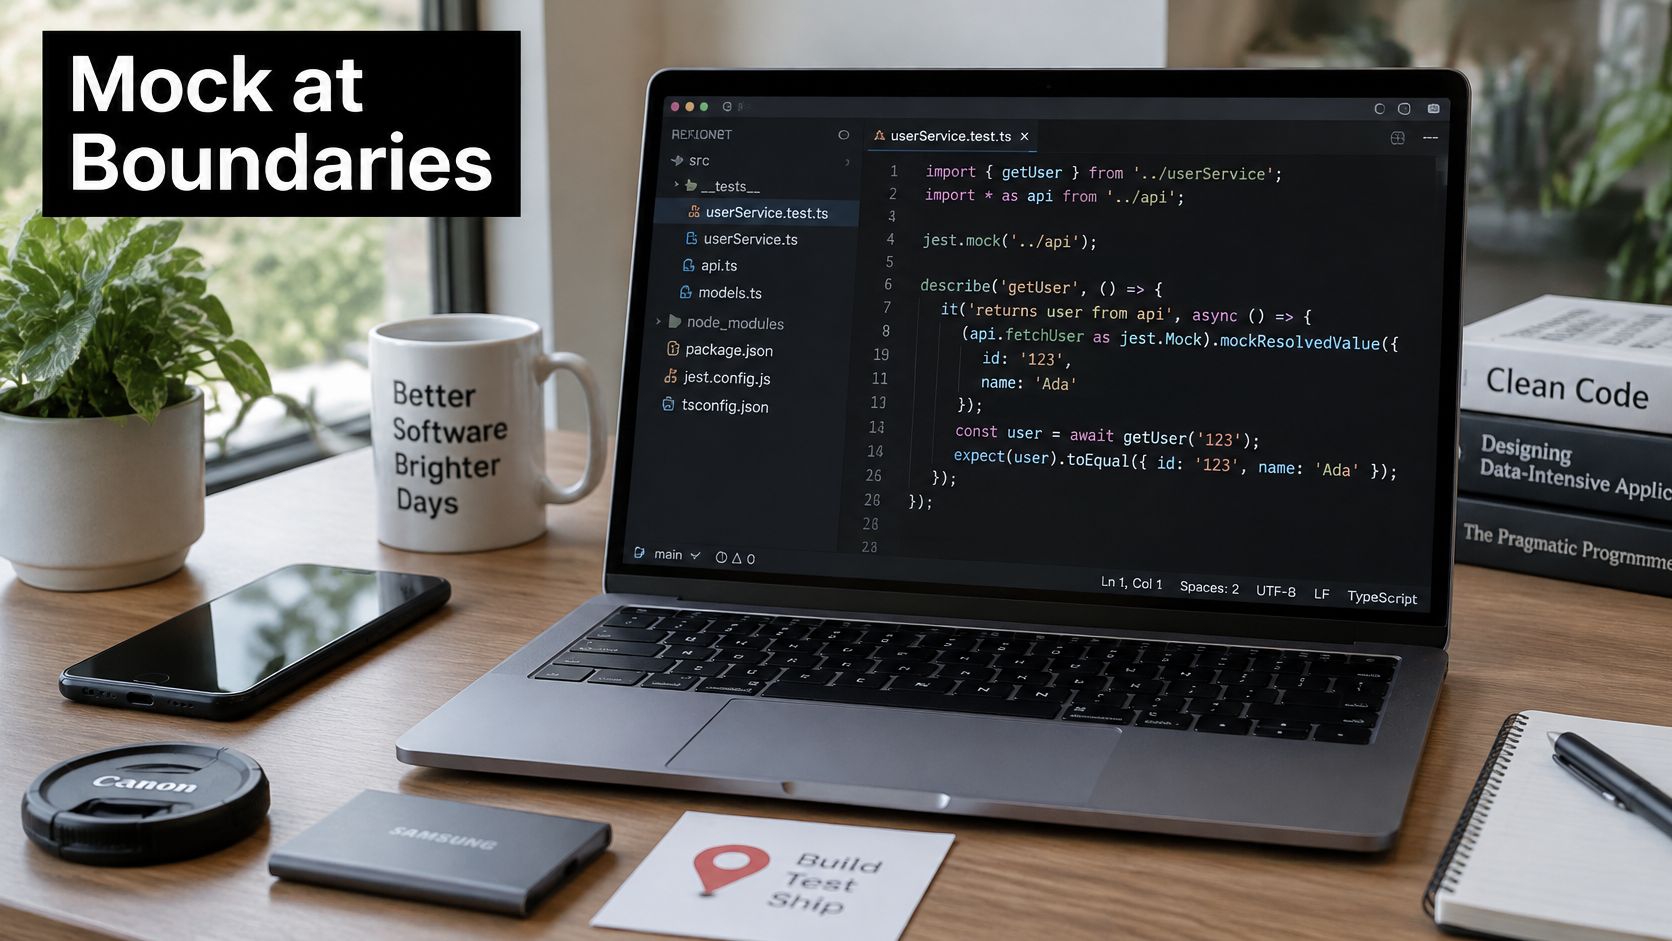
Mock where native code begins, not inside the component you're trying to verify. Camera access, persistent storage, haptics, and location need controlled substitutes in Jest; the component's own rendering and decision-making should remain real.
Say a profile screen reads a saved name from AsyncStorage. Configure the mocked getItem with mockResolvedValue('Ada'), render the screen, and await the greeting. Also assert that storage was called with the expected application key, such as profile:name.
The fixture should make that boundary obvious to anyone reviewing the test.
Keep application behavior real
Add a separate case where getItem resolves to null, then assert the empty-state prompt. If the screen handles storage failures, reject the mock and check its recovery message too.
These cases prove that the screen interprets storage results correctly. They don't prove that storage persists across app restarts, which needs a different test environment.
- Navigation inputs: Mock a router hook to return fixed route parameters when testing parameter-dependent rendering. Don't replace the entire screen with a stub.
- Navigation actions: Supply a controlled navigation function and verify its destination when that is the component's responsibility.
- Safe-area context: Use the library's provider with explicit initial metrics, or apply its Jest mock, when the rendered tree needs safe-area values.
Every screen we generate wraps its content in SafeAreaView from react-native-safe-area-context. Include that context in the test environment instead of deleting the wrapper to make rendering pass.
Keep snapshots small enough to review
A Jest snapshot records rendered structure, not the pixels a phone displays. Use it for a compact, stable component such as an icon badge or price label, where a reviewer can understand the whole diff.
Whole-screen and navigator snapshots often include unrelated structure. A small layout change can then produce a large diff while saying little about whether checkout still works.
Review discipline: Update a snapshot only after reading the diff and identifying the intended change.
Pair structural snapshots with behavioral assertions. A snapshot can preserve an error label while missing that the component never displays it after an invalid submission.
Keeping Component Suites Stable and Gated in CI
A systematic survey reports that 59% of developers encounter flaky tests monthly, weekly, or daily, as discussed in the ACM publication on flaky-test causes and fixes. Flake control belongs in your quality gate, not in a backlog category that nobody owns.
A rerun that passes doesn't establish that the original failure was harmless. It establishes that you need to investigate inconsistent behavior.
Make failures actionable
- Run
npx jest --cion every pull request. CI mode prevents new snapshots from being accepted without anyone noticing. - Key dependency caches to the lockfile. Cache
node_modulesonly with compatible runtime and platform keys; if usingnpm ci, caching the package-manager download cache is often more useful because installation replacesnode_modules. - Run component checks before device builds. Stop early when the application already fails a JavaScript behavior check.
- Rerun a failure on the same commit. Mark an inconsistent result as suspect, not automatically passed.
- Quarantine only confirmed flakes. Assign an owner and require a reproducible fix before restoring a test to the blocking suite.
Flake causes and the fixes that worked
| Flake cause | What fixed it in the study | First thing to try |
|---|---|---|
| Race condition | Adding a wait fixed 89% of cases | Replace fixed sleeps with findBy or waitFor so the test waits for the element, not a timer |
| Logic defect or test dependency | Correcting test logic fixed 100% of these cases | Compare the assertion against the component's actual state, then reset mocks, timers, and shared state after each test |
Those results describe the UI-testing study, not guaranteed outcomes for your suite. Track flake rate separately from product defects, and inspect shared fixtures, timer cleanup, and order-dependent state before adding retries.
For reviewing whether assertions validate the requirement, the 99tests test validation guide offers a useful companion to failure diagnosis. Put test ownership and release gates alongside your React Native app engineering practices, rather than treating them as separate QA paperwork.
Gate accessibility beyond JavaScript
A 2025 study of LLM-generated React Native screens found text contrast was the most frequent issue category, with 328 occurrences across evaluated prompting strategies in the published accessibility evaluation. Passing role queries wouldn't detect those contrast failures.
Require an accessibility scanner and a real-device pass for new screens. Write acceptance criteria for readable contrast, usable touch targets, meaningful labels, logical screen-reader order, and announcements after dynamic updates, then assign someone to verify them.
Start With One Screen This Week
Pick the screen your users rely on most, such as sign-in, checkout, or onboarding. Protect its main journey before spreading shallow render checks across the entire application.
Make the work small enough to finish this week:
- Render: Assert the primary heading so the test establishes that the intended screen loaded.
- Interact: Exercise the main button and check the observable outcome, not just that a callback exists.
- Await: Add an asynchronous case for the result the user waits for.
- Isolate: Mock each native module the screen touches, and nothing more.
- Gate: Wire
npm testinto the pull-request check and make failures visible to the screen's owner.
If the screen came from a prototyping tool such as RapidNative, export its standard React Native code into your own repository. Customers can export that code at any time and keep it there; the same component-testing techniques apply once it's in your project.
After a month, review the number of key screens with a passing interaction test and the flake rate, not the raw test count. Those measures tell your team whether important journeys are protected and whether developers can trust a failure.
RapidNative offers AI-powered React Native code generation on every plan, including Free, with exportable code you can test in your own repository. Visit RapidNative, build a screen for your main user journey, and add its render, interaction, and asynchronous checks before expanding the app.
Ready to build your app?
Turn your idea into a production-ready React Native app in minutes.
Free tools to get you started
Free AI PRD Generator
Generate a professional product requirements document in seconds. Describe your product idea and get a complete, structured PRD instantly.
Try it freeFree AI App Name Generator
Generate unique, brandable app name ideas with AI. Get creative name suggestions with taglines, brand colors, and monogram previews.
Try it freeFree AI App Icon Generator
Generate beautiful, professional app icons with AI. Describe your app and get multiple icon variations in different styles, ready for App Store and Google Play.
Try it freeFrequently asked questions
What is RapidNative?
RapidNative is an AI-powered mobile app builder. Describe the app you want in plain English and RapidNative generates real, production-ready React Native screens you can preview, edit, and publish to the App Store or Google Play.
Can I export the code?
Yes. RapidNative generates clean React Native and Expo code that you can export at any time. No lock-in, no proprietary format. Hand it to your developers or keep building inside RapidNative.
Is RapidNative free to use?
Yes. The free plan gives you 20 credits a month with no credit card required. Paid plans start at $20 a month and add more credits, code export, private projects and commercial rights to publish to the App Store and Google Play.
Do I need to know how to code?
No. Most users build apps by describing what they want in plain English. Developers can drop into the code whenever they want more control, but coding is optional.
How long does it take to build an app?
Most users have a working first screen in under a minute. A full MVP usually takes a few hours instead of the weeks or months traditional development requires.